Installing a network card, also known as a network interface card (NIC) or Ethernet card, allows you to add wired networking capabilities to a desktop computer or replace an existing network card for improved performance. This comprehensive guide covers everything you need to know about installing a network card, including preparation, types of network cards, hardware requirements, installation methods, configuration steps, and troubleshooting tips.
Table of Contents
- Introduction to Installing a Network Card
- Importance of Network Connectivity
- Types of Network Cards
- Preparation
- Choose the Right Network Card
- Gather Tools and Materials
- Types of Network Cards
- Ethernet Network Cards
- Wireless Network Cards (Wi-Fi Adapters)
- Hardware Requirements
- Compatibility with Operating System
- Available Slots (PCI, PCIe)
- Methods for Installing a Network Card
- Installing an Ethernet Network Card
- Installing a Wireless Network Card
- Configuring the Network Card
- Installing Drivers
- Connecting to the Network
- Testing and Verifying Connectivity
- Checking Network Status
- Testing Network Connection
- Maintenance Tips
- Updating Drivers
- Network Security Considerations
- Troubleshooting
- Common Issues
- Solutions
- Conclusion
1. Introduction to Installing a Network Card
Importance of Network Connectivity
Network connectivity is essential for accessing the internet, sharing files, and communicating with other devices within a local area network (LAN) or over the internet. Installing a network card enables reliable and fast wired or wireless networking capabilities for your computer.
Types of Network Cards
- Ethernet Network Cards: Provide wired network connectivity using Ethernet cables, offering stable and high-speed connections suitable for gaming, streaming, and large file transfers.
- Wireless Network Cards (Wi-Fi Adapters): Enable wireless network connectivity, allowing flexibility and mobility without the need for physical Ethernet cables.
2. Preparation
Choose the Right Network Card
- Considerations: Decide between Ethernet or wireless based on your networking needs (speed, mobility, etc.).
- Compatibility: Ensure the network card is compatible with your operating system (Windows, macOS, Linux) and network standards (e.g., Gigabit Ethernet, Wi-Fi 6).
Gather Tools and Materials
- Tools: Screwdriver (Phillips, flathead), if required for installation.
- Materials: Network card (Ethernet or wireless), driver installation disc or download link (for initial setup).
3. Types of Network Cards
Ethernet Network Cards
- Description: Internal cards that provide Ethernet connectivity through RJ45 ports.
- Advantages: Stable and fast wired connection, ideal for gaming, streaming, and high-bandwidth applications.
- Disadvantages: Requires Ethernet cables and physical connection to the network.
Wireless Network Cards (Wi-Fi Adapters)
- Description: Internal or external adapters that enable wireless connectivity using Wi-Fi standards.
- Advantages: Flexibility and mobility without physical cables, suitable for laptops or desktops in locations with limited Ethernet access.
- Disadvantages: Potential for slower speeds compared to Ethernet, susceptible to wireless interference.
4. Hardware Requirements
Compatibility with Operating System
- Drivers: Ensure the network card is compatible with your operating system version.
- System Requirements: Check minimum system requirements specified by the manufacturer (CPU, RAM, available slots).
Available Slots (PCI, PCIe)
- PCI Slots: Older interface for expansion cards, less common in modern motherboards.
- PCIe Slots: Current standard for expansion cards, offering higher bandwidth and compatibility with modern motherboards.
5. Methods for Installing a Network Card
Installing an Ethernet Network Card
- Prepare the Computer:
- Power down your computer completely.
- Disconnect all cables and peripherals.
- Open the Computer Case:
- Remove the side panel of your computer case to access the internal components.
- Ground yourself to discharge any static electricity by touching a metal part of the case.
- Locate PCI/PCIe Slot:
- Identify an available PCI or PCIe slot on your motherboard where you will install the Ethernet network card.
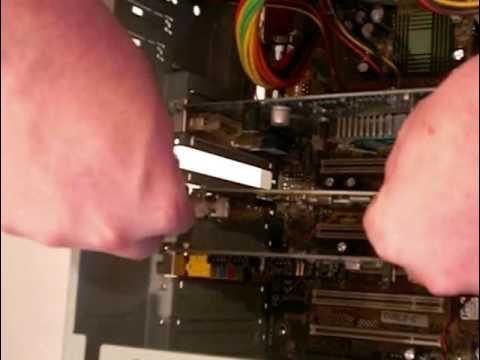
- Install the Network Card:
- Remove the metal cover from the PCI or PCIe slot (if necessary).
- Align the network card with the slot and gently press it into place until it is fully seated.
- Secure the network card to the case using the screw or latch provided.
- Close the Computer Case:
- Ensure the network card is securely installed and does not interfere with other components.
- Replace the side panel of the computer case and secure it with screws.
- Install Drivers:
- Power on your computer and wait for the operating system to detect the new hardware.
- Use the provided driver installation disc or download the latest drivers from the manufacturer’s website.
- Follow on-screen prompts to install the drivers.
- Connect Ethernet Cable:
- Plug one end of an Ethernet cable into the RJ45 port on the network card.
- Connect the other end of the Ethernet cable to a router, modem, or network switch to establish a wired network connection.
Installing a Wireless Network Card
- Prepare the Adapter:
- Remove the wireless network card from its packaging.
- Identify whether it is an internal PCIe card or an external USB adapter.
- Insert the Adapter:
- For PCIe Cards:
- Open the computer case and locate an available PCIe slot.
- Insert the wireless network card into the PCIe slot and secure it with a screw if necessary.
- Close the computer case and secure the side panel.
- For USB Adapters:
- Simply plug the USB wireless adapter into an available USB port on your computer.
- For PCIe Cards:
- Install Drivers:
- Power on your computer and wait for the operating system to detect the new hardware.
- Use the provided driver installation disc or download the latest drivers from the manufacturer’s website.
- Follow on-screen prompts to install the drivers.
- Connect to Wi-Fi Network:
- Use the Wi-Fi utility or the operating system’s built-in Wi-Fi settings to scan for available networks.
- Select your network, enter the password (if required), and connect.
6. Configuring the Network Card
Installing Drivers
- Driver Installation: Install the drivers as per the instructions provided with the network card or from the manufacturer’s website.
- Software Utility: Some network cards come with a software utility that allows advanced configuration options, such as optimizing connection settings or managing network profiles.
Connecting to the Network
- Wired Network (Ethernet): Connect an Ethernet cable from the network card to a router, modem, or network switch.
- Wireless Network (Wi-Fi): Use the Wi-Fi utility or the operating system’s built-in Wi-Fi settings to connect to your wireless network.
7. Testing and Verifying Connectivity
Checking Network Status
- Network Utility: Use the network utility or operating system settings to check the status of your network connection.
- LED Indicators: Most network cards have LED indicators that show connectivity status and activity.
Testing Network Connection
- Browsing: Open a web browser and navigate to a website to confirm internet connectivity.
- Speed Test: Use online speed test tools to verify download and upload speeds.
8. Maintenance Tips
Updating Drivers
- Regular Updates: Periodically check for driver updates from the manufacturer’s website to ensure compatibility and performance improvements.
- Automatic Updates: Enable automatic updates if available to receive the latest driver versions.
Network Security Considerations
- Encryption: Ensure your network is secured with WPA2 or WPA3 encryption to protect data transmission.
- Firewall: Enable firewall settings on your computer for added security against unauthorized access.
9. Troubleshooting
Common Issues
- Driver Issues: Incorrect or outdated drivers may cause connectivity problems.
- Hardware Recognition: Ensure the network card is properly recognized by the operating system.
- Network Configuration: Verify network settings and connections for proper configuration.
Solutions
- Driver Update: Install the latest drivers from the manufacturer’s website to resolve compatibility issues.
- Network Troubleshooting: Restart your router or contact your internet service provider (ISP) for assistance with network stability.
- Hardware Check: Ensure the network card is securely installed and functioning correctly within the system.
10. Conclusion
Installing a network card allows you to add wired Ethernet connectivity or wireless Wi-Fi capabilities to your desktop computer, enhancing network performance and flexibility. By following the steps outlined in this guide—preparing for installation, choosing the right network card, installing drivers, configuring network settings, testing connectivity, and performing maintenance—you can successfully set up and utilize a network card. Whether you opt for a fast Ethernet connection for gaming and streaming or wireless convenience for mobility, network cards play a crucial role in modern computing. If you encounter any issues during installation or operation, refer to troubleshooting tips or consult with the network card manufacturer’s support for assistance.