Introduction to Windows Firewall
The Windows Firewall is a built-in security feature in Windows operating systems that monitors and controls network traffic based on predefined rules. It helps protect your computer from unauthorized access and potentially harmful network activity by filtering incoming and outgoing connections. Enabling the Windows Firewall is recommended to enhance the security of your system, while disabling it may be necessary in certain situations, such as troubleshooting network issues or using third-party firewall software.
Methods to Enable and Disable Windows Firewall
Method 1: Using Control Panel
- Open Control Panel:
- Click on the Start button (Windows icon) in the bottom-left corner of the screen and type “Control Panel.” Select “Control Panel” from the search results.
- Go to Windows Firewall Settings:
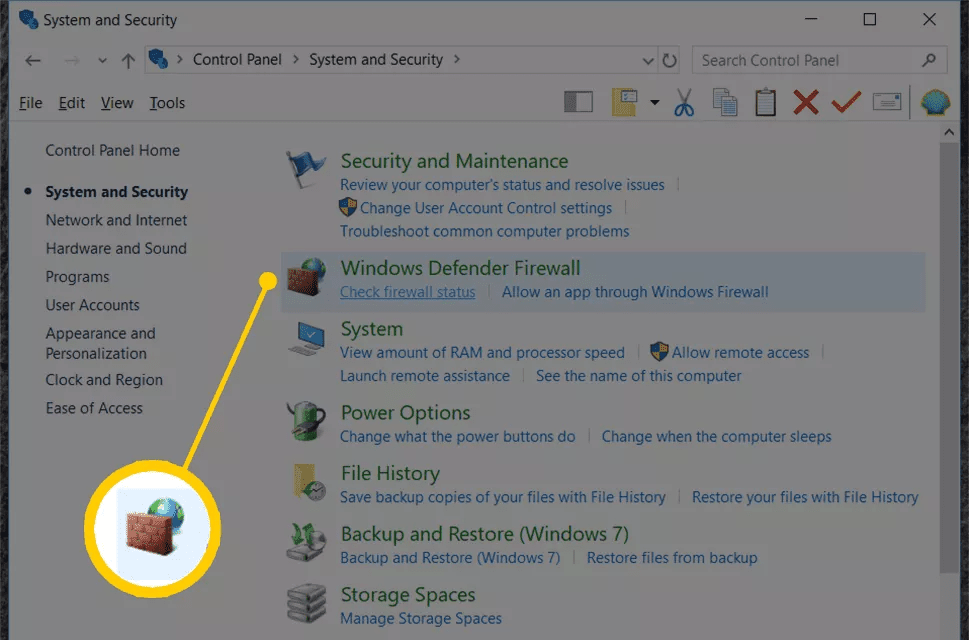
- In Control Panel, click on “System and Security,” then click on “Windows Firewall.”
- Enable or Disable Windows Firewall:
- On the left-hand side of the Windows Firewall window, click on “Turn Windows Firewall on or off.”
- To enable the Windows Firewall, select the option for “Turn on Windows Firewall” under both the private network settings and public network settings.
- To disable the Windows Firewall, select the option for “Turn off Windows Firewall” under both the private network settings and public network settings.
- Click “OK” to save the changes.
Method 2: Using Windows Settings
- Open Windows Settings:
- Click on the Start button (Windows icon) and select “Settings” (gear icon) from the menu.
- Go to Update & Security:
- In the Settings window, click on “Update & Security.”
- Navigate to Windows Security:
- In the left-hand menu, click on “Windows Security.”
- Open Windows Security Settings:
- Click on “Open Windows Security” to access the Windows Security app.
- Manage Firewall Settings:
- In the Windows Security app, click on “Firewall & network protection.”
- Change Firewall Settings:
- Under “Firewall & network protection,” click on “Manage settings.”
- To enable the Windows Firewall, ensure that the switches for “Firewall” under both private network and public network are set to “On.”
- To disable the Windows Firewall, set the switches for “Firewall” under both private network and public network to “Off.”
- Confirm Changes:
- Click “Yes” or “OK” to confirm the changes to Windows Firewall settings.
Additional Tips and Considerations
- Security Implications:
- Enabling the Windows Firewall helps protect your computer from unauthorized access and potentially harmful network traffic. It is recommended to keep the firewall enabled for enhanced security.
- Third-Party Firewall Software:
- If you prefer using third-party firewall software, consider disabling the Windows Firewall to avoid conflicts and unnecessary resource consumption.
- Exception Rules:
- You can customize Windows Firewall settings by adding exception rules to allow specific programs or services to communicate through the firewall, even when it is enabled.
- Network Profiles:
- Windows Firewall settings may vary based on the network profile (private, public, domain). Ensure you configure the firewall settings appropriately for each network type.
Conclusion
Enabling and disabling the Windows Firewall in Windows 10 is crucial for managing network security and controlling inbound and outbound network traffic effectively. By following the step-by-step instructions provided in this guide using Control Panel or Windows Settings, you can easily configure Windows Firewall settings to suit your security preferences and network requirements.
Regularly review and update firewall settings to ensure your computer is protected from unauthorized access and potential security threats. Take advantage of firewall management features to customize rules and exceptions, enhancing the security and functionality of your Windows 10 system.