Introduction
As our digital footprints expand, online privacy becomes an increasingly important concern. Microsoft Edge, the default web browser in Windows 10, addresses this concern by providing users with the option to enable “Do Not Track.” This feature allows users to express their preference not to be tracked by websites for targeted advertising or data collection. This comprehensive guide aims to empower users with step-by-step instructions, optimization tips, and troubleshooting insights on how to enable Do Not Track in Microsoft Edge. Whether you’re a privacy-conscious user or someone seeking greater control over your online footprint, this guide is your roadmap to a more secure and private browsing experience.
Understanding the Importance of Do Not Track
1. Privacy Empowerment:
- Do Not Track (DNT) is a privacy preference that users can enable in their web browsers. When activated, it sends a signal to websites, informing them that the user does not wish to be tracked.
2. Voluntary Nature:
- It’s crucial to note that Do Not Track is a voluntary signal, and its effectiveness relies on whether websites choose to honor it. While many websites respect DNT settings, it’s not a foolproof method due to varying levels of compliance.
3. Reducing Targeted Advertising:
- Enabling Do Not Track can help reduce targeted advertising. By expressing the desire not to be tracked, users may experience fewer personalized ads based on their online activities.
Step-by-Step Guide on How to Enable Do Not Track in Microsoft Edge
1. Open Microsoft Edge:
- Launch the Microsoft Edge browser on your Windows 10 computer.
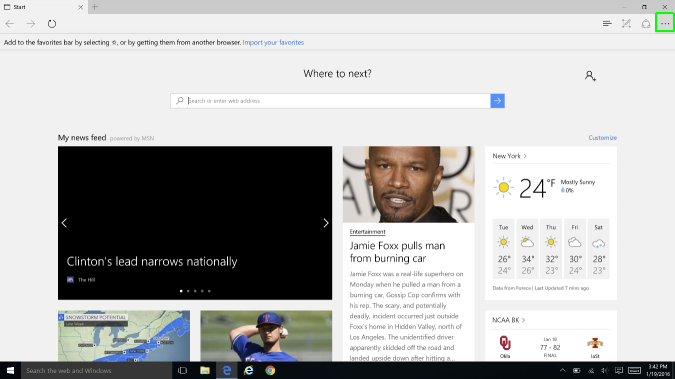
2. Access the Settings Menu:
- Click on the three horizontal dots in the upper-right corner of the browser window to open the menu.
3. Navigate to Settings:
- From the menu, select “Settings” to access the browser’s settings.
4. Choose Privacy, Search, and Services:
- In the left sidebar, select “Privacy, search, and services.” This section houses settings related to your browsing privacy.
5. Locate the Tracking Prevention Section:
- Within the “Privacy, search, and services” section, find the “Tracking prevention” category. This is where you can configure your Do Not Track settings.
6. Toggle On “Send Do Not Track Requests”:
- Under the “Tracking prevention” section, locate the option that says “Send Do Not Track requests.” Toggle the switch to the “On” position to enable Do Not Track.
7. Customize Tracking Prevention Settings (Optional):
- Microsoft Edge offers additional tracking prevention settings that you can customize. Explore options such as “Basic,” “Balanced,” and “Strict” to adjust the level of tracking prevention based on your preferences.
8. Close and Relaunch Microsoft Edge:
- After making changes, close and relaunch Microsoft Edge to ensure that the Do Not Track setting is active. The browser will now send a signal to websites expressing your preference not to be tracked.
Tips for Optimizing Do Not Track Settings
1. Regularly Review Privacy Settings:
- Periodically revisit your privacy settings to ensure they align with your preferences. Privacy concerns and preferences may evolve, so staying informed is crucial.
2. Explore Additional Privacy Features:
- Microsoft Edge offers additional privacy features beyond Do Not Track. Explore features like InPrivate Browsing, which allows you to browse without saving your history.
3. Adjust Tracking Prevention Level:
- Depending on your preferences, you can adjust the tracking prevention level. “Basic” allows more tracking, while “Strict” blocks a higher degree of tracking. Choose a level that balances privacy and website functionality.
4. Educate Yourself on Tracking Technologies:
- Understanding different tracking technologies, such as cookies and scripts, can empower you to make more informed decisions about your privacy settings.
5. Use Extensions for Enhanced Privacy:
- Explore privacy-focused extensions available in the Microsoft Edge Add-ons Store. Some extensions can complement Do Not Track settings by blocking additional tracking elements on websites.
Troubleshooting Common Issues
1. Websites Not Honoring Do Not Track:
- If you find that some websites are not honoring your Do Not Track settings, it may be due to the website’s policies. Not all websites choose to respect DNT signals.
2. Browser Updates:
- Ensure that your Microsoft Edge browser is updated to the latest version. Browser updates often include improvements and bug fixes that enhance privacy features, including Do Not Track.
3. Adjust Tracking Prevention Level for Compatibility:
- Some websites may experience issues with functionality when tracking prevention is set to “Strict.” Consider adjusting the level to “Basic” or “Balanced” for improved compatibility with certain websites.
4. Clear Browser Cache:
- If you encounter issues related to tracking prevention, clearing the browser cache can resolve potential conflicts. In the settings menu, navigate to “Privacy, search, and services,” and click on “Choose what to clear” to clear the cache.
Conclusion
Enabling Do Not Track in Microsoft Edge is a proactive step toward safeguarding your online privacy. This comprehensive guide, enriched with step-by-step instructions, optimization tips, and troubleshooting insights, aims to empower users to navigate these settings with confidence. Whether you’re a privacy-conscious individual or someone newly exploring online privacy features, let this guide be your companion on the journey to a more secure and private browsing experience. As you explore the possibilities of Do Not Track in Microsoft Edge, may your digital interactions align seamlessly with your privacy preferences, contributing to a safer and more confidential online presence.
