Introduction:
In the realm of document creation, Microsoft Word 2010 offers a plethora of tools to enhance visual appeal and convey information effectively. Among these tools, the capability to insert and manipulate shapes stands out as a powerful feature for adding dynamism and clarity to documents. In this extensive guide, we will explore the intricacies of working with shapes in Microsoft Word 2010, unraveling their functionalities, customization options, and best practices for leveraging shapes to create compelling and professional documents.
I. Understanding Shapes in Word 2010:
- Definition and Purpose:
- Shapes in Word 2010 are graphical elements that can be inserted into documents to illustrate concepts, emphasize key points, or enhance visual appeal. They provide a versatile means of conveying information and organizing content.
- Types of Shapes:
- Word 2010 offers a wide array of predefined shapes, including rectangles, circles, arrows, lines, and more. Users can also create custom shapes using the drawing tools.
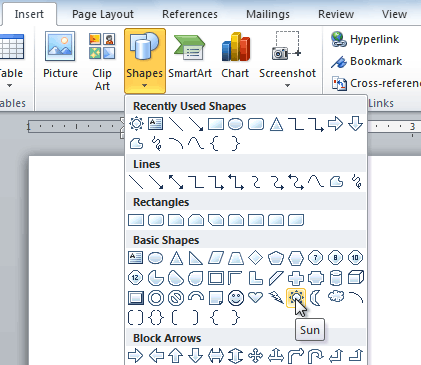
II. Accessing Shape Tools:
- Inserting Shapes:
- Access the Shapes gallery from the Insert tab in Word 2010. Choose from a variety of shapes to insert into your document.
- Drawing Tools:
- Explore the Drawing Tools tab to access additional options for customizing shapes, such as adjusting size, color, and effects.
III. Creating and Formatting Shapes:
- Inserting Basic Shapes:
- Insert basic shapes, such as rectangles and circles, by selecting them from the Shapes gallery. Click and drag to draw the shape in your document.
- Customizing Shape Properties:
- Customize shape properties, including size, color, outline, and fill, using the formatting options available in the Drawing Tools tab. Experiment with different combinations to achieve the desired look.
IV. Arranging and Aligning Shapes:
- Grouping and Ungrouping Shapes:
- Group multiple shapes together to move and resize them as a single unit. Ungroup shapes to edit them individually.
- Aligning and Distributing Shapes:
- Use alignment and distribution options to arrange shapes evenly within your document. Align shapes relative to each other or distribute them evenly across the page.
V. Adding Text to Shapes:
- Adding Text Boxes:
- Insert text boxes into shapes to add labels, captions, or additional information. Customize text formatting, alignment, and spacing to complement the shape design.
- Text Wrapping Options:
- Explore text wrapping options to control how text interacts with shapes. Choose from various wrapping styles to achieve the desired layout.
VI. Enhancing Shapes with Effects:
- Applying Shadow and Reflection:
- Add depth and dimension to shapes by applying shadow and reflection effects. Experiment with different settings to achieve the desired visual impact.
- Adding 3D Effects:
- Explore 3D effects to give shapes a three-dimensional appearance. Adjust lighting, depth, and perspective to create realistic effects.
VII. Incorporating SmartArt Graphics:
- Exploring SmartArt:
- Access the SmartArt gallery to insert pre-designed graphics and diagrams into your document. SmartArt makes it easy to visualize complex concepts and processes.
- Customizing SmartArt:
- Customize SmartArt graphics by adding or removing shapes, changing layouts, and modifying colors and styles. Tailor graphics to suit your specific content and presentation needs.
VIII. Using Shapes for Diagrams and Flowcharts:
- Creating Flowcharts:
- Use shapes to create flowcharts and diagrams that illustrate processes, workflows, and organizational structures. Connect shapes with lines and arrows to visualize the flow of information.
- Adding Connector Lines:
- Insert connector lines between shapes to establish relationships and connections. Customize line styles and endpoints to enhance clarity and readability.
IX. Collaborative Editing with Shapes:
- Sharing Shape Templates:
- Collaborate with colleagues by sharing document templates containing predefined shapes and graphics. Ensure consistency and uniformity across documents and presentations.
- Coordinating Design Elements:
- Coordinate design elements and shapes across collaborative projects to maintain visual coherence and brand identity. Establish style guidelines for shape usage and formatting.
X. Document Accessibility and Shapes:
- Descriptive Shapes:
- Use descriptive shape names and labels to enhance document accessibility. Provide clear and meaningful descriptions for users with visual impairments.
- Alt Text for Images:
- Add alt text to shapes and graphics to provide alternative descriptions for screen readers. Ensure that all visual elements are accessible to users with disabilities.
XI. Mastering Shape Techniques:
- Continuous Learning:
- Mastery of shape techniques involves continuous learning and exploration of advanced functionalities for optimal document design.
- Community and Online Resources:
- Engage with the community and explore online resources, tutorials, and forums to stay updated on the latest shape features and design best practices.
XII. Conclusion:
- Elevating Document Design:
- By mastering the art of working with shapes in Microsoft Word 2010, users can elevate the design and visual appeal of their documents, creating engaging and impactful content.
- Empowering Visual Communication:
- Striking the perfect balance between functionality and aesthetics, Word 2010’s shape features empower users to go beyond conventional text, enabling them to convey ideas and information through visually compelling and professionally designed documents.
As you embark on the journey of working with shapes in Microsoft Word 2010, you unlock the potential to transform your documents into dynamic and visually appealing creations. Embrace the diverse features, experiment with creative designs, and empower yourself to create documents that captivate and effectively communicate your message.