Introduction:
In the world of document creation, Microsoft Word 2010 offers a visual dimension to storytelling through the inclusion of Clip Art and Pictures. These elements not only enhance the aesthetics of documents but also play a crucial role in conveying information, engaging readers, and making content more memorable. In this extensive guide, we will delve into the intricacies of inserting Clip Art and Pictures in Microsoft Word 2010, exploring their functionalities, customization options, and best practices for creating visually appealing and effective documents.
I. Understanding Clip Art and Pictures in Word 2010:
- Definition and Purpose:
- Clip Art in Word 2010 refers to a collection of pre-made illustrations or graphics that users can insert into their documents. Pictures encompass a broader range, including photographs, images, and drawings. Both serve the purpose of visually enriching the content.
- Types of Visual Elements:
- Clip Art includes stylized illustrations, icons, and symbols. Pictures encompass photographs, diagrams, charts, and other visual representations. Together, they offer a diverse set of visual elements to enhance document design.
II. Accessing Clip Art and Pictures Tools:
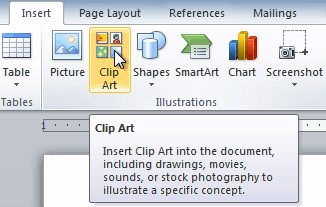
- Inserting Clip Art:
- Access the Clip Art tools from the Insert tab in Word 2010. Use the Clip Art search bar to find relevant illustrations, or explore the Clip Art gallery for a broader selection.
- Inserting Pictures:
- Insert pictures by selecting the Pictures option in the Insert tab. Choose from existing images on your computer, online sources, or use the drawing tools to create custom illustrations.
III. Inserting and Customizing Clip Art:
- Inserting Clip Art:
- Search for Clip Art using keywords or scroll through the gallery to find suitable illustrations. Click on the desired image to insert it into your document.
- Customizing Clip Art Properties:
- Resize, rotate, and position Clip Art using the sizing handles and rotation tools. Adjust the layout options to control how text interacts with the Clip Art.
IV. Inserting and Customizing Pictures:
- Inserting Pictures from Files:
- Insert pictures from existing files on your computer by selecting the Pictures option. Navigate to the desired image and click Insert.
- Online Picture Sources:
- Explore online picture sources directly from Word 2010. Insert pictures from online repositories such as Bing Image Search or OneDrive to access a vast collection of images.
V. Formatting and Editing Visual Elements:
- Picture Styles and Effects:
- Use Picture Styles to apply predefined formatting to pictures, such as borders, shadows, and reflections. Experiment with Picture Effects to add artistic enhancements.
- Image Corrections and Adjustments:
- Adjust brightness, contrast, and color saturation using the Picture Corrections tools. Fine-tune the appearance of images to achieve the desired visual impact.
VI. Grouping and Layering Visual Elements:
- Grouping Clip Art and Pictures:
- Group multiple Clip Art or Picture elements together to move and resize them as a single unit. This is useful for maintaining a cohesive layout.
- Layering Visual Elements:
- Control the stacking order of visual elements by adjusting the layering. Bring forward or send backward elements to arrange them in front of or behind others.
VII. Text Wrapping and Layout Options:
- Text Wrapping for Visual Integration:
- Use text wrapping options to control how text flows around Clip Art or Pictures. Choose from various wrapping styles to achieve a seamless integration with the text.
- Layout Options for Alignment:
- Explore layout options to align visual elements relative to the page or surrounding text. Adjust alignment and spacing for a polished document layout.
VIII. Inserting Charts and Graphs:
- Inserting Charts:
- Enhance data visualization by inserting charts directly into Word 2010 documents. Utilize the Chart tools to create, customize, and edit charts without leaving the Word environment.
- Customizing Chart Elements:
- Customize chart elements, such as titles, labels, and legends, to convey information effectively. Modify colors and styles to match the document’s overall design.
IX. Collaborative Editing with Visual Elements:
- Sharing Document Templates:
- Collaborate seamlessly by sharing document templates with predefined Clip Art, Pictures, and visual elements. Ensure consistency and uniformity across collaborative projects.
- Coordinating Visual Design Elements:
- Coordinate the use of visual design elements across collaborative projects to maintain visual coherence and convey a unified message. Establish style guidelines for consistent design.
X. Document Accessibility and Visual Elements:
- Alt Text for Accessibility:
- Enhance document accessibility by adding alt text to Clip Art, Pictures, and visual elements. Provide descriptive text to assist users with visual impairments.
- Descriptive Image Labels:
- Use descriptive image labels for Clip Art and Pictures to ensure that users can understand the content even without viewing the visuals. Accessibility is crucial for an inclusive audience.
XI. Mastering Visual Design Techniques:
- Continuous Learning:
- Mastery of visual design techniques involves continuous learning and exploration of advanced functionalities for optimal document design.
- Community and Online Resources:
- Engage with the community and explore online resources, tutorials, and forums to stay updated on the latest design features and best practices.
XII. Conclusion:
- Elevating Visual Storytelling:
- By mastering the art of inserting Clip Art and Pictures in Microsoft Word 2010, users can elevate their visual storytelling capabilities, creating documents that captivate and effectively communicate their message.
- Empowering Creative Expression:
- Striking the perfect balance between functionality and creativity, Word 2010’s visual elements empower users to go beyond traditional text, enabling them to tell compelling stories through captivating visuals.
As you embark on the journey of inserting Clip Art and Pictures in Microsoft Word 2010, you unlock the potential to transform your documents into visually rich and engaging narratives. Embrace the diverse features, experiment with creative visuals, and empower yourself to create documents that captivate and effectively convey your message.