Introduction:
Waterfalls, with their mesmerizing flow and ethereal beauty, have been a timeless subject of fascination for artists and photographers alike. Capturing the silky smooth motion of waterfalls requires a delicate balance of photographic skill and post-processing expertise. In this extensive guide, we will delve into the step-by-step process of creating silky smooth waterfalls using Adobe Photoshop. From selecting the right photographs to employing advanced editing techniques, this comprehensive tutorial aims to elevate your waterfall photography to new heights.
Section 1: Choosing the Right Photographs
Step 1: Capturing Long Exposures:
Achieving the silky smooth effect in waterfalls often involves capturing long exposure shots. Use a tripod to stabilize your camera and set a slow shutter speed to allow the water’s movement to blur, creating the desired smoothness.
Step 2: Considering Composition:
Pay attention to composition when capturing waterfall images. Position yourself to include interesting foreground elements or use framing techniques to enhance the overall visual appeal of your photographs.
Section 2: Importing and Organizing Images
Step 1: Transferring Images to Photoshop:
After capturing the waterfall images, transfer them to your computer and organize them in a dedicated folder. This step ensures easy access and efficient workflow during the editing process.
Step 2: Opening Images in Photoshop:
Launch Adobe Photoshop and open the waterfall images you’ve selected for editing. Use the “File” menu and select “Open” to access the images within the Photoshop workspace.
Section 3: Basic Adjustments in Adobe Camera Raw
Step 1: Accessing Adobe Camera Raw:
Before diving into Photoshop, make basic adjustments using Adobe Camera Raw. This includes tweaks to exposure, contrast, and white balance. Access Adobe Camera Raw by selecting “Filter” > “Camera Raw Filter.”
Step 2: Enhancing Highlights and Shadows:
Fine-tune the highlights and shadows in Adobe Camera Raw to bring out the details in both the water and surrounding elements. Adjust the sliders for highlights and shadows until you achieve a balanced and visually pleasing result.
Section 4: Combining Images for Dynamic Range
Step 1: Bracketed Exposures for HDR:
If you’ve captured bracketed exposures, consider merging them to create a High Dynamic Range (HDR) image. This technique helps preserve details in both highlights and shadows, crucial for achieving a balanced look in waterfalls.
Step 2: Merging HDR in Photoshop:
To merge bracketed exposures, select the images in Adobe Bridge or Lightroom, right-click, and choose “Merge to HDR in Photoshop.” Follow the prompts to merge the images, creating a single HDR file.
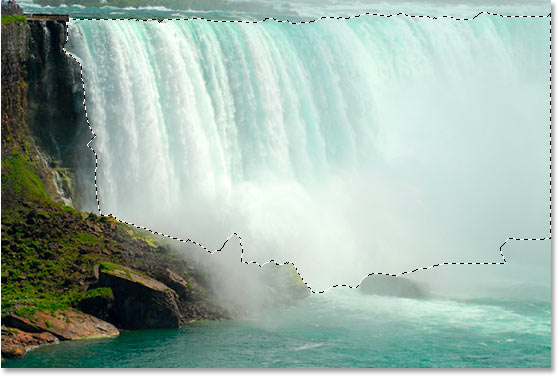
Section 5: Focus on Water Details
Step 1: Isolating the Water:
Create a duplicate layer of your image and isolate the waterfall. Use selection tools like the Pen Tool or Lasso Tool to carefully trace around the water, separating it from the surrounding elements.
Step 2: Applying Gaussian Blur:
With the water isolated on the duplicate layer, apply a Gaussian Blur to enhance the silky smooth effect. Experiment with the blur radius to achieve the desired level of smoothness while retaining essential details.
Section 6: Enhancing Waterfall Motion
Step 1: Utilizing the Motion Blur Filter:
To further emphasize the motion of the waterfall, apply the Motion Blur filter to the entire image or specific areas. Adjust the angle and distance parameters to simulate the direction and intensity of the water’s flow.
Step 2: Masking for Selective Blur:
Use layer masks to selectively apply the Motion Blur effect to specific parts of the waterfall. This allows for fine-tuned control over the areas where you want to enhance the sense of movement.
Section 7: Color Grading for Atmosphere
Step 1: Adjusting Hue/Saturation:
Enhance the overall atmosphere of your waterfall image by adjusting color tones. Use the Hue/Saturation adjustment layer to fine-tune specific colors, emphasizing the mood you want to convey.
Step 2: Introducing Gradient Maps:
Experiment with Gradient Maps to add a touch of color grading to your image. This technique allows for creative control over the color palette, helping to evoke specific emotions in your waterfall photograph.
Section 8: Creating a Dreamy Atmosphere
Step 1: Softening Surrounding Elements:
To enhance the dreamy and ethereal feel of your waterfall image, soften the surrounding elements. Create a duplicate layer, apply a slight Gaussian Blur, and use a layer mask to reveal the softened layer selectively.
Step 2: Adding Vignettes for Focus:
Guide the viewer’s attention toward the waterfall by adding a subtle vignette. Use the Elliptical Marquee Tool to create a selection around the waterfall, invert the selection, and apply a darkening effect to the outer areas.
Section 9: Fine-Tuning with Dodge and Burn
Step 1: Dodging for Highlights:
Use the Dodge Tool to selectively lighten highlights in the waterfall. This step adds a touch of brilliance to areas where the water catches the light, contributing to the overall smooth and luminous effect.
Step 2: Burning for Shadows:
Employ the Burn Tool to darken shadows and create depth in your waterfall image. Focus on areas where shadows naturally occur, enhancing the contrast and three-dimensional quality of the scene.
Section 10: Advanced Techniques for Masterful Edits
Step 1: Incorporating Light Leaks:
For a whimsical and enchanting touch, experiment with adding subtle light leaks. Create a new layer, apply color gradients, and set the blend mode to Screen or Overlay to achieve a soft, glowing effect.
Step 2: Introducing Luminosity Masks:
Harness the power of luminosity masks to precisely control adjustments based on the brightness values in your image. This advanced technique provides unparalleled control over the editing process.
Section 11: Adding Final Touches
Step 1: Sharpening Details:
Prior to finalizing your waterfall image, apply sharpening techniques to enhance details. Use the Unsharp Mask filter or Smart Sharpen to bring out intricate textures in the water and surrounding elements.
Step 2: Checking Overall Composition:
Evaluate the overall composition and make any final adjustments to cropping, alignment, or perspective. Ensure that the elements in your waterfall image harmonize to create a visually appealing and balanced scene.
Section 12: Saving and Exporting
Step 1: Save Your Masterpiece:
Once satisfied with your silky smooth waterfall image, save your work in a high-quality format such as PSD to retain layers and editing flexibility for future adjustments.
Step 2: Exporting for Different Platforms:
When ready to share your masterpiece, export the image in appropriate formats for various platforms. Whether for print, web, or social media, ensure the exported file showcases the full impact of your silky smooth waterfall composition.
Section 13: Troubleshooting Common Challenges
Challenge 1: Overblown Highlights:
If highlights in your waterfall appear too bright or overblown, revisit the exposure adjustments in Adobe Camera Raw or use the Dodge Tool selectively to tone down excessively bright areas.
Challenge 2: Unwanted Artifacts:
To address unwanted artifacts in your image, such as color fringing or noise, consider applying targeted adjustments with tools like the Clone Stamp or Healing Brush to clean up distracting elements.
Section 14: Showcasing Inspirational Examples
Example 1: Enchanting Twilight Waterfall:
Explore the enchanting allure of a silky smooth waterfall captured during twilight, where the soft glow of ambient light enhances the dreamlike quality of the scene.
Example 2: Misty Mountain Cascade:
Witness the mystical charm of a mountain cascade enveloped in mist, creating a serene and tranquil atmosphere with a perfect balance of smooth water motion.
Section 15: Advancing Skills in Waterfall Photography
Step 1: Exploring Different Waterfall Types:
Expand your waterfall photography skills by exploring different types of waterfalls. From cascades to horsetails, each type presents unique challenges and opportunities for creative expression.
Step 2: Experimenting with Multiple Exposures:
Push the boundaries of creativity by experimenting with multiple exposures. Blend images of the same waterfall captured at different times or from different angles to create visually dynamic compositions.
Conclusion:
Capturing silky smooth waterfalls in Photoshop is a captivating journey that combines technical expertise with artistic vision. This comprehensive guide has equipped you with the tools and techniques needed to transform your waterfall photographs into works of art. As you embark on your creative endeavors, let the soothing flow of waterfalls inspire your artistic expression, and let Photoshop be the canvas through which you bring the magic of silky smooth waterfalls to life. Embrace the tranquility, embrace the artistry – let your waterfall images become a testament to the seamless harmony of nature and creativity.