Introduction:
In the world of digital artistry, the use of color plays a crucial role in setting the mood, evoking emotions, and creating a visual narrative. Among the myriad of color techniques, the monochromatic color effect stands out for its ability to convey a sense of harmony and simplicity. Adobe Photoshop, with its vast array of tools and features, provides artists with the means to effortlessly create stunning monochromatic compositions. This comprehensive guide will navigate you through the step-by-step process of crafting a monochromatic color effect in Photoshop, exploring various techniques, adjustments, and artistic choices to achieve a harmonious and impactful result.
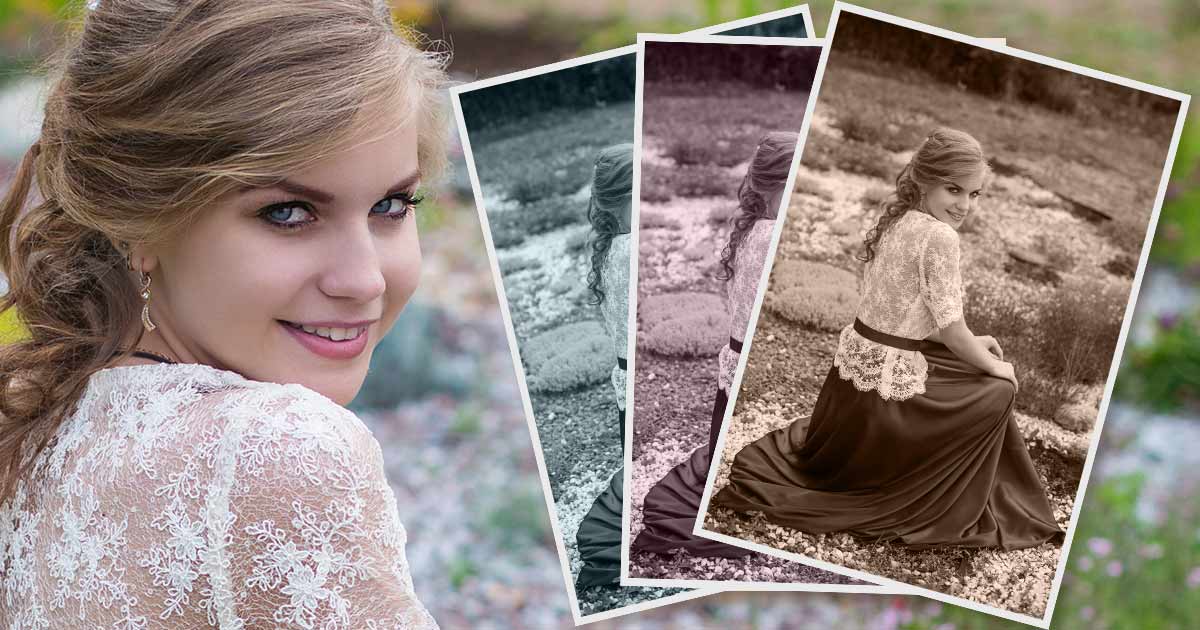
I. Selecting the Right Image:
1.1 Image Choice:
- Begin by selecting an image that aligns with the mood and theme you wish to convey through the monochromatic color effect.
- Consider images with distinct subjects, strong contrasts, or interesting textures for optimal impact.
1.2 High-Quality Image:
- Opt for a high-resolution image to maintain clarity and detail in the final monochromatic composition.
- High-quality images provide a solid foundation for the nuanced application of color adjustments.
II. Launching Adobe Photoshop and Opening the Image:
2.1 Opening Photoshop:
- Launch Adobe Photoshop on your computer to initiate the creative process.
- Create a new document or open an existing one where you want to apply the monochromatic color effect.
2.2 Importing the Image:
- Import the chosen image into Photoshop as the base layer.
- Ensure the image layer is positioned at the bottom of the layer stack, serving as the canvas for your monochromatic masterpiece.
III. Converting to Grayscale:
3.1 Grayscale Conversion:
- Start by converting the image to grayscale to remove all color information.
- Navigate to Image > Adjustments > Desaturate or use the shortcut Shift+Ctrl+U (Windows) or Shift+Command+U (Mac).
IV. Applying a Single Hue:
4.1 Hue/Saturation Adjustment Layer:
- Add a Hue/Saturation adjustment layer above the grayscale image layer.
- Tick the “Colorize” option to apply a single hue to the entire image.
4.2 Choosing the Base Color:
- Experiment with the “Hue” slider to select the base color for your monochromatic effect.
- Adjust the “Saturation” and “Lightness” sliders to refine the intensity and brightness of the chosen color.
V. Exploring Gradient Maps:
5.1 Adding a Gradient Map Adjustment Layer:
- Further refine the monochromatic effect by adding a Gradient Map adjustment layer.
- Choose a gradient that complements your chosen base color, or experiment with custom gradients for a unique look.
5.2 Adjusting Blend Modes:
- Experiment with different blend modes for the Gradient Map layer to achieve diverse tonal variations.
- Overlay, Soft Light, or Multiply modes can enhance the depth and richness of the monochromatic effect.
VI. Fine-Tuning with Levels:
6.1 Adding Levels Adjustment Layer:
- Fine-tune the contrast and tonal range of the monochromatic composition by adding a Levels adjustment layer.
- Adjust the black and white input sliders to enhance the overall dynamic range.
6.2 Clipping Adjustment Layers:
- Ensure that the adjustment layers are clipped to the grayscale image layer for targeted effects.
- Right-click on the adjustment layer and choose “Create Clipping Mask.”
VII. Introducing Texture and Detail:
7.1 Texturizing with Overlay Layers:
- Enhance the visual interest of the monochromatic composition by introducing texture.
- Overlay layers with subtle textures can be added above the grayscale layer, set to Overlay or Soft Light blend modes.
7.2 Enhancing Details with High Pass Filter:
- Use the High Pass filter to accentuate details in the image.
- Duplicate the grayscale layer, apply the High Pass filter, and set the blend mode to Overlay or Soft Light.
VIII. Adding Vignettes for Focus:
8.1 Creating a Vignette:
- Guide the viewer’s focus by adding a vignette effect.
- Create a new layer, use a soft brush to paint around the edges with a dark color, and adjust the layer opacity for a subtle vignette.
8.2 Customizing Vignette Styles:
- Experiment with different vignette styles, such as oval or radial gradients, to achieve varied compositional effects.
- Adjust opacity and blending modes for optimal integration.
IX. Reviewing and Refining:
9.1 Iterative Review:
- Step back and review the entire composition, considering the harmony of color, texture, and details.
- Make iterative adjustments to the hue, saturation, and other parameters for a refined and cohesive monochromatic result.
9.2 Saving Iterative Versions:
- Save iterative versions of your project to preserve different stages of the creative process.
- This practice allows for experimentation and easy backtracking if desired.
X. Exporting the Monochromatic Masterpiece:
10.1 Saving in Appropriate Formats: – Save the final monochromatic composition in the desired format, resolution, and color space. – Consider the intended use, whether for digital display, print, or further digital manipulation.
10.2 Sharing and Showcasing: – Share your monochromatic masterpiece on social media platforms or within digital art communities. – Engage with fellow artists, gather feedback, and celebrate the captivating simplicity of your color-harmonized creation.
XI. Conclusion:
Creating a monochromatic color effect in Adobe Photoshop is a journey into the realm of visual harmony, where deliberate color choices transform an image into a powerful and cohesive composition. By skillfully applying adjustments, experimenting with blend modes, and refining details, designers can craft monochromatic masterpieces that resonate with a sense of simplicity and elegance. As you embark on your monochromatic exploration, let your creativity guide you, experiment with different hues, and witness the transformative power of Photoshop in elevating your images into timeless works of art.