Introduction:
Photoshop’s Liquify tool is a powerful and versatile feature that enables digital artists, photographers, and designers to reshape and enhance images with precision and creativity. In this comprehensive guide, we will delve into the intricacies of the Liquify tool, exploring its various functionalities, techniques, and best practices. Whether you’re a beginner looking to grasp the basics or an experienced user aiming to refine your skills, this ultimate guide will equip you with the knowledge to harness the full potential of the Liquify tool in Photoshop.
Section 1: Understanding the Basics of the Liquify Tool
Subsection 1.1: Accessing the Liquify Tool
To begin using the Liquify tool, open your image in Photoshop and navigate to Filter > Liquify. This will bring up the Liquify workspace, providing a range of tools and options for image manipulation.
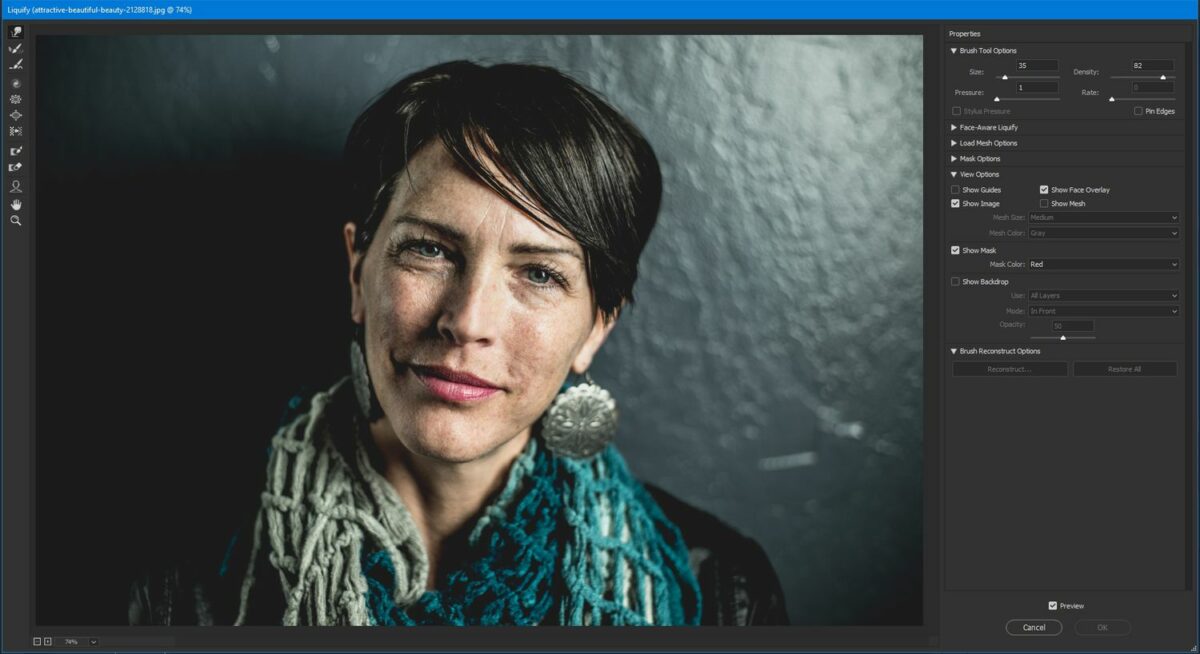
Subsection 1.2: Overview of Liquify Workspace
Familiarize yourself with the Liquify workspace, which consists of a preview window displaying the image, a set of tools on the left, and various adjustment options on the right. Key tools include the Forward Warp, Reconstruct, Pucker, Bloat, and more.
Section 2: Mastering the Core Liquify Tools
Subsection 2.1: Forward Warp Tool
The Forward Warp tool is the primary tool for pushing, pulling, and warping elements in the image. Adjust the brush size and pressure settings to control the intensity of the warp. Experiment with different brush sizes for detailed or broad transformations.
Subsection 2.2: Reconstruct Tool
The Reconstruct tool acts as an undo for specific areas, helping to revert localized changes. Adjust the brush size and strength to control the area affected by reconstruction.
Subsection 2.3: Pucker and Bloat Tools
The Pucker tool contracts and tightens areas, while the Bloat tool expands and adds volume. Control the brush size and pressure to achieve subtle or dramatic adjustments.
Subsection 2.4: Twirl Clockwise and Counter-Clockwise Tools
The Twirl Clockwise and Counter-Clockwise tools rotate pixels in a circular motion. Adjust the brush size and pressure to control the radius and intensity of the twist.
Section 3: Advanced Techniques with Liquify
Subsection 3.1: Face Retouching and Sculpting
Liquify is widely used for face retouching and sculpting. Use the Forward Warp tool to subtly refine facial features, reshape the nose, eyes, or lips, and achieve natural-looking enhancements. Be mindful of maintaining a balanced and realistic appearance.
Subsection 3.2: Body Contouring and Slimming
For body contouring and slimming, use the Forward Warp tool to adjust proportions. Be cautious not to distort the image excessively; aim for subtle refinements that enhance without creating unrealistic shapes.
Subsection 3.3: Liquify for Creative Artwork
Explore the creative potential of Liquify by using it for abstract and artistic effects. Experiment with the Twirl, Pucker, and Bloat tools to create unique distortions, swirls, and liquefied textures. Combine tools for intricate and visually captivating results.
Section 4: Utilizing Liquify Filter Options
Subsection 4.1: Face-Aware Liquify
The Face-Aware Liquify option provides intelligent facial recognition, allowing for targeted adjustments to specific facial features. Use sliders to modify eyes, nose, mouth, and face shape individually. This feature streamlines face retouching with precision.
Subsection 4.2: Mask Options for Controlled Editing
Liquify offers masking options to control the areas affected by the tool. Create a mask to isolate regions of the image, ensuring that only selected areas undergo transformation. This is particularly useful for nuanced adjustments in complex compositions.
Subsection 4.3: Brush Density, Pressure, and Rate
Understanding brush settings is crucial for achieving desired results. Brush Density controls how much the tool affects the image, Pressure determines the strength of the effect, and Rate influences the speed of the adjustments. Fine-tune these settings based on the specific requirements of your editing.
Section 5: Using Liquify for Photo Restoration
Subsection 5.1: Correcting Distortions and Warping
Liquify is a valuable tool for correcting distortions and warping in images, especially in cases where lens or perspective distortions have occurred. Use the Forward Warp and Reconstruct tools to realign elements and restore a natural look.
Subsection 5.2: Repairing Facial Expressions
Liquify can be employed to repair facial expressions in group photos. Adjust facial features to subtly align expressions or fix closed eyes, creating a harmonious and pleasing group portrait.
Section 6: Tips and Best Practices for Effective Liquify Editing
Subsection 6.1: Work Non-Destructively
To maintain flexibility and allow for future adjustments, work on duplicate layers or use Smart Objects. This ensures that the original image remains intact, and changes can be revisited or modified at any time.
Subsection 6.2: Use Multiple Layers for Complex Edits
For intricate or multi-layered edits, utilize multiple Liquify layers. Each layer can address specific aspects of the image, providing a structured and organized editing process.
Subsection 6.3: Pay Attention to Proportions
Maintain a keen eye for proportions, especially when editing portraits. Subtle adjustments can enhance features, but excessive alterations may lead to unrealistic and distracting results.
Subsection 6.4: Experiment with Blend Modes
Explore the creative potential of Liquify by experimenting with different blend modes for the Liquify layers. Overlay, Soft Light, or Multiply can yield interesting and artistic effects when applied to specific edits.
Subsection 6.5: Save and Document Settings
When working on complex edits, save your Liquify settings using the “Save Mesh” option. This allows you to apply the same distortions to other images or revisit the same adjustments later.
Section 7: Undoing and Reverting Changes
Subsection 7.1: Step Backward and History Panel
If you need to undo specific steps, use the Step Backward command (Ctrl + Alt + Z) or navigate to the History panel. The History panel allows you to revert to previous states of the image, providing a comprehensive undo system.
Subsection 7.2: Saving Multiple Versions
To preserve different stages of your Liquify edits, save multiple versions of the image or use the “Save As” option with distinct filenames. This ensures that you can revisit or compare different iterations.
Section 8: Exporting the Final Liquified Image
Once satisfied with the Liquify edits, export the final image for sharing, printing, or further use.
Subsection 8.1: Save As High-Resolution Image
Save the liquified image in a suitable format, such as JPEG or TIFF, ensuring it retains high resolution for optimal quality.
Subsection 8.2: Maintain Layered PSD File
Save a layered PSD file to preserve all the Liquify layers. This allows for future edits or adjustments without loss of quality.
Section 9: Showcasing Your Liquify Creations
Celebrate your mastery of the Liquify tool by showcasing your final images. Share your work on design platforms, social media, or incorporate it into your portfolio. Engage with the digital art community, seek constructive feedback, and let your liquified creations stand as a testament to your creativity and skill in image manipulation.
Conclusion:
The Liquify tool in Photoshop is a gateway to endless creative possibilities, offering both practical applications and artistic exploration. By following the comprehensive steps and techniques outlined in this ultimate guide, you can confidently navigate the Liquify workspace, apply precise adjustments, and unleash the full potential of this transformative tool. May your liquified creations captivate viewers with their precision, artistry, and the seamless fusion of technical expertise with imaginative vision.