Introduction
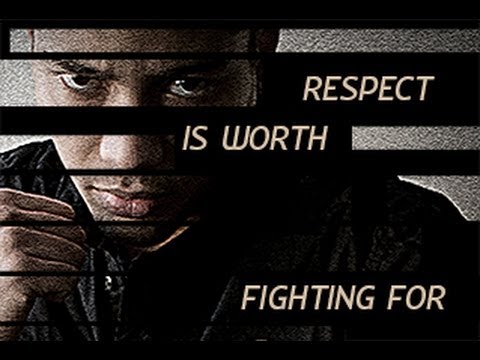
Designing a movie poster is a captivating and complex endeavor that requires a blend of creative vision, technical expertise, and attention to detail. The Bourne Legacy, part of the iconic Bourne film series, offers a rich source of inspiration for creating a visually stunning movie poster. In this extensive tutorial, we will embark on a step-by-step journey through the process of designing a Bourne Legacy-inspired movie poster using Adobe Photoshop. From composition and color grading to typography and special effects, we will cover all aspects to ensure your final creation radiates the essence of cinematic excellence.
Step 1: Gather Resources and Inspiration
Before diving into Photoshop, gather essential resources and immerse yourself in the visual language of The Bourne Legacy. Collect high-resolution stills from the movie, study the color palette, and identify key design elements that evoke the essence of the film. This preparatory phase lays the foundation for a cohesive and authentic poster design.
Step 2: Set Up Your Photoshop Document
- Create a New Document: Open Adobe Photoshop and create a new document with dimensions suitable for a movie poster. Consider standard poster sizes, such as 24×36 inches, ensuring a high-resolution canvas for detailed design work.
- Set Background Color: Choose a background color that complements the mood of The Bourne Legacy. Dark, atmospheric tones often align with the thriller genre. Set the background color using the Paint Bucket tool.
Step 3: Import and Arrange Images
- Import Movie Stills: Place the collected stills into your Photoshop document. Select images that showcase key characters, action sequences, or iconic moments from The Bourne Legacy. Use the “Place Embedded” option to maintain image quality.
- Arrange and Blend Images: Experiment with the arrangement of images to create a dynamic composition. Use layer blending modes and masks to seamlessly blend images together. Consider the visual flow and balance of elements within the poster.
Step 4: Color Grading for Cinematic Ambiance
- Adjust Hue/Saturation: Enhance the cinematic feel by adjusting the overall color scheme. Experiment with the Hue/Saturation adjustment layer to fine-tune the colors. Aim for a moody and intense palette reminiscent of the film’s atmosphere.
- Apply Gradient Maps: Use Gradient Maps to introduce targeted color grading. Emphasize cool tones in shadows and warm tones in highlights to evoke a dramatic and cinematic ambiance. Experiment with different gradient combinations to achieve the desired effect.
Step 5: Typography with Impact
- Choose Font Styles: Select fonts that resonate with the Bourne Legacy aesthetic. Consider bold, sans-serif fonts for titles and taglines, maintaining readability and impact.
- Create Text Layers: Introduce text layers for the movie title, tagline, and additional information. Experiment with layer styles like bevel and emboss, drop shadow, and stroke to add depth and prominence to the text.
Step 6: Implement Special Effects
- Lens Flares and Glows: Enhance the cinematic flair by adding lens flares and glows. Use the Lens Flare filter for natural light effects and experiment with layer styles to create subtle glows around key elements.
- Smoke and Particle Brushes: Introduce a sense of dynamism with smoke and particle brushes. Create a new layer and use brushes to add atmospheric elements that evoke the intensity of action sequences.
Step 7: Adjust Lighting and Shadows
- Dodge and Burn: Fine-tune lighting by using the Dodge and Burn tools. Enhance highlights and shadows to create depth and dimension within the poster. Focus on key elements, such as characters and central imagery.
- Overlay Textures: Overlay subtle textures to add a tactile quality to the poster. Experiment with textures that complement the overall theme, such as grunge or subtle film grain.
Step 8: Final Touches and Refinements
- Global Adjustments: Make global adjustments to ensure cohesiveness. Use adjustment layers like Levels and Curves to refine overall contrast and tonality. Consider adding a vignette to draw attention to the central elements.
- Check Composition: Zoom out and evaluate the overall composition. Ensure that key elements are strategically placed, and the visual hierarchy aligns with the storytelling aspect of The Bourne Legacy.
Step 9: Save and Export
- Save Your Work: Save your Photoshop document in a layered format to preserve editability. Regularly save incremental versions to safeguard against unexpected issues.
- Export for Print or Web: Depending on your intended use, export the final poster in a suitable format. For print, save as a high-resolution image with CMYK color mode. For digital use, use RGB color mode and optimize for web.
Step 10: Showcase and Share Your Creation
- Present Your Poster: Showcase your Bourne Legacy-inspired movie poster with pride. Consider creating a presentation or portfolio piece that highlights your design process, from concept to final execution.
- Seek Feedback: Share your work with peers, mentors, or online communities to gather constructive feedback. Consider the insights of others to refine and improve your design skills.
Conclusion
Crafting a movie poster inspired by The Bourne Legacy in Adobe Photoshop is a fulfilling and educational journey that hones your design skills. From mastering color grading to implementing special effects and typography, each step contributes to the creation of a visually captivating poster that encapsulates the essence of the film. As you embark on your poster design endeavors, remember that the fusion of creativity and technical proficiency is key. Embrace the challenges, experiment with different techniques, and let your passion for design shine through as you bring cinematic excellence to life on the canvas of Adobe Photoshop.
