Introduction:
Windows 10, Microsoft’s versatile operating system, provides users with a multitude of customization options to personalize their computing experience. Among these options is the ability to change the default Windows font, allowing users to create a unique and visually appealing textscape. In this extensive guide, we will delve into the intricacies of changing the default Windows font in Windows 10, providing users with a step-by-step walkthrough, insights into the benefits of font customization, and tips for achieving a more personalized and aesthetically pleasing digital environment.
Understanding the Impact of Font Customization:
Fonts play a crucial role in shaping the visual identity of the Windows interface. Changing the default Windows font can have several benefits, both in terms of aesthetics and usability:
- Personalization:
- Changing the default font allows users to personalize their computing experience, creating a unique and visually appealing interface.
- Enhanced Readability:
- Choosing a font that suits your preferences and enhances readability can contribute to a more comfortable and user-friendly experience.
- Visual Consistency:
- Customizing the default font ensures visual consistency across different applications, providing a cohesive and harmonious appearance.
- Aesthetic Appeal:
- Fonts have a significant impact on the overall aesthetic of the interface. Choosing a font that aligns with your design preferences contributes to a more visually pleasing environment.
- Usability for Accessibility:
- Certain fonts are designed with accessibility in mind, offering improved legibility for users with visual impairments. Customizing the default font can enhance the overall usability of the system.
Methods to Change the Default Windows Font in Windows 10:
Windows 10 offers users multiple approaches to change the default font, providing flexibility based on individual preferences. The following methods outline how to customize the default Windows font seamlessly:
Method 1: Using Registry Editor
- Open Registry Editor:
- Press “Windows key + R” to open the Run dialog.
- Type “regedit” and press Enter to open the Registry Editor.
- Navigate to Font Settings:
- In the Registry Editor, navigate to:
HKEY_LOCAL_MACHINE\SOFTWARE\Microsoft\Windows NT\CurrentVersion\Fonts
- In the Registry Editor, navigate to:
- Modify Font Entries:
- Locate the font entries, such as “Segoe UI (TrueType),” and double-click on them.
- Change the font file name to the desired font. Ensure that the font file is installed on your system.
- Restart Your System:
- Close the Registry Editor and restart your system for the changes to take effect.
Method 2: Using Control Panel
- Open Control Panel:
- Press “Windows key + X” and select “Control Panel” from the context menu.
- Navigate to Font Settings:
- In Control Panel, click on “Appearance and Personalization.”
- Choose Change Font Settings:
- Click on “Fonts” to open the Fonts settings.
- Select Default Font:
- In the Fonts window, select the desired font for various items, such as icons, menu, message box, etc.
- Apply Changes:
- Click “Apply” and then “OK” to apply the changes.
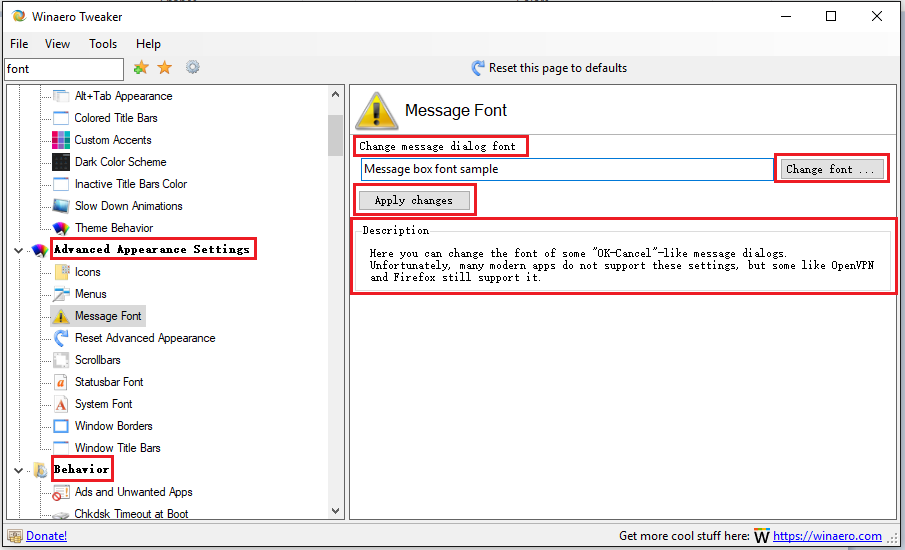
Method 3: Using Third-Party Tools
- Download Font Management Tool:
- Explore third-party font management tools that provide advanced customization options.
- Install and Configure:
- Download and install the font management tool of your choice.
- Use the tool’s interface to select and set the default Windows font.
- Follow Tool-Specific Instructions:
- Refer to the documentation or user guide provided by the font management tool for specific instructions on changing the default font.
Considerations and Additional Tips:
- Backup Registry:
- Before making changes in the Registry Editor, consider creating a backup to avoid potential issues. This ensures that you can restore the original settings if needed.
- Font File Compatibility:
- Ensure that the font file you choose is compatible with Windows 10 and properly installed on your system.
- Test Readability:
- After changing the default font, test the readability across various applications to ensure it meets your preferences and usability requirements.
- Restore Default Settings:
- If you encounter issues or wish to revert to the default font, use the font settings in Control Panel to restore the original configurations.
- Explore Font Libraries:
- Explore reputable font libraries to discover a wide range of fonts that suit your design preferences. Ensure that the chosen font supports the characters needed for your language.
- Community Forums and Discussions:
- Engage with Windows 10 community forums and discussions to share experiences, discover additional font customization tips, and troubleshoot any issues related to changing the default Windows font.
Conclusion:
Changing the default Windows font in Windows 10 is a powerful customization that allows users to shape the visual identity of their digital environment. By following the comprehensive methods outlined in this guide, users can effortlessly create a more personalized, aesthetically pleasing, and readable interface. Embrace the versatility of Windows 10, explore font options that resonate with your preferences, and immerse yourself in a digital environment that truly reflects your style. Windows 10 is not just an operating system—it’s a canvas for personal expression and creativity, and changing the default Windows font is a key element in crafting your unique digital experience.
