In the realm of printing, efficiency and convenience are paramount. Windows 7 offers users the flexibility to designate a default printer, streamlining the printing process and enhancing productivity. Whether in the office or at home, knowing how to change the default printer in Windows 7 can save time and streamline workflow. In this exhaustive guide, we will delve deep into the intricacies of printer management, providing step-by-step instructions and tips for changing the default printer to suit your needs and preferences.
Understanding Default Printers in Windows 7:
Before delving into the process of changing the default printer, let’s first grasp the concept and significance of default printers in Windows 7:
- Definition: The default printer in Windows 7 is the designated printer that automatically receives print jobs when no specific printer is selected. It serves as the primary output device for printing documents, photos, and other materials.
- Convenience: Designating a default printer eliminates the need to manually select a printer each time you print, streamlining the printing process and enhancing convenience.
- User Preferences: Users can choose their preferred default printer based on factors such as proximity, print quality, and printer capabilities to optimize printing efficiency.
Changing the Default Printer in Windows 7:
Now, let’s explore the step-by-step process of changing the default printer in Windows 7:
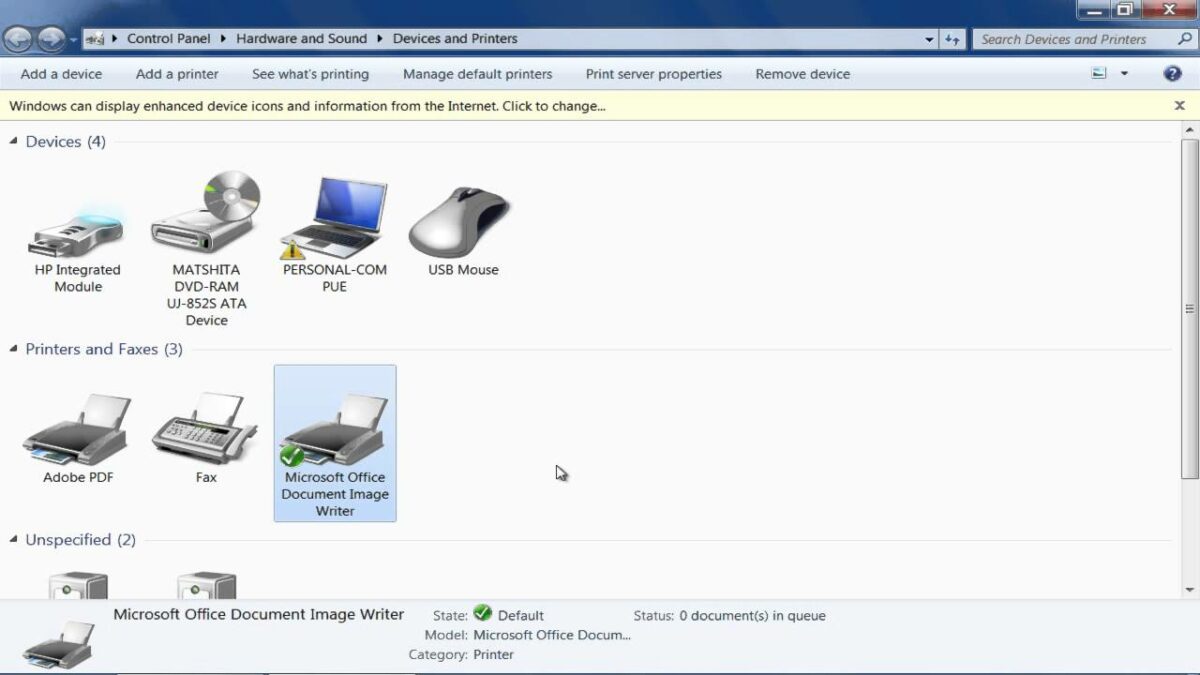
- Accessing Devices and Printers:
- Click on the Start button in the taskbar.
- Navigate to “Devices and Printers” from the Start menu or search for it in the search bar.
- Selecting Default Printer:
- In the Devices and Printers window, locate the printer that you want to set as the default.
- Right-click on the desired printer icon and select “Set as default printer” from the context menu.
- Verifying Default Printer:
- Once selected, the chosen printer will be designated as the default printer, indicated by a green checkmark next to its icon.
- Print jobs will automatically be sent to the default printer unless specified otherwise.
Advanced Features and Tips:
To further enhance printer management and optimize printing efficiency in Windows 7, consider the following advanced features and tips:
- Creating Printer Shortcuts:
- Pin frequently used printers to the Start menu or taskbar for quick access and convenience.
- Right-click on the printer icon in Devices and Printers and select “Create shortcut” to place a shortcut on the desktop or other locations.
- Managing Printer Preferences:
- Customize printer preferences and settings to suit your printing needs and optimize output quality.
- Access printer properties by right-clicking on the printer icon and selecting “Printer properties” from the context menu.
- Setting Printer Defaults:
- Adjust default settings such as paper size, orientation, and print quality to streamline the printing process.
- Navigate to printer properties and select the “Advanced” tab to modify default settings for all print jobs.
- Utilizing Network Printers:
- Connect to network printers and designate them as default printers to access shared printing resources.
- Ensure that network printers are properly configured and accessible on the network for seamless printing.
Conclusion:
Changing the default printer in Windows 7 is a simple yet powerful way to streamline the printing process and enhance productivity. By following the comprehensive guide outlined above, users can easily designate their preferred printer as the default, ensuring that print jobs are sent to the desired output device with minimal effort. Whether in the office, at home, or on the go, Windows 7 provides users with the flexibility and convenience to manage printers effectively and optimize printing efficiency. So take control of your printing preferences today, change the default printer with confidence, and enjoy seamless printing experiences in Windows 7.