Introduction:
In the realm of digital artistry and photography, the ability to resize images for print is a crucial skill that can make the difference between a stunning, high-quality print and a lackluster reproduction. This comprehensive guide delves into the intricacies of resizing images for print using Photoshop, offering detailed insights, step-by-step instructions, and professional tips. Whether you’re a seasoned graphic designer, a passionate photographer, or a curious beginner, this guide will empower you to navigate the nuances of image resizing, ensuring your prints capture the essence of your creative vision.
Table of Contents:
- Understanding the Importance of Image Resizing for Print:
- a. The Impact of Image Resolution on Print Quality
- b. Common Print Sizes and Their Requirements
- c. Balancing Resolution and File Size for Optimal Results
- Choosing the Right Image for Print Resizing:
- a. Assessing Image Quality and Composition
- b. Identifying the Intended Print Size and Format
- c. Recognizing the Influence of Image Content on Resizing Decisions
- Essential Preparations for Image Resizing:
- a. Organizing Layers for Non-Destructive Editing
- b. Backing Up Original Files for Safety
- c. Setting Up a Clear Workspace for Efficient Editing
- Determining the Ideal Print Resolution:
- a. Understanding Pixels Per Inch (PPI) vs. Dots Per Inch (DPI)
- b. Calculating Print Resolution Based on Print Size
- c. Balancing Resolution for Different Print Mediums (e.g., Magazine, Poster, Canvas)
- Upscaling and Downscaling Techniques:
- a. Strategies for Increasing Image Size (Upscaling)
- b. Maintaining Image Quality during Upscaling
- c. Techniques for Reducing Image Size (Downscaling)
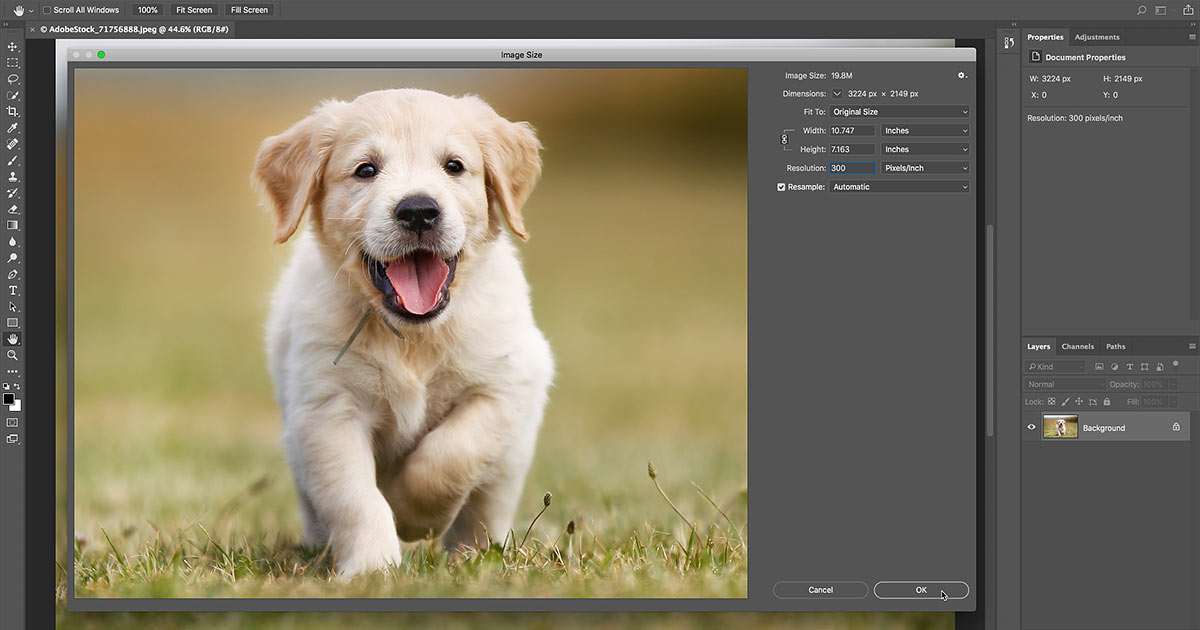
- Utilizing Image Size and Canvas Size Commands in Photoshop:
- a. Accessing the Image Size Dialog Box
- b. Resampling Options for Image Resizing
- c. Understanding and Applying the Canvas Size Command
- Resizing Images for Specific Print Mediums:
- a. Print Considerations for Photography
- b. Designing Graphics for Print Publications
- c. Sizing Images for Large Format Printing
- Avoiding Common Pitfalls in Resizing:
- a. Identifying and Addressing Pixelation Issues
- b. Dealing with Artifacts and Compression Artifacts
- c. Ensuring Color Accuracy during Resizing
- Optimizing Sharpness and Detail for Print:
- a. Sharpening Techniques for Print-Ready Images
- b. Balancing Sharpening for Different Print Sizes
- c. Applying Additional Detail Enhancements
- Soft Proofing for Print Accuracy:
- a. Understanding the Soft Proofing Feature in Photoshop
- b. Simulating Print Conditions for Color Accuracy
- c. Making Adjustments Based on Soft Proofing Results
- Saving and Exporting Print-Ready Images:
- a. Choosing the Right File Format for Print (e.g., TIFF, PSD)
- b. Optimizing Images for Various Print Processes
- c. Preserving Layers for Future Adjustments
- Inspirational Examples and Case Studies:
- a. Showcasing Noteworthy Print-Resized Projects
- b. Breakdowns of Notable Challenges and Solutions
- c. Exploring Different Styles and Approaches in Print-Ready Image Editing
Conclusion:
Resizing images for print is a crucial step in the journey from digital creation to tangible art. This comprehensive guide has equipped you with the knowledge and tools needed to navigate the complexities of image resizing in Photoshop, ensuring your prints are a true reflection of your artistic intent. As you embark on your journey of print-ready image editing, remember that attention to detail, a deep understanding of Photoshop’s capabilities, and a commitment to optimizing image quality will guide you towards creating prints that captivate and endure. So, dive into the world of print perfection with Photoshop and let your creativity flourish as you bring your digital creations to life in stunning, tangible form.