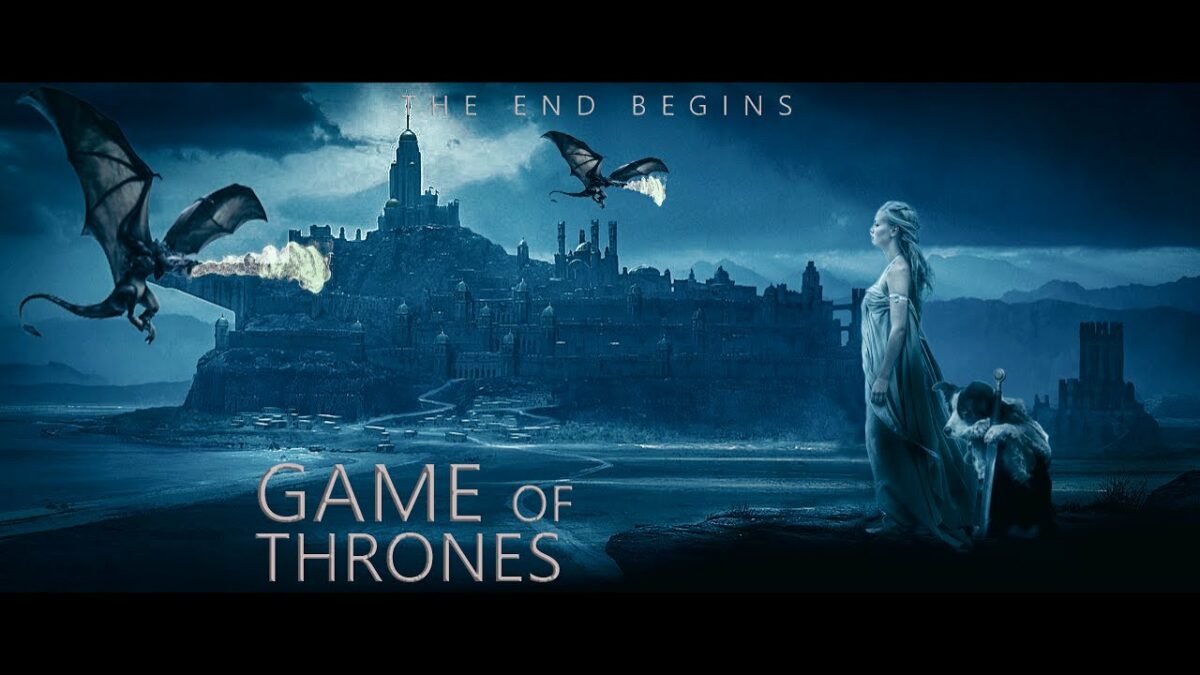
Categories
How To Guides Photoshop

Staying Ahead: A Comprehensive Guide on How to Keep Photoshop Always Up to Date

Introduction:

Adobe Photoshop stands as the pinnacle of digital imaging and graphic design software, and to fully harness its capabilities, it’s essential to keep it updated with the latest features, enhancements, and security patches. Adobe continually refines and expands Photoshop through regular updates, ensuring users have access to cutting-edge tools and a secure editing environment. In this extensive guide, we will explore the various methods and considerations for keeping Photoshop always up to date, ensuring you stay at the forefront of digital creativity.

Section 1: Understanding the Importance of Updates

1.1 Evolution of Features:

  • Adobe Photoshop undergoes constant development, introducing new features and improvements with each update.
  • Staying updated ensures you have access to the latest tools, workflows, and creative possibilities.

1.2 Security Enhancements:

  • Regular updates often include security patches to address vulnerabilities.
  • Keeping Photoshop up to date minimizes the risk of security threats and provides a safer environment for your creative work.

Section 2: Adobe Creative Cloud Subscription

2.1 The Role of Creative Cloud:

  • Adobe Creative Cloud serves as the hub for managing and updating Adobe software, including Photoshop.
  • A Creative Cloud subscription is the gateway to seamless updates and additional creative resources.

2.2 Verifying Subscription Status:

  • Ensure your Creative Cloud subscription is active and associated with the Adobe ID used to install Photoshop.
  • Subscription status influences access to the latest Photoshop updates.

Section 3: Manual Update Checks

3.1 Navigating to the Creative Cloud App:

  • Launch the Adobe Creative Cloud app on your computer.
  • If not installed, download and install it from the official Adobe website.

3.2 Checking for Updates:

  • In the Creative Cloud app, navigate to the “Apps” section.
  • Locate Photoshop and click the “Update” button if an update is available.

Section 4: Automatic Updates

4.1 Enabling Automatic Updates:

  • In the Creative Cloud app’s preferences, explore the “Settings” or “Preferences” section.
  • Ensure that automatic updates are enabled to receive the latest Photoshop versions seamlessly.

4.2 Configuring Update Preferences:

  • Customize update preferences based on your workflow, specifying when updates are installed.
  • Options may include installing updates immediately or waiting until a convenient time.

Section 5: Notifications and Alerts

5.1 Configuring Notifications:

  • Adjust notification settings to receive alerts when updates are available.
  • Notifications serve as timely reminders to stay current with Photoshop releases.

5.2 Staying Informed:

  • Regularly check Adobe’s official communication channels, such as the Adobe blog or social media, for announcements on major updates.
  • Adobe often provides insights into upcoming features and enhancements.

Section 6: Troubleshooting Update Issues

6.1 Network Connectivity:

  • Ensure a stable internet connection to download updates successfully.
  • Uninterrupted connectivity is crucial for the seamless installation of Photoshop updates.

6.2 Clearing Cache and Preferences:

  • If encountering issues, consider clearing the cache and preferences in the Creative Cloud app.
  • This can resolve potential conflicts and ensure a smoother update process.

Section 7: Dealing with Version Compatibility

7.1 Compatibility Checks:

  • Before updating, verify the compatibility of third-party plugins and extensions with the new Photoshop version.
  • Some plugins may require updates to work seamlessly with the latest release.

7.2 Backing Up Preferences:

  • Before updating, consider backing up your Photoshop preferences to preserve custom settings and configurations.
  • This precautionary step ensures a smooth transition to the updated version.

Section 8: Navigating Major Version Updates

8.1 Understanding Major Updates:

  • Adobe occasionally releases major version updates with significant feature additions and improvements.
  • Major updates may require additional considerations, such as adapting to interface changes or exploring new functionalities.

8.2 Exploring New Features:

  • Take the time to explore and familiarize yourself with new features introduced in major updates.
  • Adobe often provides resources, tutorials, and documentation to guide users through changes.

Section 9: Customizing the Update Process

9.1 Preferences for Update Frequency:

  • In the Creative Cloud app preferences, customize the frequency of update checks.
  • Adjust these settings based on your preference for staying at the forefront of updates.

9.2 Controlling Version Installation:

  • Creative Cloud allows users to install and maintain multiple versions of Photoshop simultaneously.
  • This flexibility is beneficial for users who need to work with specific versions for compatibility reasons.

Section 10: Utilizing Adobe Support Resources

10.1 Adobe Support Website: – Explore the Adobe Support website for troubleshooting guides, FAQs, and resources related to updating Photoshop. – The support site is a valuable tool for resolving common issues and gaining insights into the update process.

10.2 Contacting Adobe Support: – If encountering persistent issues, consider reaching out to Adobe Support for personalized assistance. – Adobe’s support team can provide guidance and solutions tailored to your specific situation.

Section 11: Community Engagement and Feedback

11.1 Adobe Community Forums: – Engage with the Adobe Community Forums to connect with other Photoshop users. – Share experiences, seek advice, and stay informed about common issues and solutions related to updates.

11.2 Providing Feedback: – Actively participate in Adobe’s feedback mechanisms, such as user surveys or beta testing programs. – Your input contributes to the refinement of future updates and features.

Section 12: Future Developments and Continuous Learning

12.1 Adobe’s Commitment to Innovation: – Stay informed about Adobe’s roadmap and future developments. – Adobe’s commitment to innovation ensures a dynamic landscape for Photoshop users.

12.2 Lifelong Learning: – Embrace a mindset of continuous learning to adapt to evolving features and industry trends. – Leverage Adobe’s educational resources and tutorials to enhance your Photoshop proficiency.

Conclusion:

Keeping Adobe Photoshop always up to date is a proactive measure that not only ensures access to the latest features but also promotes a secure and efficient editing environment. This comprehensive guide has provided a roadmap for navigating updates through Creative Cloud, configuring preferences, troubleshooting issues, and staying informed about the latest developments. Armed with this knowledge, you are well-equipped to embark on a journey of continuous creativity, exploring the full potential of Photoshop’s evolving capabilities. Now, stay ahead, keep Photoshop up to date, and let your digital creations thrive in the ever-evolving world of visual storytelling. Happy editing!

Categories
How To Guides Photoshop

Mastering Precision: A Comprehensive Guide on How to Crop Images in Photoshop with the Crop Tool

Introduction:

Cropping is a fundamental aspect of image editing, allowing photographers and designers to refine composition, eliminate distractions, and focus on the key elements within a frame. Adobe Photoshop, a powerhouse in the realm of digital editing, offers a versatile and powerful Crop Tool that empowers users to precisely tailor their images. In this extensive guide, we will explore the intricacies of the Crop Tool in Photoshop, providing step-by-step instructions and insights into leveraging its features for impeccable image cropping.

Section 1: Unveiling the Significance of Image Cropping

1.1 The Art of Composition:

  • Composition plays a pivotal role in visual storytelling and communication.
  • Cropping allows for intentional framing, directing the viewer’s attention to specific elements within an image.

1.2 Enhancing Visual Impact:

  • Effective cropping can enhance the visual impact of an image, making it more compelling and engaging.
  • It enables photographers and designers to optimize the composition for different purposes, such as social media posts, prints, or web design.

Section 2: Navigating to the Crop Tool in Photoshop

2.1 Accessing the Crop Tool:

  • Open your image in Photoshop and select the Crop Tool from the toolbar.
  • Alternatively, press the keyboard shortcut “C” to activate the Crop Tool.

2.2 Understanding the Crop Tool Options:

  • Familiarize yourself with the options bar at the top of the screen when the Crop Tool is selected.
  • This area provides various settings and parameters for refining your crop.

Section 3: Basic Image Cropping

3.1 Selecting the Crop Area:

  • Click and drag over your image to create a selection box using the Crop Tool.
  • Adjust the size and position of the selection as needed.

3.2 Finalizing the Crop:

  • Press the “Enter” key or click the checkmark icon in the options bar to apply the crop.
  • The image is now cropped based on your selected area.

Section 4: Adjusting Crop Boundaries

4.1 Dragging Crop Handles:

  • Resize the crop boundaries by clicking and dragging the handles on the edges or corners of the selection box.
  • Hold the “Shift” key to maintain the original aspect ratio.

4.2 Rotating the Crop:

  • To rotate the crop, move your cursor outside the selection box until it becomes a curved double-headed arrow.
  • Click and drag to rotate, allowing for creative framing adjustments.

Section 5: Aspect Ratio and Resolution

5.1 Customizing Aspect Ratio:

  • Use the options bar to set a specific aspect ratio for your crop.
  • Choose from common ratios or enter custom values based on your requirements.

5.2 Resolving Image Size:

  • When cropping, be mindful of the resolution settings in the options bar.
  • Adjust the resolution to control the final size and quality of the cropped image.

Section 6: Straightening and Aligning

6.1 Straightening Horizons:

  • For images with skewed horizons, use the Straighten Tool within the Crop Tool.
  • Click and drag along a horizontal line, and Photoshop will automatically straighten the image.

6.2 Aligning to Guides and Grids:

  • Enable the “Show Grid” or “Show Guides” option in the options bar for precision.
  • Align elements within your image to the grid or guides to enhance symmetry and balance.

Section 7: Using the Rule of Thirds

7.1 Activating the Rule of Thirds Overlay:

  • Enable the Rule of Thirds overlay in the options bar to guide your cropping decisions.
  • This overlay divides the image into a grid, helping you align key elements along the grid lines.

7.2 Aligning Elements with the Grid:

  • Place important elements, such as the main subject or focal points, along the intersecting points of the grid.
  • This technique enhances visual balance and interest.

Section 8: Content-Aware Crop

8.1 Enabling Content-Aware Crop:

  • Photoshop’s Content-Aware Crop is a powerful feature that intelligently fills in gaps when expanding the canvas.
  • Check the “Content-Aware” option in the options bar before finalizing your crop.

8.2 Expanding the Canvas:

  • Extend the crop boundaries beyond the original image, and Photoshop will use content-aware technology to fill in the added areas.
  • This is particularly useful for preserving details near the edges.

Section 9: Cropping Non-Destructively with Adjustment Layers

9.1 Using Adjustment Layers for Cropping:

  • To crop non-destructively, add an Adjustment Layer and apply a mask.
  • Use the mask to reveal or hide specific areas, achieving a reversible crop effect.

9.2 Fine-Tuning Over Time:

  • As your creative vision evolves, easily revisit and adjust the mask for refined cropping without altering the original image.

Section 10: Advanced Cropping Techniques

10.1 Perspective Cropping: – Photoshop’s Perspective Crop Tool allows for cropping with perspective adjustments. – Align the crop to a specific perspective, ideal for correcting distortion in architectural or wide-angle shots.

10.2 Cropping for Different Outputs: – Tailor your crops based on the intended output, whether it’s for social media, print, or web design. – Adjust aspect ratios and resolutions accordingly to optimize image presentation.

Section 11: Saving and Exporting Cropped Images

11.1 Saving in Photoshop Format: – Save your work in Photoshop’s native PSD format to preserve layers and editing capabilities. – This is crucial if you anticipate further adjustments or need to maintain a non-destructive workflow.

11.2 Exporting for Different Platforms: – When ready to share or use the cropped image, export it in a suitable format (e.g., JPEG or PNG). – Consider the platform’s requirements for resolution and file size.

Section 12: Troubleshooting Common Issues

12.1 Resolution and Quality Concerns: – Be cautious when cropping to avoid excessive resolution reduction, which can impact image quality. – If resolution loss occurs, consider starting with a higher-resolution image or adjust settings accordingly.

12.2 Distortion and Pixelation: – In cases where distortion or pixelation occurs during cropping, utilize the Content-Aware Crop feature. – Experiment with different crop settings to find the optimal balance.

Conclusion:

The Crop Tool in Adobe Photoshop is a versatile instrument that empowers creatives to refine and elevate their images with precision. This comprehensive guide has walked you through the fundamentals, from basic cropping techniques to advanced features like Content-Aware Crop and non-destructive cropping with adjustment layers. Armed with this knowledge, you are equipped to wield the Crop Tool with finesse, shaping your images to convey your artistic vision with clarity and impact. Now, dive into your editing endeavors, explore the art of cropping, and watch as your images transform into polished compositions that captivate and resonate.

Categories
How To Guides Photoshop

Navigating Adobe Photoshop: A Comprehensive Guide to Understanding the Differences Between “Open Image” and “Place Image

Introduction:

Adobe Photoshop stands as a digital realm for creative expression, offering an extensive array of tools and features to bring ideas to life. Among the fundamental operations are “Open Image” and “Place Image,” each serving distinct purposes in the creative process. This comprehensive guide will delve into the nuances of these functions, providing insights into when and how to use “Open Image” and “Place Image” in Photoshop, ensuring efficient and effective workflow management.

Section 1: Unraveling the Basics

  1. Defining “Open Image”:
    • The “Open Image” feature in Photoshop is a direct approach to loading an image file into the software. This action opens the selected image as an independent document, where edits and modifications can be made directly to the image file itself.
  2. Understanding “Place Image”:
    • On the other hand, “Place Image” is a method used to embed external files, such as images or graphics, into an existing Photoshop document. This creates a linked or embedded smart object, allowing for dynamic updates if the external file is modified.

Section 2: When to Use “Open Image”

  1. Working with a Single Image:
    • “Open Image” is the preferred choice when working with a single image that requires comprehensive edits. This method provides a dedicated workspace for editing the image without the need for additional layers or smart objects.
  2. Initiating a New Project:
    • When starting a new project that revolves around a single image, using “Open Image” provides a clean slate for creative exploration. This is particularly useful when the focus is on a standalone piece rather than incorporating external elements.
  3. Directly Editing Photographs:
    • Photographers often opt for “Open Image” when dealing with raw image files or high-resolution photographs. This approach allows for direct adjustments, retouching, and enhancements without the complexities associated with embedding external files.

Section 3: When to Use “Place Image”

  1. Incorporating External Elements:
    • “Place Image” becomes indispensable when integrating external elements, such as logos, graphics, or other images, into an existing Photoshop document. This method enables dynamic updates if the linked file undergoes changes.
  2. Maintaining Non-Destructive Workflow:
    • When prioritizing a non-destructive workflow, “Place Image” is the go-to choice. Embedding external files as smart objects ensures that any modifications made to the linked file are reflected in the Photoshop document, maintaining flexibility and adaptability.
  3. Creating Collages or Composites:
    • Designers crafting collages or intricate compositions often prefer “Place Image” to seamlessly blend various elements. This method simplifies the organization of layers and allows for efficient adjustments in a multi-layered composition.

Section 4: Step-by-Step Guide: “Open Image”

  1. Navigating to “Open Image”:
    • Launch Adobe Photoshop and navigate to the “File” menu. Select “Open,” locate your desired image file on your computer, and click “Open.”
  2. Editing in the Image Workspace:
    • Once the image is opened, make necessary edits directly in the image workspace. This can include adjustments to color, exposure, cropping, and other enhancements.
  3. Saving Changes:
    • After completing edits, save the changes directly to the original image file or create a new version. This ensures that modifications are preserved for future use.

Section 5: Step-by-Step Guide: “Place Image”

  1. Accessing “Place Image”:
    • Open your existing Photoshop document and navigate to the “File” menu. Choose “Place Embedded” or “Place Linked,” depending on your preference.
  2. Selecting the External File:
    • Locate and select the external file you wish to embed. Click “Place” to insert the file into your Photoshop document.
  3. Adjusting and Confirming Placement:
    • Adjust the size and position of the placed image as needed. Confirm the placement by pressing “Enter” or clicking the checkmark icon in the options bar.
  4. Editing the External File:
    • To edit the embedded file, double-click on its smart object layer in the layers panel. This opens the linked file in a separate window, where modifications can be made. Save the changes to see them reflected in the main document.

Section 6: Combining Techniques for Advanced Projects

  1. Layering “Open Image” within “Place Image”:
    • For complex projects, consider layering “Open Image” documents within a “Place Image” document. This approach allows for a combination of standalone edits and dynamic updates from external elements.
  2. Utilizing Smart Objects:
    • Convert layers to smart objects when employing “Open Image” to maintain flexibility. This enables non-destructive editing and the ability to revisit and modify adjustments even after saving and closing the document.

Section 7: Common Pitfalls and Troubleshooting

  1. Loss of Smart Object Link:
    • Be cautious of potential issues when using “Place Image.” If the link to the external file is lost or the file is moved, Photoshop may prompt for re-linking or cause discrepancies in the document.
  2. Maintaining Consistency in Color Profiles:
    • When working with multiple images or external elements, ensure consistency in color profiles. Mismatched color profiles can lead to unexpected color shifts and inconsistencies in the final composition.

Section 8: Finalizing and Exporting Your Project

  1. Reviewing and Fine-Tuning:
    • Take the time to review your project, making any necessary adjustments to achieve the desired outcome. Fine-tune edits, layer blending, and overall composition.
  2. Saving and Exporting:
    • Save your project in Photoshop format (PSD) to retain layers and edits for future modifications. When ready to share or use the final version, export the document in a suitable format, such as JPEG or PNG.

Section 9: Showcasing Your Photoshop Proficiency

  1. Sharing on Creative Platforms:
    • Showcase your Photoshop proficiency by sharing your projects on creative platforms, such as Behance, Dribbble, or Instagram. Provide insights into your workflow and engage with the creative community.
  2. Collaborating with Others:
    • Collaborate with fellow designers and artists by sharing editable Photoshop documents. This facilitates seamless collaboration, allowing others to explore and build upon your work.

Conclusion:

Understanding the distinctions between “Open Image” and “Place Image” in Adobe Photoshop empowers users to navigate their creative endeavors with precision and efficiency. This comprehensive guide has shed light on the applications, benefits, and intricacies of each method, providing a roadmap for when and how to employ these features in diverse creative projects. As you continue to explore the expansive world of Photoshop, let this guide serve as a valuable resource, unlocking the full potential of your digital artistry within this dynamic and innovative platform.