Introduction:
In the realm of document creation, Microsoft Word 2010 allows users to transcend the ordinary by incorporating captivating visuals. Pictures play a pivotal role in conveying information, telling stories, and enhancing the overall visual appeal of documents. To harness the full potential of these visuals, it’s essential to master the art of formatting pictures. In this extensive guide, we will delve into the intricacies of formatting pictures in Microsoft Word 2010, exploring a myriad of tools, customization options, and best practices for creating visually stunning and professional-looking documents.
I. Understanding Picture Formatting in Word 2010:
- Definition and Purpose:
- Formatting pictures in Word 2010 refers to the process of customizing various aspects of an image to improve its appearance, alignment, and integration within the document. This includes adjusting size, position, styles, and applying artistic effects.
- Types of Picture Formatting:
- Picture formatting encompasses a range of adjustments, including resizing, cropping, applying styles, adding borders, and utilizing advanced features like artistic effects and image corrections.
II. Accessing Picture Formatting Tools:
- Inserting Pictures:
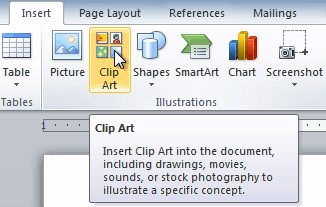
- Begin by inserting pictures into your Word document from external files or online sources. Navigate to the Insert tab, select Pictures, and choose the desired image.
- Picture Tools Format Tab:
- Upon inserting a picture, the Format tab appears under Picture Tools, providing a plethora of formatting options. This tab becomes the go-to hub for refining the visual aspects of your images.
III. Resizing and Cropping Pictures:
- Adjusting Picture Size:
- Resize pictures by dragging the sizing handles or manually entering specific dimensions. Maintain proportions by holding down the Shift key while resizing.
- Cropping Images:
- Crop pictures to focus on specific areas. Utilize the Crop tool to trim unwanted portions and create a more visually appealing composition.
IV. Picture Styles and Effects:
- Applying Picture Styles:
- Enhance your images with predefined Picture Styles. Experiment with different styles that alter the frame, shadow, and reflection to achieve a polished look.
- Artistic Effects:
- Explore Artistic Effects to transform your pictures into unique visuals. Apply effects such as pencil sketches, watercolor, or oil painting to add a creative touch.
V. Adding Borders and Frames:
- Customizing Picture Borders:
- Apply borders to pictures for emphasis or to create a distinct visual separation. Adjust border color, thickness, and style to match the overall document aesthetic.
- Picture Frames:
- Experiment with picture frames to encase your images in stylish designs. Customize frame colors and styles to complement the document’s visual theme.
VI. Image Corrections and Adjustments:
- Brightness and Contrast:
- Fine-tune image brightness and contrast to achieve the desired visual impact. Use the Corrections tool to enhance or tone down the overall luminosity.
- Color Saturation:
- Adjust color saturation to make images more vibrant or muted. Strike the right balance to ensure that colors complement the document’s overall color scheme.
VII. Picture Alignment and Positioning:
- Aligning Pictures:
- Align pictures with precision using the alignment options available in the Format tab. Ensure a neat and organized layout by aligning pictures relative to the page or other objects.
- Positioning Options:
- Explore positioning options to precisely place pictures in relation to text or other elements. Control the layout and flow of the document by choosing appropriate positioning settings.
VIII. Text Wrapping for Visual Integration:
- Text Wrapping Styles:
- Utilize text wrapping options to seamlessly integrate pictures with text. Choose from various styles like square, tight, or through to control how text interacts with the image.
- Controlling Text Flow:
- Adjust text flow around pictures to create a harmonious layout. Control how text wraps around images to enhance readability and visual appeal.
IX. Advanced Picture Formatting Techniques:
- Transparency:
- Apply transparency to pictures for a subtle and blended appearance. Adjust the transparency level to achieve the desired visual effect.
- Reflections and Shadows:
- Add reflections and shadows to pictures to create depth and dimension. Experiment with different settings to enhance the overall visual appeal.
X. Collaborative Editing with Formatted Pictures:
- Sharing Document Templates:
- Collaborate seamlessly by sharing document templates with predefined and formatted pictures. Ensure consistency and uniformity across collaborative projects.
- Coordinating Visual Elements:
- Coordinate the use of formatted pictures across collaborative projects to maintain visual coherence and convey a unified message. Establish style guidelines for consistent design.
XI. Document Accessibility and Formatted Pictures:
- Alt Text for Accessibility:
- Enhance document accessibility by adding alt text to formatted pictures. Provide descriptive text to assist users with visual impairments in understanding the content.
- Descriptive Image Labels:
- Use descriptive image labels for formatted pictures to ensure that users can comprehend the visual elements, even without viewing the visuals. Accessibility is crucial for an inclusive audience.
XII. Mastering Picture Formatting Techniques:
- Continuous Learning:
- Mastery of picture formatting techniques involves continuous learning and exploration of advanced functionalities for optimal document design.
- Community and Online Resources:
- Engage with the community and explore online resources, tutorials, and forums to stay updated on the latest formatting features and best practices.
XIII. Conclusion:
- Elevating Visual Communication:
- By mastering the art of formatting pictures in Microsoft Word 2010, users can elevate their visual communication capabilities, creating documents that captivate and effectively convey their message.
- Empowering Visual Expression:
- Striking the perfect balance between functionality and creativity, Word 2010’s picture formatting features empower users to go beyond mere visuals, enabling them to craft visually stunning documents that leave a lasting impression.
As you embark on the journey of formatting pictures in Microsoft Word 2010, you unlock the potential to transform your documents into visually rich and engaging masterpieces. Embrace the diverse features, experiment with creative formatting, and empower yourself to create documents that captivate and effectively communicate your message.