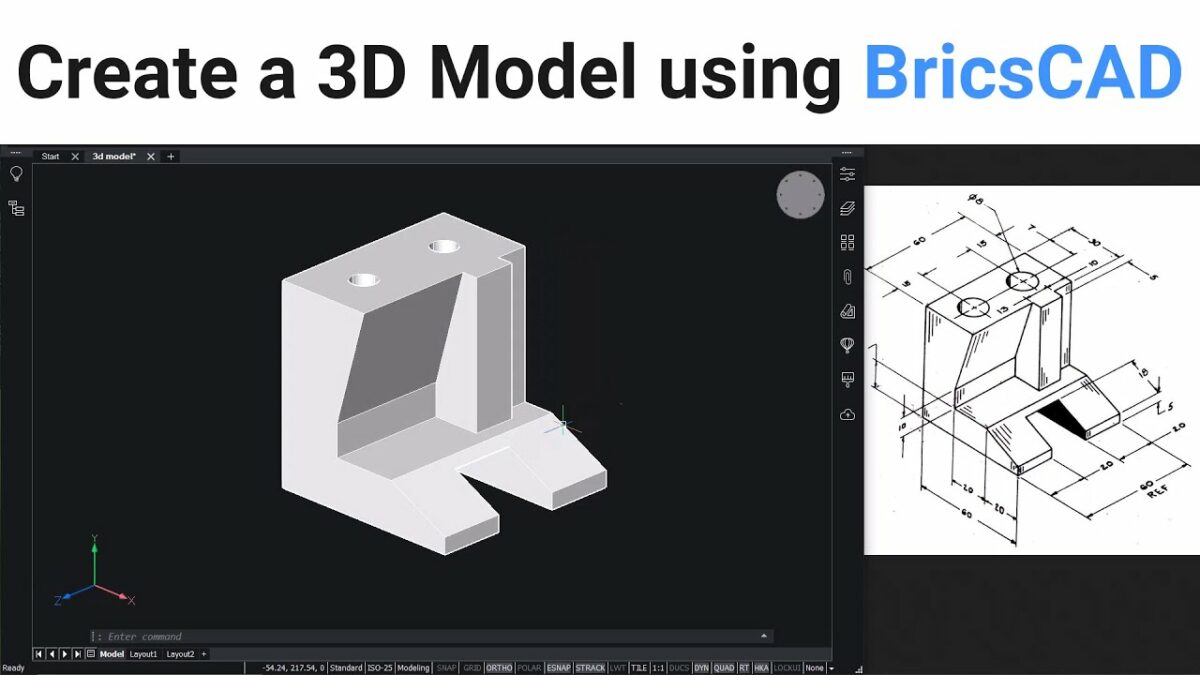
Categories
How To Guides

Crafting Elegance: A Detailed Guide to Designing Lower Third Graphics in Adobe After Effects

Introduction:

Lower third graphics are essential elements in video production, providing context, information, and visual polish to enhance viewer engagement and comprehension. Whether used in documentaries, news broadcasts, interviews, or online videos, lower thirds serve as on-screen overlays that display pertinent information such as names, titles, or captions without interrupting the main content. Adobe After Effects offers a wealth of tools and features to create stylish and professional-looking lower third graphics that complement your video projects seamlessly. In this extensive guide, we’ll explore the step-by-step process of designing lower third graphics in Adobe After Effects, covering everything from design principles to animation techniques, to help you craft polished and effective lower thirds that elevate your video productions.

Understanding Lower Third Graphics in Adobe After Effects:

Lower third graphics are graphical overlays that appear in the lower portion of the screen during video playback, typically containing text, graphics, or both. In Adobe After Effects, lower thirds are created using a combination of text layers, shape layers, effects, and animation techniques to achieve desired visual styles and motion effects. Lower thirds serve various purposes, such as identifying speakers, providing context or information, branding content, or guiding viewer attention, and are essential components of professional video productions.

Key Elements of Lower Third Graphics in Adobe After Effects:

Creating lower third graphics in Adobe After Effects involves understanding several key elements, including:

  1. Composition: Composition is the arrangement and organization of elements within the lower third graphic, determining the visual hierarchy, balance, and readability of the information presented. Consider factors such as text placement, font selection, color contrast, and graphic elements to create visually appealing and effective lower thirds that complement your video content.
  2. Text Layers: Text layers are the primary components of lower third graphics, containing textual information such as names, titles, captions, or descriptions. Use the Text tool in After Effects to create text layers, and customize the text properties, including font, size, style, alignment, color, and tracking, to achieve desired typography and legibility.
  3. Shape Layers: Shape layers are versatile elements that can be used to create graphic elements, backgrounds, borders, or decorative accents within lower third graphics. Use the Shape tool in After Effects to create shape layers, and customize the shape properties, including fill color, stroke color, stroke width, and opacity, to enhance the visual appeal and composition of the lower third.
  4. Effects and Enhancements: Effects and enhancements can add depth, texture, and visual interest to lower third graphics, enriching the overall look and feel of the design. Experiment with effects such as shadows, glows, gradients, or blurs to add dimension and polish to text and graphic elements, and use motion graphics techniques such as animation presets, transitions, or keyframing to create dynamic motion effects that draw viewer attention.

Step-by-Step Guide to Creating Lower Third Graphics in Adobe After Effects:

Follow these step-by-step instructions to create lower third graphics in Adobe After Effects:

  1. Plan Your Design: Begin by planning the layout, typography, and visual style of your lower third graphic based on the content and context of your video project. Consider factors such as text placement, font selection, color scheme, and graphic elements to create a cohesive and visually appealing design that complements your video content.
  2. Create a New Composition: Once you’ve planned your design, create a new composition in After Effects by selecting “Composition” > “New Composition” from the menu. Set the composition settings, including resolution, frame rate, duration, and background color, according to your project requirements.
  3. Add Text Layers: Use the Text tool in After Effects to create text layers for the textual information you want to include in the lower third graphic. Click and drag to create a text box in the Composition panel, and type or paste the desired text into the text box. Customize the text properties, such as font, size, style, alignment, color, and tracking, to achieve the desired typography and legibility for your lower third.
  4. Create Shape Layers: Use the Shape tool in After Effects to create shape layers for graphic elements, backgrounds, borders, or decorative accents within the lower third graphic. Click and drag to draw shapes directly in the Composition panel, and customize the shape properties, such as fill color, stroke color, stroke width, and opacity, to enhance the visual appeal and composition of the lower third.
  5. Arrange and Composite Layers: Arrange the text layers and shape layers within the Composition panel to create the desired layout and composition for the lower third graphic. Use the Selection tool to move, resize, rotate, or scale layers as needed, and use the Transform properties in the Timeline panel to adjust layer properties, such as position, scale, rotation, opacity, and anchor point.
  6. Apply Effects and Enhancements: Enhance your lower third graphic by applying effects and enhancements to text and shape layers. Experiment with effects such as shadows, glows, gradients, or blurs to add depth and dimension to text and graphic elements, and use motion graphics techniques such as animation presets, transitions, or keyframing to create dynamic motion effects that draw viewer attention.
  7. Preview and Refine: Preview the lower third graphic in the Composition panel to assess its appearance, readability, and composition. Make any necessary adjustments or refinements to the layout, typography, color scheme, effects, or motion effects to achieve the desired visual impact and complement your video content effectively.
  8. Export Graphic: Once you’re satisfied with the lower third graphic, export it as a standalone graphic file or as part of your video project. To export the lower third graphic as a standalone graphic file, select the composition containing the lower third graphic in the Project panel, and choose “Composition” > “Save Frame As” > “File” from the menu. To export the lower third graphic as part of your video project, render and export the composition containing the lower third graphic as a video file by selecting “Composition” > “Add to Render Queue” from the menu and configuring the render settings, including output format, resolution, and codec options.

Best Practices for Creating Lower Third Graphics in Adobe After Effects:

To create compelling and effective lower third graphics in Adobe After Effects, consider the following best practices:

  1. Keep it Simple: Focus on conveying essential information clearly and concisely through your lower third graphic, and avoid cluttering the design with unnecessary text or graphic elements. Keep the layout clean, balanced, and easy to read, and prioritize readability and visual clarity in your design choices.
  2. Maintain Consistency: Maintain consistency with your brand’s identity and visual style when designing lower third graphics. Use colors, fonts, and graphic elements that align with your brand’s aesthetic and messaging, and ensure that the lower third graphic complements the overall look and feel of your video content.
  3. Consider Timing and Duration: Consider the timing and duration of the lower third graphic within your video project, and ensure that it appears at appropriate moments and remains on-screen for a suitable duration to convey the intended information effectively. Avoid prolonged or intrusive lower third graphics that may distract or disrupt the flow of your video content.
  4. Test and Iterate: Test your lower third graphic in different viewing environments and playback conditions to ensure that it performs as intended and resonates with your audience. Solicit feedback from colleagues, clients, or focus groups, and be open to revising and refining your lower third graphic based on constructive criticism and user testing.
  5. Optimize for Viewing Platforms: Consider the platform and device on which your video content will be viewed, and optimize your lower third graphic accordingly. Ensure that the lower third graphic remains legible and visually appealing across different screen sizes, aspect ratios, and viewing resolutions, and adjust the layout, typography, and graphic elements as needed to accommodate varying viewing conditions.

Conclusion:

In conclusion, designing lower third graphics in Adobe After Effects is a creative and rewarding process that allows video producers and motion graphic designers to enhance their video projects with professional-looking overlays that provide context, information, and visual polish. By understanding the principles of design, mastering the tools and techniques of After Effects, and following best practices for lower third design, you can create polished and effective lower thirds that elevate your video productions and engage your audience effectively. So, dive into the world of lower third design, experiment with different layouts, typography, and effects, and unleash your creativity to create compelling and memorable lower third graphics that enhance your video content and leave a lasting impression.

Categories
How To Guides

Mastering Clip Properties: A Comprehensive Guide to Adjusting Clip Properties in DaVinci Resolve

Introduction: Adjusting clip properties is a fundamental aspect of the video editing process, allowing editors to fine-tune various aspects of their footage to achieve the desired look and feel. DaVinci Resolve provides a comprehensive set of tools and features for adjusting clip properties, empowering editors to manipulate aspects such as color, size, speed, and more with precision and control. In this extensive guide, we’ll explore the intricacies of adjusting clip properties in DaVinci Resolve, offering step-by-step tutorials, expert tips, and real-world examples to help you master this essential aspect of video editing.

Section 1: Understanding Clip Properties Before delving into the specifics of adjusting clip properties in DaVinci Resolve, it’s important to understand what clip properties are and how they affect your footage. This section provides an overview of clip properties, including common parameters and their impact on the editing process.

  • Defining Clip Properties: Explore the concept of clip properties, which refer to various attributes and settings associated with individual video clips in DaVinci Resolve. Understand how clip properties encompass aspects such as color, size, speed, audio levels, and more, and how adjusting these properties can influence the visual and auditory presentation of your footage.
  • Key Parameters: Familiarize yourself with key parameters that govern clip properties in DaVinci Resolve. Learn about parameters such as exposure, white balance, contrast, saturation, sharpness, speed, scale, position, rotation, opacity, and audio levels, and understand how they contribute to the overall look and feel of your video clips.

Section 2: Adjusting Clip Properties in the Edit Page DaVinci Resolve offers a range of tools and features for adjusting clip properties directly within the Edit page, providing editors with flexibility and control over their editing process. This section provides step-by-step tutorials and demonstrations for adjusting clip properties in the Edit page.

  • Color Correction: Learn how to perform basic color correction on your video clips in DaVinci Resolve. Explore techniques for adjusting exposure, white balance, contrast, saturation, and sharpness to achieve a balanced and visually appealing look for your footage. Discover how to use the Color page and color grading tools to fine-tune color and tone adjustments with precision.
  • Speed Changes: Discover how to adjust the speed of your video clips in DaVinci Resolve to create slow-motion or fast-motion effects. Learn how to change clip speed, maintain audio pitch, and customize speed ramps for smooth transitions between different playback speeds. Explore techniques for creating dynamic and engaging visual effects using speed changes.
  • Transformations: Explore techniques for applying transformations to your video clips in DaVinci Resolve. Learn how to adjust clip scale, position, rotation, and opacity to reframe, resize, and reposition clips within your project. Discover how to create dynamic compositions and visual effects using transformation controls.

Section 3: Adjusting Clip Properties in the Color Page In addition to the Edit page, DaVinci Resolve offers advanced tools and features for adjusting clip properties in the Color page, allowing editors to perform precise color grading and correction on their footage. This section delves into techniques for adjusting clip properties in the Color page.

  • Advanced Color Correction: Delve into advanced color correction techniques in DaVinci Resolve’s Color page. Learn how to use color grading tools such as primaries wheels, curves, qualifiers, and power windows to achieve precise color adjustments and creative looks for your footage. Explore techniques for matching shots, creating stylized looks, and achieving consistent color grading across your project.
  • Secondary Color Correction: Discover how to perform secondary color correction in DaVinci Resolve to isolate and adjust specific colors or areas within your footage. Learn how to use secondary color grading tools such as qualifiers, masks, and tracking to target and manipulate specific elements within your clips. Explore techniques for enhancing skin tones, adjusting skies, and correcting color casts with precision.

Section 4: Real-World Applications and Case Studies Gain inspiration and insight from real-world examples and case studies that demonstrate the creative potential and practical applications of adjusting clip properties in DaVinci Resolve. This section showcases innovative editing techniques employed in diverse contexts, from narrative films and documentaries to commercials and music videos.

  • Narrative Filmmaking: Explore how filmmakers use advanced clip property adjustments in DaVinci Resolve to enhance the visual storytelling and aesthetics of narrative film projects. Learn how to manipulate color, speed, and transformations to create mood, atmosphere, and visual impact that supports the narrative and engages the audience.
  • Documentary Editing: Discover how documentary editors leverage clip property adjustments in DaVinci Resolve to enhance the storytelling and clarity of documentary projects. Learn how to perform subtle color corrections, speed changes, and transformations to improve visual continuity, clarify information, and maintain audience engagement throughout the documentary.
  • Commercial Production: Explore how commercial editors use clip property adjustments in DaVinci Resolve to create polished and visually compelling commercials that captivate audiences and promote products or brands effectively. Learn how to use color grading, speed changes, and transformations to enhance product shots, create dynamic transitions, and convey brand identity with precision and impact.

Section 5: Conclusion Adjusting clip properties in DaVinci Resolve is a powerful and versatile tool for enhancing your video projects with precision and control. By mastering the techniques and principles outlined in this guide, you can unlock a world of creative possibilities and elevate your editing prowess to new heights of excellence. Embrace the creative potential of clip property adjustments, and let DaVinci Resolve be your canvas for bringing your vision to life with precision, finesse, and impact.

Categories
How To Guides

Unlocking Creativity: A Comprehensive Guide to Using the Effects Library in DaVinci Resolve

Introduction: The Effects Library in DaVinci Resolve serves as a treasure trove of creative tools and resources, offering a vast array of effects, transitions, titles, and generators to enhance your video projects. Whether you’re a seasoned professional or a novice editor, understanding how to effectively navigate and utilize the Effects Library can elevate your editing skills and bring your creative vision to life. In this extensive guide, we’ll explore the intricacies of using the Effects Library in DaVinci Resolve, providing step-by-step tutorials, expert tips, and real-world examples to help you unleash your creativity and achieve stunning results.

Section 1: Exploring the Effects Library Before diving into the specifics of using the Effects Library, it’s important to understand its purpose and layout. This section provides an overview of the Effects Library in DaVinci Resolve, including its categories, subcategories, and organization features.

  • Understanding the Effects Library: Explore the concept of the Effects Library, which houses a diverse collection of effects, transitions, titles, and generators for enhancing your video projects. Learn how the Effects Library is organized into categories such as Effects, Transitions, Titles, and Generators, making it easy to locate specific types of effects.
  • Layout and Navigation: Familiarize yourself with the layout and navigation features of the Effects Library in DaVinci Resolve. Discover how to browse through the different categories and subcategories, preview effects and transitions, and access additional options and settings.

Section 2: Using Effects and Transitions The Effects Library in DaVinci Resolve offers a wide range of effects and transitions to add visual flair and polish to your video projects. This section provides step-by-step tutorials and demonstrations for using effects and transitions from the Effects Library.

  • Applying Effects: Learn how to apply effects to your video clips using the Effects Library in DaVinci Resolve. Explore techniques for browsing and previewing effects, applying effects to individual clips or entire tracks, and customizing effect parameters to achieve the desired look and feel.
  • Adding Transitions: Discover how to add transitions between video clips using the Transitions category in the Effects Library. Learn about different types of transitions, such as cuts, fades, wipes, and dissolves, and explore techniques for applying transitions, adjusting duration and timing, and customizing transition properties.

Section 3: Creating Titles and Graphics In addition to effects and transitions, the Effects Library in DaVinci Resolve also offers a variety of tools for creating titles, graphics, and other visual elements. This section delves into techniques for using titles and generators from the Effects Library.

  • Designing Titles: Learn how to create custom titles and text elements using the Titles category in the Effects Library. Explore techniques for choosing and customizing title templates, adding text, adjusting font styles and colors, and animating title elements for dynamic visual impact.
  • Generating Graphics: Discover how to use generators from the Effects Library to create custom graphics and visual elements for your video projects. Learn how to add shapes, backgrounds, and other graphic elements to your timeline, and explore techniques for customizing properties such as size, color, and opacity.

Section 4: Real-World Applications and Case Studies Gain inspiration and insight from real-world examples and case studies that demonstrate the creative potential and practical applications of the Effects Library in DaVinci Resolve. This section showcases innovative effects, transitions, titles, and generators employed in diverse editing projects.

  • Narrative Filmmaking: Explore how filmmakers use effects and transitions from the Effects Library to enhance the storytelling and visual aesthetics of narrative film projects. Learn how to create mood and atmosphere, convey emotions, and guide the viewer’s attention through creative use of effects and transitions.
  • Documentary Editing: Discover how documentary editors leverage titles and graphics from the Effects Library to convey information, add context, and enhance the storytelling in documentary projects. Learn how to create lower thirds, captions, and other informational graphics, and explore techniques for integrating titles seamlessly into documentary edits.
  • Commercial Production: Explore how commercial editors use effects and transitions from the Effects Library to create polished and engaging commercials that captivate audiences. Learn how to add visual flair, highlight product features, and create eye-catching transitions that enhance the commercial appeal of advertising projects.

Section 5: Conclusion The Effects Library in DaVinci Resolve is a powerful and versatile tool for enhancing your video projects with creative effects, transitions, titles, and graphics. By mastering the techniques and principles outlined in this guide, you can unlock a world of creative possibilities and elevate your editing prowess to new heights of excellence. Embrace the creative potential of the Effects Library, and let DaVinci Resolve be your canvas for bringing your vision to life with precision, finesse, and impact.