In the vast realm of document design, the cover page serves as the gateway to your content, setting the tone, conveying essential information, and making a memorable first impression on your audience. Whether you’re creating reports, proposals, or manuscripts, a well-designed cover page can captivate readers’ attention and establish the credibility and professionalism of your document. In this extensive guide, we’ll explore the intricacies of inserting a cover page in Microsoft Word, empowering you to create compelling and visually appealing cover pages with ease and precision.
Understanding the Significance of a Cover Page:
Before delving into the practical aspects of inserting a cover page, it’s crucial to grasp the significance of this introductory element in document design. A cover page serves multiple purposes, including:
- Introducing the document: The cover page provides essential details such as the title, author’s name, date, and organization, giving readers an overview of the document’s contents and context.
- Establishing branding: A well-designed cover page reinforces the organization’s branding and visual identity, fostering recognition and trust among stakeholders and audiences.
- Creating a professional impression: A visually appealing and well-organized cover page conveys professionalism and attention to detail, enhancing the document’s credibility and authority.
By incorporating a cover page into your document design strategy, you can create documents that command attention, convey information effectively, and leave a lasting impression on your audience.
Basic Cover Page Insertion:
Inserting a cover page in Microsoft Word is a straightforward process that can be accomplished using built-in templates and features. Here’s how to do it:
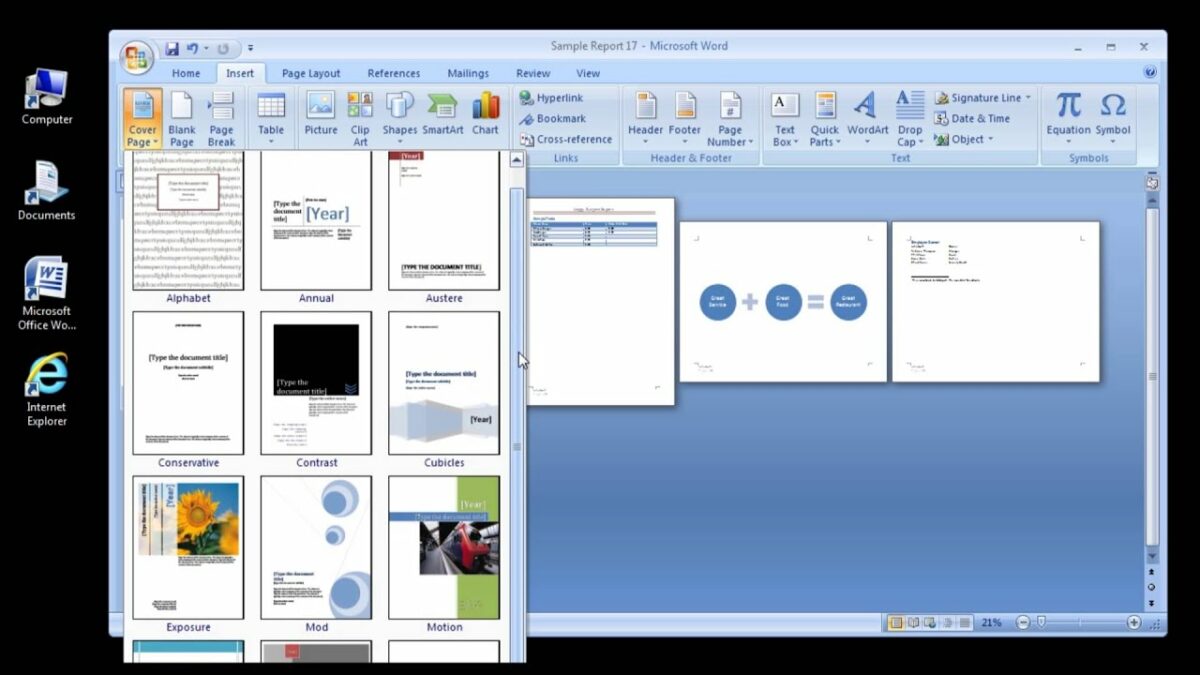
- Access Cover Page Templates:
- Open Microsoft Word and create a new document or open an existing one where you want to insert the cover page.
- Navigate to the “Insert” tab located in the top menu bar.
- In the “Pages” group, click on the “Cover Page” button to access a gallery of cover page templates.
- Select a Cover Page Template:
- Browse through the available cover page templates in the gallery and choose the one that best suits your document’s style and content.
- Click on the desired template to insert it into your document. The cover page will be added as the first page of the document, with placeholders for the title, author, and other details.
- Customize Cover Page Elements:
- After inserting the cover page template, you can customize the text, fonts, colors, and layout to align with your document’s branding and requirements.
- Click on the text placeholders to edit the title, author’s name, date, and other details. Use the formatting options in the “Home” tab to adjust the font size, style, alignment, and spacing as needed.
- Add Additional Content:
- Depending on your document’s content and purpose, you may choose to add additional elements to the cover page, such as a logo, image, or brief summary of the document.
- Insert images or logos by navigating to the “Insert” tab and selecting “Pictures” or “Online Pictures.” Use text boxes to add additional text or information.
Advanced Cover Page Customization:
While basic cover page insertion suffices for most scenarios, Microsoft Word offers advanced features and customization options to further enhance the appearance and functionality of cover pages. Here are some additional features you may explore:
- Create a Custom Cover Page:
- If the built-in templates don’t meet your requirements, you can create a custom cover page from scratch using text boxes, shapes, images, and other design elements.
- Arrange and format the elements to create a visually appealing and professional-looking cover page that reflects your document’s theme and branding.
- Save Cover Page as Template:
- Once you’ve customized a cover page to your liking, you can save it as a template for future use. Simply select the cover page, right-click, and choose “Save as Template” from the context menu. Give your template a descriptive name and save it in the appropriate location.
- Apply Page Numbering:
- If your document requires page numbering, you can add page numbers to the cover page and subsequent pages using Word’s built-in page numbering feature.
- Navigate to the “Insert” tab, click on “Page Number,” and choose the desired location and format for the page numbers.
Best Practices for Cover Page Design:
While inserting a cover page is relatively straightforward, it’s essential to adhere to best practices for cover page design to ensure effectiveness and professionalism. Here are some tips to consider:
- Keep it Simple and Clear:
- Avoid cluttering the cover page with excessive text or graphics. Keep the design clean, simple, and focused on conveying essential information to the reader.
- Maintain Branding Consistency:
- Ensure that the cover page aligns with your organization’s branding guidelines in terms of colors, fonts, logo placement, and overall aesthetic.
- Use High-Quality Images:
- If incorporating images or logos, use high-quality, high-resolution graphics to maintain visual clarity and professionalism.
- Proofread Carefully:
- Double-check all text on the cover page for accuracy, spelling, and grammar errors. A well-proofread cover page reflects attention to detail and professionalism.
Conclusion:
Inserting a cover page in Microsoft Word is a fundamental step in creating professional, visually appealing documents that make a strong first impression on your audience. By mastering the basic insertion process, exploring advanced customization options, and adhering to best practices for cover page design, you can create cover pages that effectively convey essential information, reflect your organization’s branding, and set the stage for the content that follows. Whether you’re creating reports, proposals, or presentations, a well-designed cover page enhances the document’s credibility, professionalism, and impact, leaving a positive impression on your readers. So, the next time you embark on a document creation journey in Word, remember to leverage the power of cover pages to captivate your audience’s attention and set the stage for success.