Introduction:
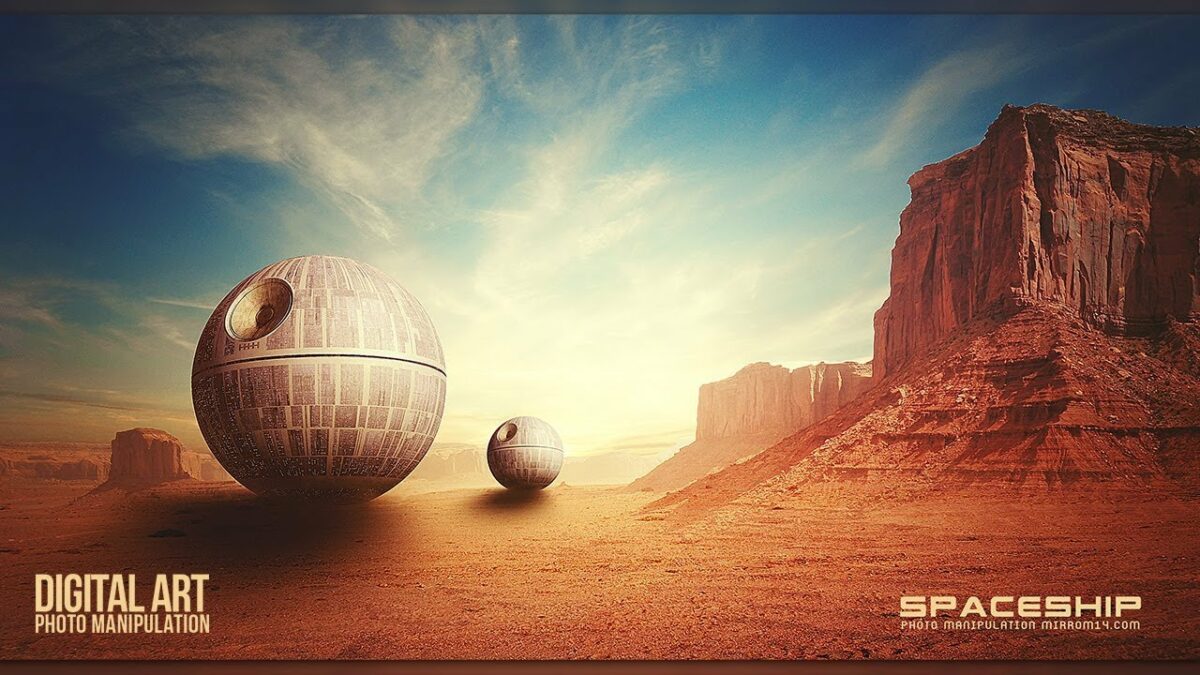
Embark on a journey into the future of digital artistry as we delve into the step-by-step process of creating a captivating sci-fi chamber photo manipulation in Adobe Photoshop. This comprehensive tutorial is designed to guide both novice and experienced Photoshop users through the intricacies of blending reality with futuristic elements. From manipulating lighting to incorporating advanced technology, this tutorial will empower you to transport your audience into a mesmerizing sci-fi realm.
I. Conceptualizing the Sci-Fi Chamber:
Before delving into the tutorial, let’s establish key concepts that define an effective sci-fi chamber photo manipulation:
A. Futuristic Elements:
- Envision advanced technology, holographic displays, and sleek architectural designs within the sci-fi chamber.
- Consider how these elements contribute to the overall futuristic atmosphere.
B. Lighting and Atmosphere:
- Visualize the lighting conditions, including sources of artificial light and ambient glow.
- Explore how the atmosphere within the chamber enhances the sci-fi narrative.
C. Narrative and Storytelling:
- Craft a narrative for your sci-fi chamber photo manipulation.
- Consider the purpose of the chamber, its inhabitants, and the story it tells within the futuristic setting.
II. Setting Up the Photoshop Document:
Prepare your canvas for the sci-fi chamber photo manipulation:
A. Canvas Dimensions:
- Open Adobe Photoshop and create a new document with dimensions suitable for your artwork.
- Consider a spacious canvas that allows for intricate details and futuristic elements.
B. Background Base:
- Establish a base for the background, setting the foundation for the sci-fi chamber.
- Use gradients, solid colors, or abstract textures to create a visually interesting backdrop.
III. Building the Sci-Fi Architecture:
Construct the architectural elements of the sci-fi chamber:
A. Sleek Surfaces and Shapes:
- Use the Pen Tool to create sleek architectural shapes for walls, floors, and ceilings.
- Experiment with smooth curves and sharp angles to convey a futuristic design language.
B. Holographic Displays:
- Integrate holographic displays using shapes or custom brushes.
- Experiment with blending modes to achieve a translucent and otherworldly appearance.
C. Advanced Technology:
- Incorporate advanced technology elements, such as touchscreens or interactive interfaces.
- Enhance realism by paying attention to details like reflections and lighting on technological surfaces.
IV. Manipulating Lighting:
Master the art of manipulating lighting within the sci-fi chamber:
A. Ambient Glow:
- Create ambient glow using soft brushes or gradients.
- Illuminate specific areas to simulate the subtle glow emitted by futuristic lighting sources.
B. Point Light Sources:
- Add point light sources, such as holographic displays or futuristic light fixtures.
- Manipulate the intensity and color of these sources to enhance the sci-fi atmosphere.
C. Lighting Effects:
- Experiment with lighting effects, such as lens flares or glow layers.
- Blend these effects with the overall composition to achieve a cinematic and immersive lighting experience.
V. Incorporating Futuristic Elements:
Bring your sci-fi chamber to life with futuristic details:
A. Floating Objects:
- Introduce floating or levitating objects within the chamber.
- Use shadows and lighting effects to create a sense of weightlessness.
B. Robotic or Cyborg Elements:
- Infuse robotic or cyborg elements into the scene.
- Blend these elements seamlessly with the architectural design to enhance the futuristic narrative.
C. Advanced Materials:
- Experiment with materials like glass, metal, or holographic surfaces.
- Pay attention to reflections, transparency, and material properties to achieve realism.
VI. Adding Inhabitants and Details:
Populate your sci-fi chamber with inhabitants and intricate details:
A. Humanoid Figures:
- Introduce humanoid figures or characters into the chamber.
- Adjust their scale and placement to create a sense of scale within the futuristic environment.
B. Interactive Elements:
- Create interactive elements such as touchscreens, holographic buttons, or control panels.
- Consider the functionality and purpose of each element within the sci-fi narrative.
C. Environmental Details:
- Add environmental details such as floating particles, steam, or atmospheric effects.
- Enhance the overall atmosphere by incorporating subtle details that contribute to the sci-fi ambiance.
VII. Blending and Adjustments:
Refine the integration of elements through blending and adjustments:
A. Layer Masks:
- Use layer masks to refine the edges of architectural elements and futuristic details.
- Achieve seamless blending between different layers for a polished appearance.
B. Color Grading:
- Apply color grading adjustments to unify the color palette.
- Enhance the sci-fi mood by experimenting with futuristic color schemes.
C. Depth of Field:
- Simulate depth of field by applying blur to elements in the foreground or background.
- Direct focus to specific areas of the chamber to create visual interest.
VIII. Real-World Applications: Sharing Your Sci-Fi Chamber:
Share your sci-fi chamber photo manipulation with the world through various platforms and formats:
A. Digital Art Communities:
- Showcase your artwork on digital art platforms such as DeviantArt or ArtStation.
- Engage with the community to receive feedback and connect with fellow digital artists.
B. Social Media Platforms:
- Share your creation on social media platforms like Instagram, Twitter, or Pinterest.
- Utilize appropriate hashtags to reach a broader audience and showcase your sci-fi chamber to enthusiasts.
C. Personal Portfolio:
- Feature your sci-fi chamber photo manipulation in your personal portfolio.
- Provide context and explanations for each design choice to enhance the viewer’s understanding.
IX. Tips for Sci-Fi Chamber Photo Manipulation Excellence:
Optimize your creative process with these tips for crafting an exceptional sci-fi chamber photo manipulation:
A. Consistent Design Language:
- Maintain a consistent design language for architectural elements and futuristic details.
- Ensure that all components contribute to the cohesive sci-fi narrative.
B. Story-driven Composition:
- Let the narrative guide your composition choices.
- Craft a story within the sci-fi chamber that captivates viewers and sparks their imagination.
C. Attention to Detail:
- Pay meticulous attention to details for a polished and professional finish.
- Zoom in to refine small elements and ensure a high level of realism.
D. Dynamic Lighting Techniques:
- Experiment with dynamic lighting techniques to create a visually striking atmosphere.
- Use lighting to convey the mood and enhance the overall sci-fi aesthetic.
X. Conclusion:
Creating a sci-fi chamber photo manipulation in Photoshop is a testament to the limitless possibilities of digital art. As you navigate the complexities of blending futuristic elements with architectural design, remember that each brushstroke and adjustment contributes to the immersive experience. May your sci-fi chamber transport viewers into a future where technology and aesthetics converge in harmony. Embrace the challenges of creating a futuristic narrative, celebrate the fusion of imagination and design, and may your sci-fi chamber stand as a beacon of creativity in the ever-evolving landscape of digital artistry. May your artwork inspire others to explore the boundaries of the possible and envision a future where the extraordinary becomes the new reality.


