Creating a time-lapse video is a fantastic way to capture processes that take place over a long period, such as sunsets, blooming flowers, bustling city streets, or even the movement of the stars. Time-lapse videos condense hours, days, or even months of footage into a short, captivating clip. PowerDirector, developed by CyberLink, offers powerful tools to help you create stunning time-lapse videos. This comprehensive guide will take you through each step of the process, from shooting the footage to editing it in PowerDirector.
Understanding Time-Lapse Videos
Time-lapse videos are created by taking a series of still images at regular intervals over a long period and then playing them back at a normal video frame rate, creating the illusion of fast motion. This technique is widely used in various fields, including filmmaking, documentary production, and even science.
Getting Started with PowerDirector
Before you begin creating your time-lapse video, ensure you have PowerDirector installed on your computer. If you haven’t installed it yet, download and install the latest version from the CyberLink website. Once installed, open PowerDirector and follow these steps:
Step 1: Create a New Project
- Launch PowerDirector: Open the software.
- Start a New Project: Click on “New Project” or select “Create New Project” from the File menu.
Step 2: Import Your Footage
To create a time-lapse video, you’ll need a series of still images or a continuous video clip. Here’s how to import them into PowerDirector:
- Media Room: Navigate to the “Media Room” tab.
- Import Media: Click on “Import Media Files” and select the images or video you want to use.
Preparing Your Footage
Shooting Time-Lapse Footage
Before diving into PowerDirector, you need to capture the right footage. Here are some tips for shooting time-lapse footage:
- Use a Stable Camera: A tripod is essential to keep your camera steady over long periods.
- Set Regular Intervals: Use a timer or intervalometer to take photos at consistent intervals. The interval duration depends on the subject’s speed and the desired final video length.
- Manual Settings: Set your camera to manual mode to maintain consistent exposure and focus.
- Sufficient Storage and Power: Ensure you have enough storage space and battery life to capture all the images needed.
Importing Still Images
If you’re using a series of still images, you’ll need to import them into PowerDirector:
- Select Multiple Images: Use the Ctrl or Shift key to select multiple images.
- Import as Sequence: Import the images as a sequence to ensure they are treated as a continuous video clip.
Importing a Continuous Video
If you’ve shot a continuous video, simply import the video file:
- Select Video File: Choose the video file you want to use.
- Import Video: Import it into the Media Room for editing.
Creating the Time-Lapse Video
Once you have your footage ready, you can start creating the time-lapse video in PowerDirector. Here’s a detailed guide:
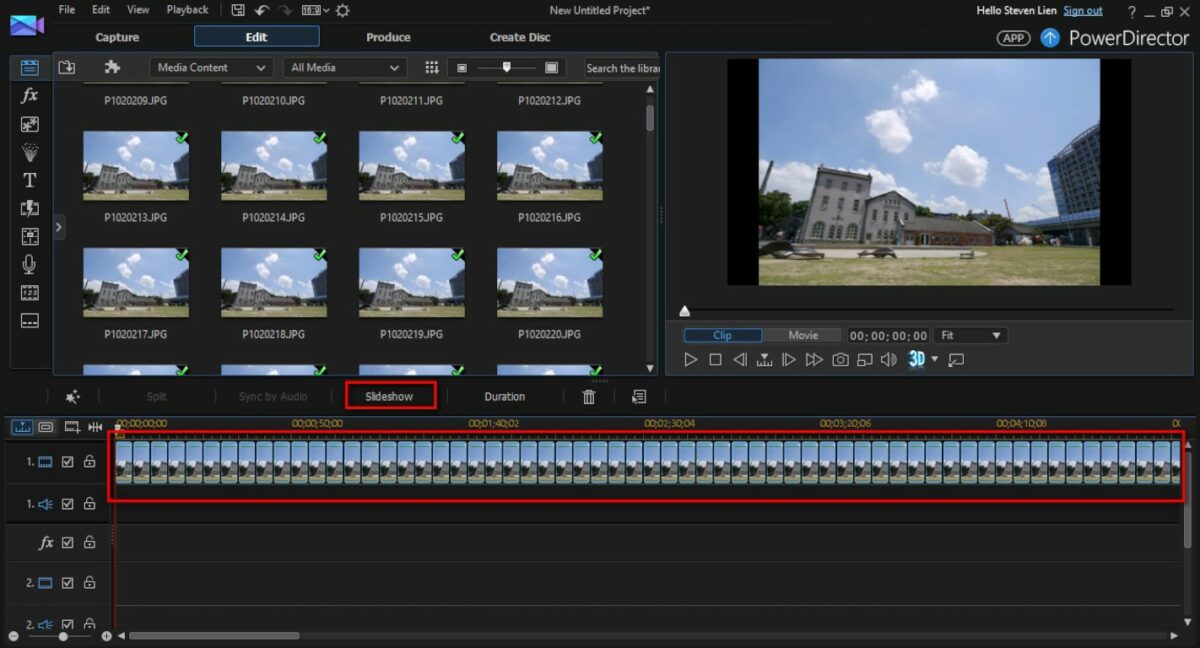
Step 1: Add Your Footage to the Timeline
- Drag and Drop: Drag your footage (either images or video) from the Media Room to the timeline.
- Arrange in Sequence: Ensure the images are in the correct sequence if you are using still images.
Step 2: Adjust the Speed
To create the time-lapse effect, you’ll need to adjust the speed of your footage. Here’s how to do it:
- Select the Clip: Click on the video clip or sequence of images in the timeline.
- Tools Menu: Click on the “Tools” button located above the timeline.
- Power Tools: Select “Power Tools” from the dropdown menu.
- Video Speed: Choose “Video Speed” from the options.
- Adjust Speed: Increase the speed by adjusting the slider or entering a specific value. Typically, time-lapse videos require a significant speed increase, such as 1000% or more.
Step 3: Preview and Fine-Tune
- Preview the Video: Use the preview window to watch your time-lapse video and see how the speed adjustment looks.
- Fine-Tune Speed: If the video is too fast or too slow, go back to the Video Speed settings and adjust accordingly.
Step 4: Stabilize the Footage
Time-lapse videos can sometimes appear shaky, especially if shot in windy conditions or with minor camera movements. PowerDirector offers a stabilization tool to smooth out your footage:
- Select the Clip: Click on the video clip in the timeline.
- Tools Menu: Click on the “Tools” button.
- Stabilizer: Select “Stabilizer” from the dropdown menu.
- Adjust Stabilization: Use the slider to adjust the level of stabilization. Preview the video to ensure the stabilization effect is appropriate.
Enhancing Your Time-Lapse Video
PowerDirector offers various tools to enhance your time-lapse video further. Here are some techniques to consider:
Adding Music
Music can significantly enhance the impact of your time-lapse video. Here’s how to add a soundtrack:
- Import Music: Import your chosen music file into the Media Room.
- Add to Timeline: Drag and drop the music file to the audio track in the timeline.
- Adjust Length: Trim or extend the music to match the length of your time-lapse video.
Applying Color Correction
Color correction can make your time-lapse video more visually appealing. Here’s how to apply color correction in PowerDirector:
- Select the Clip: Click on the video clip in the timeline.
- Fix/Enhance: Click on the “Fix/Enhance” button above the timeline.
- Color Adjustment: Use the color adjustment tools to tweak the brightness, contrast, saturation, and other settings.
- Preview: Use the preview window to see the effects of your adjustments in real-time.
Adding Titles and Text
Adding titles or text can provide context or information about your time-lapse video. Here’s how to add them in PowerDirector:
- Title Room: Navigate to the “Title Room” tab.
- Select a Template: Choose a title template that suits your video.
- Add to Timeline: Drag and drop the title to the timeline.
- Customize Text: Click on the title in the timeline and use the text editor to customize the text, font, size, and color.
Applying Transitions
Transitions can smooth out the flow between different sections of your time-lapse video. Here’s how to add them:
- Transition Room: Navigate to the “Transition Room” tab.
- Select a Transition: Choose a transition effect that fits your video style.
- Add to Timeline: Drag and drop the transition between two clips in the timeline.
- Adjust Duration: Click on the transition in the timeline and adjust its duration as needed.
Exporting Your Time-Lapse Video
Once you’re satisfied with your time-lapse video, it’s time to export it. Here’s how to do it:
Step 1: Go to the Produce Tab
- Produce Tab: Click on the “Produce” tab at the top of the screen.
- Select Format: Choose the format you want to export your video in (e.g., MP4, AVI, MKV).
Step 2: Select Profile
- Choose Profile: Select a preset profile based on your video’s resolution and quality. You can also customize the profile by clicking on “Profile Analyzer.”
Step 3: Export Settings
- Set Output Folder: Choose a destination folder for your exported video.
- File Name: Enter a name for your video file.
- Start Production: Click the “Start” button to begin exporting. PowerDirector will process your video and save it in the specified location.
Tips and Best Practices for Creating Time-Lapse Videos
- Plan Your Shoot: Ensure you have a clear plan and know what you want to capture. Consider the duration, intervals, and final video length.
- Stable Setup: Use a sturdy tripod and secure your camera to avoid any movement during the shoot.
- Consistent Settings: Use manual settings for exposure, white balance, and focus to ensure consistency across all frames.
- Test Shots: Take a few test shots to check the composition and settings before starting the time-lapse sequence.
- Battery and Storage: Ensure your camera has sufficient battery life and storage space to capture the entire sequence.
Troubleshooting Common Issues
Issue 1: Flickering in Time-Lapse Video
- Solution: Use manual exposure settings to avoid changes in brightness between frames. In PowerDirector, you can also apply post-production stabilization and flicker removal effects.
Issue 2: Shaky Footage
- Solution: Use a sturdy tripod and avoid touching the camera during the shoot. In PowerDirector, use the stabilization tool to smooth out any minor shakes.
Issue 3: Inconsistent Colors
- Solution: Use manual white balance settings to maintain consistent colors. In PowerDirector, apply color correction to adjust and match the colors across the entire video.
Issue 4: Video Too Short or Long
- Solution: Adjust the interval between shots or the playback speed in PowerDirector to achieve the desired video length.
Conclusion
Creating a time-lapse video in PowerDirector is a rewarding process that allows you to capture and present the passage of time in a captivating way. By following this comprehensive guide, you can master the techniques needed to shoot, edit, and enhance your time-lapse footage. Whether you’re a beginner or an experienced filmmaker, PowerDirector provides the tools and flexibility to create stunning time-lapse videos that will impress your audience. Happy filming and editing!