Introduction to Task Scheduler
Task Scheduler is a built-in utility in Windows that enables users to schedule tasks to run automatically at predefined times or in response to specific events. It allows you to automate repetitive tasks, manage system maintenance, and ensure applications run at optimal times without manual intervention. Understanding how to use Task Scheduler effectively can streamline your workflow and improve productivity by automating routine operations.
Getting Started with Task Scheduler
- Accessing Task Scheduler:
- Click on the Start button (Windows icon) in the bottom-left corner of the screen.
- Type “Task Scheduler” in the search box and select “Task Scheduler” from the search results to open the Task Scheduler application.
- Understanding Task Scheduler Interface:
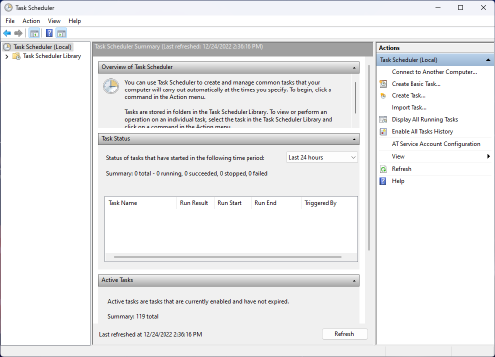
- The Task Scheduler interface is divided into several sections, including the Task Scheduler Library, which lists all scheduled tasks, and the Actions pane, where you can create, import, or delete tasks.
- Navigating Task Scheduler Library:
- In the Task Scheduler Library, tasks are organized into folders based on their origin or category. You can view existing tasks, their status, triggers, and actions configured for each task.
Creating a Basic Task
- Launch Create Basic Task Wizard:
- In the Actions pane of Task Scheduler, click on “Create Basic Task” to open the Create Basic Task Wizard.
- Name and Description:
- Enter a name and description for the task to help identify its purpose and function.
- Trigger Configuration:
- Select a trigger to determine when the task should start, such as “Daily,” “Weekly,” “Monthly,” or “At startup.” Follow the wizard prompts to configure additional trigger settings, such as specific times or intervals.
- Action Configuration:
- Choose an action that the task will perform when triggered, such as starting a program, sending an email, or displaying a message.
- Complete Task Creation:
- Review the summary of the task settings. Click “Finish” to create the task. The task will now appear in the Task Scheduler Library under the specified folder.
Advanced Task Configuration
- Using Create Task Wizard:
- For more advanced configurations, use the “Create Task” option in the Actions pane of Task Scheduler.
- General Settings:
- In the General tab, specify additional settings for the task, such as running with highest privileges, configuring compatibility options, and selecting the operating system version.
- Triggers Tab:
- Configure multiple triggers for the task to start based on specific events, such as system startup, user logon, or a specific event log entry.
- Actions Tab:
- Define one or more actions that the task will perform when triggered, such as running a script, launching an application, or sending an email notification.
- Conditions Tab:
- Specify conditions that must be met for the task to run, such as idle time, network availability, or power status.
- Settings Tab:
- Customize additional settings for the task, including how the task handles missed runs, restarts, or stops after a certain period.
Managing and Monitoring Scheduled Tasks
- View Task Properties:
- Double-click on a scheduled task in the Task Scheduler Library to view its properties, including triggers, actions, conditions, and settings configured for the task.
- Run or End Task Manually:
- Right-click on a task and select “Run” to execute the task immediately. You can also select “End” to terminate a running task if necessary.
- Disable or Delete Tasks:
- Right-click on a task and select “Disable” to temporarily stop the task from running. To delete a task, select “Delete” and confirm the action.
- Monitor Task History:
- Review the history tab of a task’s properties to track the execution status, success, or errors encountered during previous runs of the task.
Best Practices for Using Task Scheduler
- Regular Maintenance Tasks:
- Schedule regular maintenance tasks, such as disk cleanup, system backups, or antivirus scans, to run automatically at off-peak hours to minimize disruption.
- Testing and Validation:
- Test newly created tasks in Task Scheduler to ensure they perform as expected before deploying them in a production environment.
- Review Task Status and Logs:
- Monitor task status and review task logs regularly to identify any issues or failures promptly and take corrective actions as needed.
- Security Considerations:
- Ensure that tasks running with elevated privileges or accessing sensitive data are configured securely and adhere to organizational security policies.
Conclusion
Task Scheduler in Windows 10 offers a versatile platform for automating tasks and improving efficiency by scheduling routine operations to run automatically. By following the step-by-step instructions and best practices provided in this guide, you can effectively create, manage, and monitor scheduled tasks in Task Scheduler to streamline your workflow, enhance productivity, and maintain system reliability.
Take advantage of Task Scheduler’s capabilities to automate system maintenance, launch applications, perform backups, and execute scripts at specified times or intervals, ensuring your computer operates efficiently with minimal manual intervention.