Introduction:
CorelDRAW, a leading vector graphics editor, empowers designers to create intricate and visually compelling artworks. Among its versatile features, the ability to vary the width of outlines stands out as a powerful tool for adding depth, emphasis, and dynamic flair to designs. In this extensive guide, we will explore the intricacies of varying outline width in CorelDRAW, delving into various techniques, customization options, and advanced tips. Whether you’re crafting detailed illustrations, designing captivating typography, or exploring dynamic compositions, mastering the art of varying outline width opens up new dimensions within the dynamic world of CorelDRAW.
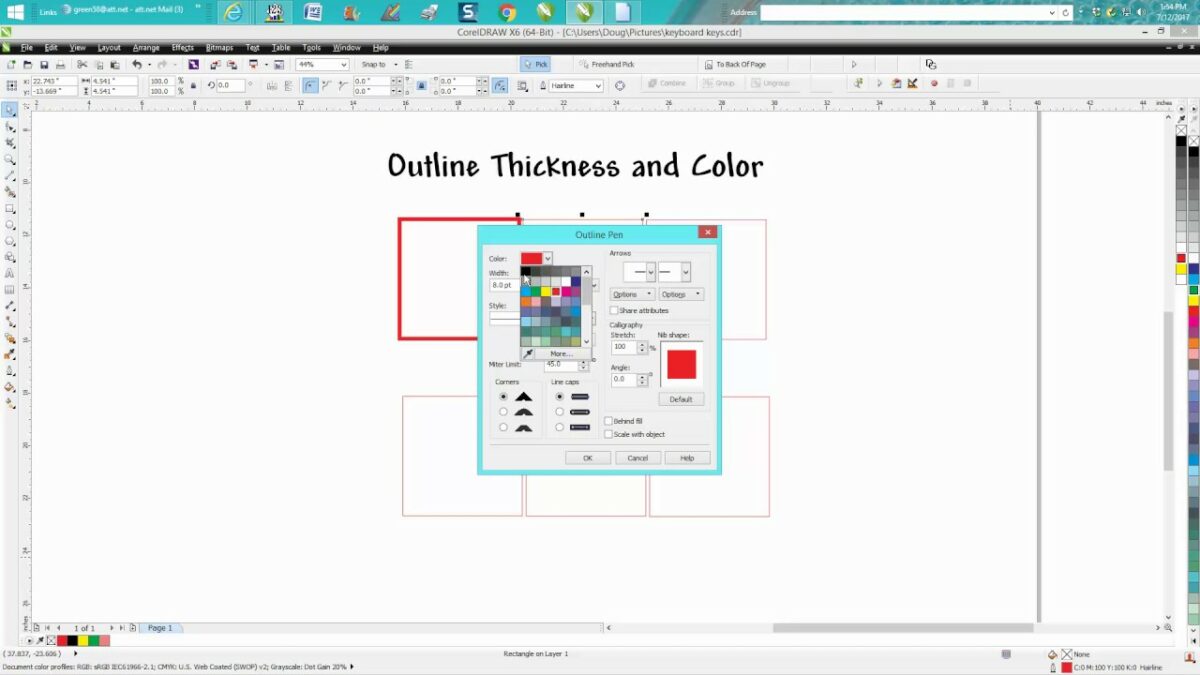
Understanding Outline Width in CorelDRAW:
Outline width refers to the thickness of the line that defines the outer edge of an object in CorelDRAW. Varying the outline width allows designers to create visual hierarchy, emphasize specific elements, and add a sense of depth to their creations. CorelDRAW provides a robust set of tools and options to manipulate outline width, catering to both basic needs and advanced customization.
Basic Techniques for Varying Outline Width:
- Selecting the Object: Begin by selecting the object for which you want to vary the outline width. Use the Pick tool to click on the desired object, ensuring it is highlighted.
- Accessing Outline Width Options: Navigate to the ‘Properties’ docker, usually located on the right side of the interface. Within the ‘Properties’ docker, locate the ‘Outline’ section, where you can customize the outline width.
- Choosing Line Thickness: Adjust the outline width by selecting a predefined line thickness from the ‘Outline’ section. Alternatively, input a custom thickness value to achieve the desired visual impact.
- Applying Variable Width Profiles: CorelDRAW offers Variable Width Profiles that enable designers to create dynamic and varied outline widths along the length of a path. Access the ‘Variable Width’ tool from the toolbox, select the path, and experiment with different profiles for unique effects.
Advanced Techniques for Fine-Tuning Outline Width:
- Customizing Outline Width Profiles: Delve into the intricacies of the ‘Outline’ docker to customize outline width profiles. Access the ‘Outline’ section, click on the ‘Edit Outline’ button, and explore the ‘Width’ graph for precise control over varying outline widths along a path.
- Utilizing Artistic Media: Artistic media in CorelDRAW allows designers to apply predefined or custom shapes to paths, influencing the outline width dynamically. Access the ‘Artistic Media’ tool, choose a media type, and experiment with how it affects the outline width of your selected path.
- Applying Tapered Lines: For tapered outline effects, explore the ‘Tapered Line’ tool. This tool allows designers to create lines with varying start and end widths, adding a dynamic and tapered look to the outlines of objects.
Customization Options for Precision:
- Fine-Tuning with the Shape Tool: After varying the outline width, use the Shape tool to fine-tune individual nodes and segments. Click and drag nodes or segments to achieve pixel-perfect adjustments, enhancing precision in your design.
- Layer Management for Organization: Employ a strategic approach to layer management for efficient organization. Group related objects on separate layers, allowing for easy adjustment of outline widths across multiple elements.
- Saving Style Presets: To streamline your workflow, save outline style presets for commonly used widths. This ensures consistency in your design and allows for quick application of predefined styles.
Troubleshooting and Optimization Strategies:
- Global vs. Local Outline Widths: Distinguish between global and local changes. Global changes, applied through the ‘Properties’ docker, affect all instances of the selected object in the document. Local changes, made through the ‘Outline’ section, apply only to the selected object.
- Undo and Redo: If the result doesn’t align with your vision, utilize the ‘Undo’ command (Ctrl + Z) to revert the action. Conversely, use ‘Redo’ (Ctrl + Y) to reapply changes that were undone.
- Saving Custom Width Profiles: To enhance efficiency, save custom width profiles for Variable Width paths. In the ‘Outline’ docker, click on the ‘Manage Width Profiles’ button, and choose ‘Save As’ to create a library of custom profiles.
Conclusion:
Varying outline width in CorelDRAW is a fundamental skill that empowers designers to add depth, emphasis, and dynamic flair to their digital creations. By exploring the various techniques, customization options, and advanced tips presented in this comprehensive guide, you’ll gain the confidence to manipulate outline widths with ease and finesse. Whether you’re crafting detailed illustrations, perfecting typography, or designing dynamic compositions, CorelDRAW provides a versatile platform to unleash your creativity within the dynamic world of vector graphics. Embrace the comprehensive tools that allow you to vary outline width, and let your designs flourish on the digital canvas with precision and visual impact.