Introduction
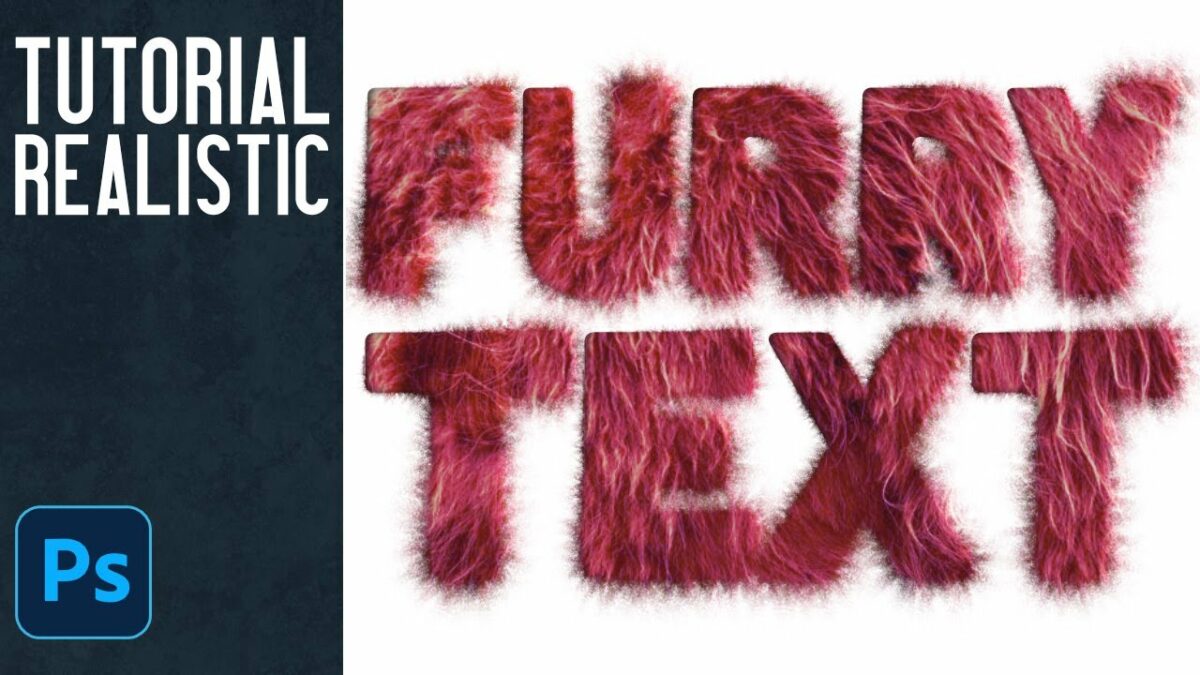
The realm of digital design in Adobe Photoshop is a playground for endless creativity, and achieving realistic textures, such as hair or fur, is a captivating endeavor. In this comprehensive tutorial, we will unravel a fast and easy way to create a stunning hair or fur text effect in Photoshop. This step-by-step guide will empower you to add depth, dimension, and a touch of natural elegance to your text, turning it into a work of art that captures the essence of realistic hair or fur.
Step 1: Setting the Stage
- Create a New Document: Open Adobe Photoshop and create a new document with dimensions suitable for your project. Consider a high-resolution canvas to ensure the details of the hair or fur effect shine through.
- Choose Your Text: Select the text you want to transform into a hair or fur effect. Choose a bold and easily readable font, as intricate details will be added in subsequent steps.
Step 2: Apply Base Layer Styles
- Set the Text Color: Choose a base color for your text that aligns with the desired hair or fur tone. Darker colors often work well for rich, deep textures, while lighter shades create a softer appearance.
- Apply Inner and Outer Shadows: Access the Layer Styles panel and apply Inner and Outer Shadows to the text layer. Adjust the shadow settings to create a subtle sense of depth and definition within the text.
Step 3: Adding Texture
- Download a Hair or Fur Texture: Find a high-quality hair or fur texture image online or use one from your personal collection. Ensure it is seamless and has a transparent background for easy integration.
- Paste Texture onto Text: Paste the hair or fur texture onto your Photoshop document. Resize and position it over the text, covering the entire area. Change the layer blending mode to “Overlay” or “Multiply” for a natural integration.
Step 4: Refining Texture Placement
- Masking Unwanted Texture Areas: Use a layer mask to refine the texture placement. Mask out any unwanted areas, such as excess texture extending beyond the text boundaries. This step ensures a seamless integration of the hair or fur effect.
- Adjust Opacity and Blending: Fine-tune the overall appearance by adjusting the opacity of the texture layer. Experiment with different blending modes to find the one that best enhances the realism of the hair or fur effect.
Step 5: Introducing Highlights and Shadows
- Create Highlights: Duplicate the textured text layer and apply a lighter color to the duplicated layer. Adjust the opacity to create highlights that mimic the way light interacts with hair or fur. This step adds dimension and depth.
- Add Shadows: Similarly, duplicate the textured text layer again and apply a darker color. Adjust the opacity to create subtle shadows, enhancing the realism of the hair or fur effect by simulating the interplay of light and shadow.
Step 6: Fine-Tuning Details
- Refine Individual Strands: Zoom in and use a soft eraser or mask to refine individual strands of hair or fur. This meticulous step adds intricacy and authenticity to the overall effect.
- Experiment with Color Variations: Play with color variations within the textured layers. Introduce subtle shifts in hue to mimic the natural variations found in real hair or fur, adding a touch of realism to your design.
Step 7: Final Touches and Enhancements
- Add a Background: Consider adding a complementary background to enhance the overall aesthetic. A gradient, textured backdrop, or a subtle pattern can elevate the realism of your hair or fur text effect.
- Apply Filters for Texture: Experiment with Photoshop filters, such as Noise or Grain, to add additional texture and depth to your design. This step can contribute to a more tactile and organic appearance.
Step 8: Save and Share Your Masterpiece
- Save Your Photoshop Document: Save your project in a layered format to retain editability. Additionally, save a flattened version in a format suitable for your intended use, such as PNG or JPEG.
- Showcase Your Creation: Share your hair or fur text effect masterpiece on social media, design platforms, or in your portfolio. Consider creating a before-and-after presentation to showcase the transformation and your creative process.
Step 9: Seek Feedback and Iterate
- Gather Feedback: Share your creation with peers, mentors, or online design communities to receive constructive feedback. Consider the insights of others to refine and improve your design skills.
- Iterate and Experiment: Use the feedback as inspiration for experimentation. Iterative design is a powerful approach; revisit your project, make adjustments, and explore variations to continue refining your skills.
Step 10: Celebrate Your Artistic Achievement
Creating a realistic hair or fur text effect in Photoshop is a testament to your artistic prowess. Through the interplay of textures, highlights, and shadows, you’ve transformed ordinary text into a captivating work of art. As you celebrate your artistic achievement, remember that each Photoshop project is a canvas for exploration and innovation. Embrace the magic of creating realistic textures, let your creativity soar, and continue pushing the boundaries of visual storytelling in the digital realm.
