Introduction:
Adobe Photoshop stands as a digital canvas where creativity knows no bounds. Among the myriad of techniques and effects, the Selective Coloring Effect stands out as a powerful tool for conveying emotion, highlighting focal points, and crafting visually striking compositions. This extensive guide delves into the intricacies of the Selective Coloring Effect in Photoshop, providing a comprehensive exploration of its applications, step-by-step implementation, creative considerations, and tips for achieving stunning results. Whether you’re a novice navigating the realm of digital art or a seasoned professional seeking to elevate your creative prowess, this guide promises to unravel the secrets behind this captivating visual technique.
I. Understanding the Selective Coloring Effect:
A. Definition:
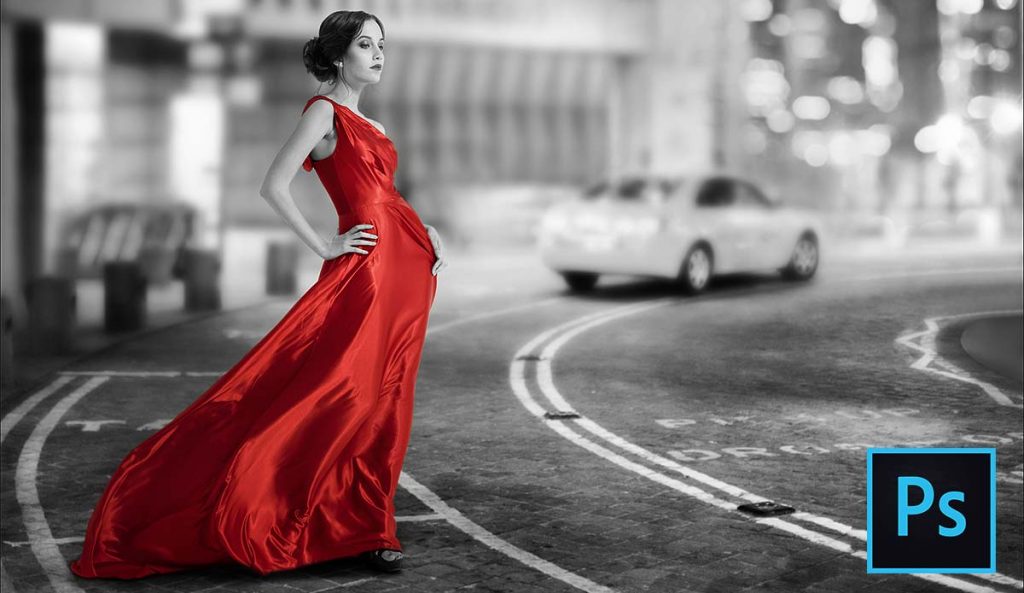
- The Selective Coloring Effect is a technique where a photograph is converted to grayscale, and specific elements are reintroduced with their original colors.
- This effect creates a powerful visual impact by drawing attention to selected portions while desaturating the rest.
B. Artistic Intent:
- Selective coloring allows artists to emphasize key elements, evoke emotions, or guide the viewer’s focus within an image.
- It serves as a versatile tool for storytelling, emphasizing mood, or conveying a specific theme.
II. Preparing the Canvas: Initial Steps in Photoshop
A. Importing the Image:
- Open Adobe Photoshop and import the image you want to apply the Selective Coloring Effect to.
- Ensure the image has sufficient resolution for detailed editing.
B. Duplicate the Background Layer:
- Create a duplicate layer of the background to preserve the original image.
- This duplication provides a non-destructive editing approach.
III. Converting to Grayscale:
A. Desaturation Techniques:
- Navigate to “Image” > “Adjustments” > “Desaturate” to convert the image to grayscale.
- Alternatively, use adjustment layers like “Black & White” or “Hue/Saturation” to desaturate.
B. Layer Masking:
- Apply a layer mask to the duplicated layer.
- Paint on the mask to reveal the grayscale image selectively.
IV. Selective Coloring Techniques:
A. Color Splash Effect:
- Use the Brush tool with a soft edge to paint over the areas where color should be preserved.
- Adjust brush opacity for subtle transitions.
B. Layer Blend Modes:
- Experiment with layer blend modes (e.g., Color, Soft Light) to refine the color blending.
- Blend modes enhance the interaction between colored and grayscale elements.
V. Refining the Effect:
A. Fine-Tuning Colors:
- Utilize adjustment layers like “Hue/Saturation” to fine-tune the color intensity.
- Adjust sliders for specific color ranges to achieve the desired effect.
B. Gradient Maps:
- Apply gradient maps for nuanced color variations.
- This enhances the overall tonality of the image, contributing to the visual appeal.
VI. Creative Considerations:
A. Focal Points and Composition:
- Identify key focal points or subjects to retain in color.
- Consider composition rules to guide the viewer’s eye within the image.
B. Emotional Impact:
- Use color psychology to evoke specific emotions.
- Warm tones may convey warmth and intimacy, while cool tones evoke calmness.
VII. Advanced Techniques and Tips:
A. Masking Tools:
- Utilize advanced masking tools like the Pen Tool for precise selections.
- This ensures accuracy in retaining color in intricate areas.
B. Adjustment Layers for Selective Effects:
- Apply additional adjustment layers for specific color enhancements.
- This allows for targeted adjustments without affecting the entire image.
VIII. Troubleshooting Common Challenges:
A. Avoiding Overemphasis:
- Be mindful of the balance between color and grayscale elements.
- Overemphasis on color may diminish the impact of the Selective Coloring Effect.
B. Maintaining Realism:
- Ensure that selectively colored elements appear realistic in their environment.
- Pay attention to lighting and shadows to enhance the overall believability.
IX. Finalizing and Exporting:
A. Merge Layers and Save:
- Once satisfied with the Selective Coloring Effect, merge visible layers.
- Save the final image in the desired format.
X. Conclusion:
The Selective Coloring Effect in Photoshop is a powerful tool that transcends traditional monochrome and color distinctions, offering a dynamic approach to visual storytelling. This comprehensive guide has navigated through the intricacies of this technique, from the initial steps of preparation to advanced tips for achieving captivating results. Embrace the artistry of Selective Coloring, experiment with various images, and elevate your creative expressions by harnessing the transformative potential of this impactful Photoshop effect. Whether conveying emotions, emphasizing focal points, or crafting thematic narratives, the Selective Coloring Effect empowers artists to infuse their images with depth and resonance, making each composition a visual masterpiece.