Introduction:
Audio is an essential component of video production, contributing to the overall mood, atmosphere, and storytelling of a project. In DaVinci Resolve, the process of adding audio to your project is straightforward, allowing users to import, edit, mix, and synchronize audio tracks with ease. In this extensive guide, we’ll explore the art of adding audio to your project in DaVinci Resolve, providing you with the knowledge and techniques to enhance your videos with professional-quality sound.
Understanding Audio in DaVinci Resolve:
Before diving into the process of adding audio to your project, it’s essential to understand how audio works within the DaVinci Resolve workflow. DaVinci Resolve supports various audio formats, including WAV, AIFF, MP3, and more, allowing users to import audio files directly into their projects. Once imported, audio tracks appear in the timeline alongside video clips, where they can be edited, trimmed, adjusted, and synchronized to create a cohesive audio-visual experience. DaVinci Resolve also offers powerful audio editing and mixing tools, including volume adjustments, fades, EQ, compression, and more, enabling users to fine-tune the audio to perfection.
Adding Audio to Your Project:
Let’s explore the step-by-step process of adding audio to your project in DaVinci Resolve:
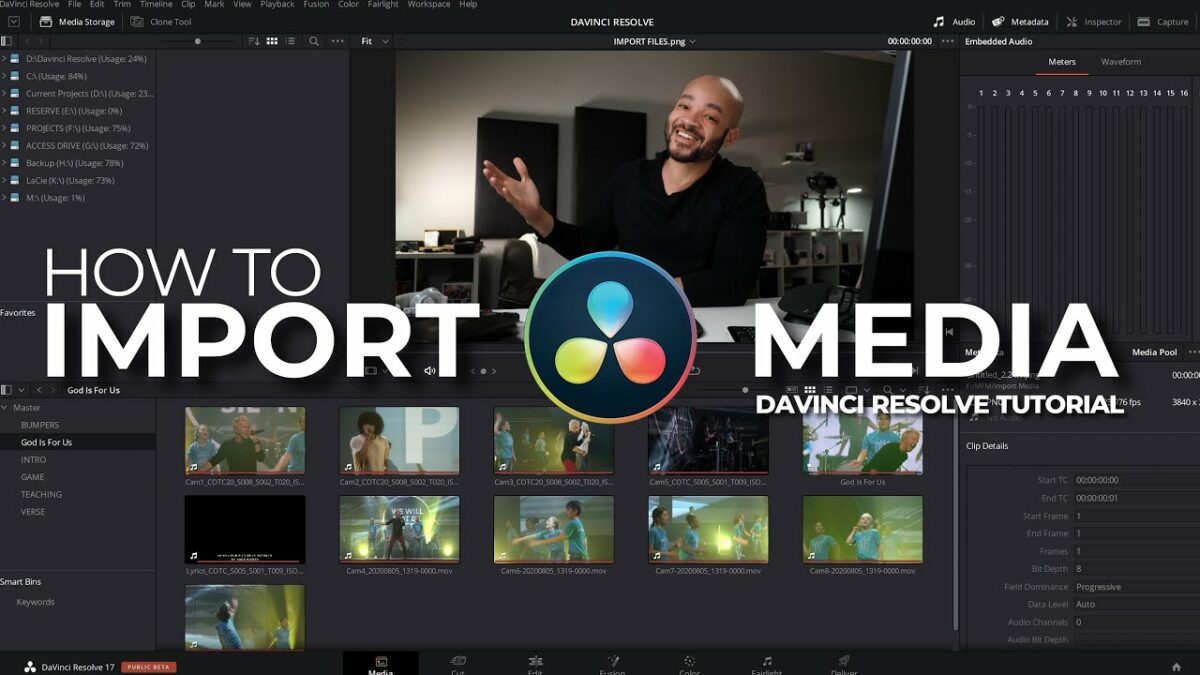
- Import Audio Files:
- Launch DaVinci Resolve and open your project. Navigate to the Media Pool panel and click on the “Import Media” button to import audio files into your project. Select the desired audio files from your computer and click “Open” to import them into the Media Pool. Alternatively, you can drag and drop audio files directly into the Media Pool from your file explorer.
- Arrange Audio Tracks:
- Once imported, audio files appear in the Media Pool as individual clips. Drag and drop the audio clips from the Media Pool into the timeline to create audio tracks. Arrange the audio tracks in the timeline according to the desired sequence and order, aligning them with corresponding video clips or segments.
- Edit Audio Clips:
- Edit the audio clips in the timeline to trim, split, and adjust their timing as needed. Use the blade tool to split audio clips at specific points, and the selection tool to trim the clips by dragging their edges. Fine-tune the timing and duration of audio clips to synchronize them with video clips and create smooth transitions between audio segments.
- Adjust Audio Levels:
- Adjust the volume levels of individual audio clips to achieve the desired balance and clarity. Click on the audio clips in the timeline to select them, then use the volume controls in the inspector panel to adjust their volume levels. Drag the volume slider up or down to increase or decrease the volume of the selected audio clip.
- Apply Audio Effects:
- Apply audio effects and enhancements to individual audio clips to improve their quality and enhance their impact. Click on the audio clips in the timeline to select them, then navigate to the Fairlight page to access the audio effects library. Choose from a wide range of audio effects, including EQ, compression, reverb, delay, and more, and apply them to the selected audio clips to achieve the desired sound.
- Create Audio Crossfades:
- Create smooth transitions between audio clips by applying crossfades at the beginning and end of each clip. Click on the audio clips in the timeline to select them, then navigate to the inspector panel to access the crossfade controls. Adjust the duration and shape of the crossfades to create seamless transitions between audio segments and eliminate abrupt changes in volume or tone.
- Synchronize Audio with Video:
- Synchronize the audio tracks with corresponding video clips or segments to ensure perfect alignment between audio and video elements. Use the timeline ruler and waveform display to visually align audio waveforms with video waveforms, or manually adjust the timing of audio clips to match the timing of video clips. Fine-tune the synchronization of audio and video elements to create a cohesive audio-visual experience.
- Preview and Playback:
- Preview your project in the viewer window to assess the overall audio-visual quality and coherence. Playback the timeline to hear how the audio tracks blend with the video clips and synchronize with on-screen action. Use the playback controls to scrub through the timeline and review your project frame by frame.
- Export Your Project:
- Once you’re satisfied with the audio editing and synchronization, export your project to create the final video with audio included. Navigate to the Deliver page, configure the export settings, and click “Add to Render Queue” to queue the project for rendering. Then, click “Start Render” to export the video with audio to your desired format and specifications.
Best Practices for Adding Audio:
To achieve professional-quality audio in your project in DaVinci Resolve, consider the following best practices:
- Use High-Quality Audio Files:
- Use high-quality audio files with a sample rate of 48kHz or higher to ensure optimal sound quality and clarity. Avoid using compressed audio formats such as MP3 for critical audio elements, as they may introduce artifacts and degrade sound quality.
- Organize Audio Tracks:
- Organize your audio tracks in the timeline by grouping related elements together and labeling them accordingly. Use color coding, track names, and markers to identify different types of audio tracks, such as dialogue, music, sound effects, and ambience, making it easier to navigate and edit your project.
- Mix Audio Levels Carefully:
- Pay attention to the relative levels of audio tracks and ensure that they blend harmoniously with each other and with the accompanying video. Avoid clipping and distortion by keeping audio levels within the recommended range (-12dB to -6dB), and use volume automation and keyframes to adjust levels dynamically throughout the project.
- Apply Subtle Audio Effects:
- Apply audio effects and enhancements sparingly and with subtlety to avoid overwhelming the listener and detracting from the overall viewing experience. Use EQ to balance the frequency response of audio tracks, compression to control dynamics, reverb to add depth and spaciousness, and other effects judiciously to enhance the audio without overpowering it.
- Monitor Audio Levels:
- Monitor audio levels throughout the editing process to ensure consistency and compliance with industry standards. Use the audio meters in the Fairlight page to monitor peak and RMS levels of audio tracks in real-time, and make adjustments as needed to maintain optimal levels and prevent clipping and distortion.
- Test on Different Playback Systems:
- Test your project on different playback systems, such as speakers, headphones, and monitors, to ensure that the audio sounds balanced and cohesive across various devices and environments. Make adjustments to the audio mix as needed to optimize the listening experience for different playback scenarios.
Conclusion:
Adding audio to your project in DaVinci Resolve is a straightforward process that allows you to enhance your videos with professional-quality sound. By importing, editing, mixing, and synchronizing audio tracks within the DaVinci Resolve workflow, you can create immersive and engaging audio-visual experiences that captivate and entertain your audience. Whether you’re producing narrative films, documentaries, commercials, or any other type of video content, mastering the art of adding audio in DaVinci Resolve empowers you to elevate the quality and impact of your projects with rich and immersive soundscapes. Experiment with different audio techniques, explore creative possibilities, and let your creativity shine as you bring your videos to life with professional-quality audio in DaVinci Resolve.