Introduction:
Packaging plays a critical role in product presentation, protection, and marketing. Designing packaging that meets aesthetic, functional, and manufacturing requirements requires specialized software tools. ArtiosCAD is a leading software solution developed by Esko for structural design and prototyping of packaging and displays. In this comprehensive guide, we will delve into the intricacies of designing packaging in ArtiosCAD, covering everything from basic concepts to advanced techniques and optimization strategies.
Section 1: Understanding Packaging Design with ArtiosCAD
1.1 Overview of Packaging Design:
Packaging design involves creating structural layouts and prototypes for boxes, cartons, displays, and other packaging solutions. Designers must consider factors such as product dimensions, material properties, transportation requirements, and branding guidelines to develop packaging that meets consumer expectations and business objectives.
1.2 Importance of Packaging Design:
Effective packaging design can enhance product visibility, protect goods from damage during shipping and handling, facilitate storage and distribution, and reinforce brand identity and messaging. Well-designed packaging can influence consumer perception, purchasing decisions, and brand loyalty, ultimately driving sales and revenue growth.
1.3 Role of ArtiosCAD:
ArtiosCAD is a specialized software tool for packaging design and structural engineering. It offers a range of features and capabilities for creating 2D and 3D packaging designs, generating die lines and layouts, simulating folding and assembly processes, and generating production-ready files for manufacturing. ArtiosCAD streamlines the packaging design process, enabling designers to iterate quickly, optimize designs, and deliver high-quality packaging solutions.
Section 2: Introduction to ArtiosCAD Software
2.1 Overview of ArtiosCAD:
ArtiosCAD is a comprehensive packaging design software developed by Esko for structural design, prototyping, and manufacturing of packaging and displays. It offers a user-friendly interface, extensive libraries of packaging templates and components, and powerful tools for creating, editing, and analyzing packaging designs.
2.2 ArtiosCAD Features and Capabilities:
ArtiosCAD provides a wide range of features and capabilities for packaging design, including:
Structural design tools: ArtiosCAD offers tools for creating 2D and 3D packaging designs, including box layouts, dielines, crease lines, and cut lines.
Parametric modeling: ArtiosCAD supports parametric modeling techniques for creating customizable packaging templates and design variants based on user-defined parameters.
Virtual prototyping: ArtiosCAD enables designers to simulate folding, bending, and assembly processes to visualize packaging designs in 3D and identify potential issues before production.
Integration with CAD/CAM systems: ArtiosCAD integrates seamlessly with CAD/CAM systems and digital printing workflows, enabling designers to generate production-ready files for manufacturing and printing.
2.3 Benefits of Using ArtiosCAD:
ArtiosCAD offers several benefits for packaging designers and manufacturers, including:
Speed and efficiency: ArtiosCAD streamlines the packaging design process with intuitive tools, automation features, and parametric modeling capabilities, reducing design time and iteration cycles.
Design accuracy: ArtiosCAD provides precise control over structural dimensions, material thicknesses, and assembly tolerances, ensuring accurate representation of packaging designs and compatibility with manufacturing processes.
Collaboration and communication: ArtiosCAD facilitates collaboration among design teams, suppliers, and customers through 3D visualization, virtual prototyping, and file sharing capabilities, enabling stakeholders to review designs, provide feedback, and make informed decisions.
Section 3: Designing Packaging in ArtiosCAD
3.1 Starting a New Project:
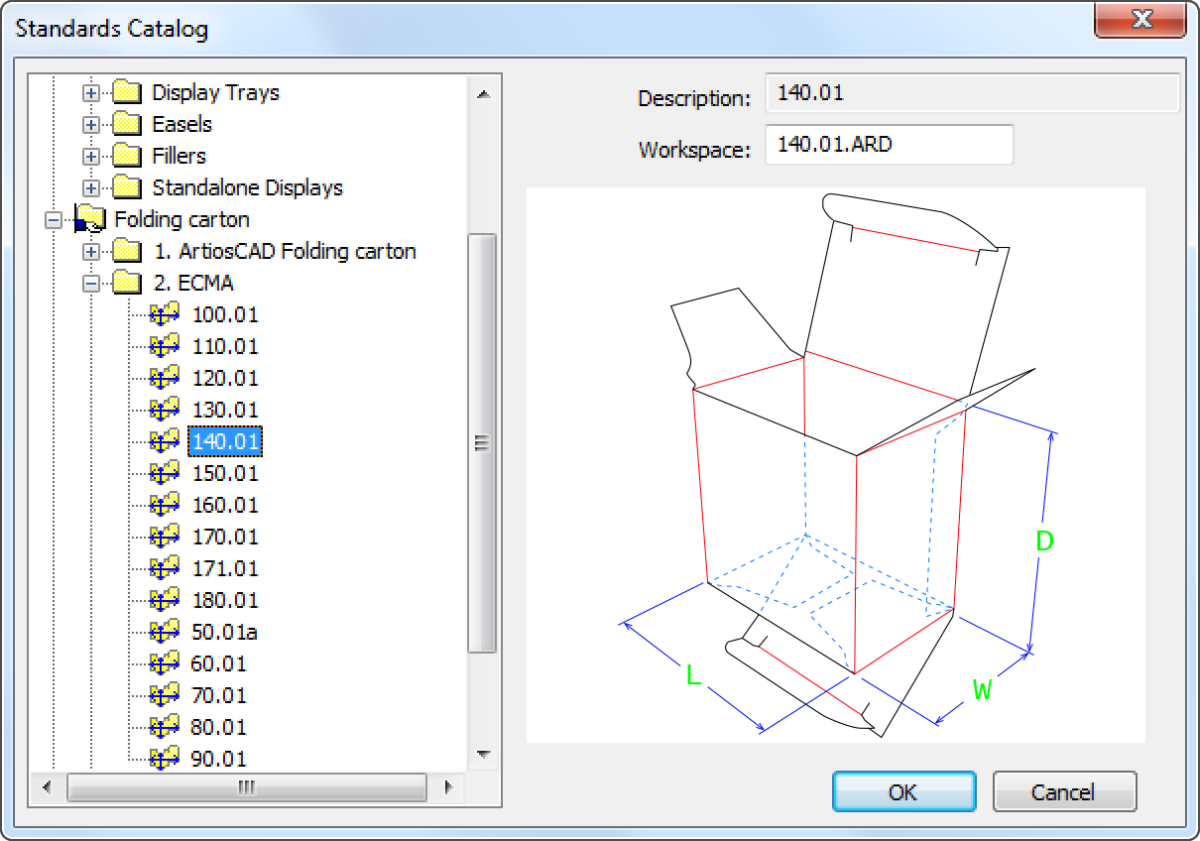
Designers begin by creating a new project in ArtiosCAD and selecting the appropriate packaging template or design layout based on product requirements and specifications. They define key parameters such as dimensions, material thickness, and structural features to customize the packaging design.
3.2 Creating Structural Designs:
Using ArtiosCAD’s design tools, designers create structural layouts for packaging components such as boxes, cartons, trays, and displays. They define dielines, crease lines, and cut lines to outline the shape and geometry of the packaging design, ensuring compatibility with manufacturing processes and assembly requirements.
3.3 Adding Graphics and Branding:
Designers enhance packaging designs by adding graphics, logos, text, and branding elements using ArtiosCAD’s drawing and editing tools. They import artwork files, apply colors and textures, and position branding elements strategically to create visually appealing packaging designs that reinforce brand identity and messaging.
3.4 Prototyping and Visualization:
ArtiosCAD enables designers to visualize packaging designs in 3D and simulate folding, bending, and assembly processes to evaluate design feasibility and performance. They review virtual prototypes, identify potential issues such as interference, collision, or misalignment, and make adjustments to optimize design integrity and functionality.
Section 4: Advanced Techniques and Optimization Strategies
4.1 Parametric Modeling:
ArtiosCAD supports parametric modeling techniques for creating customizable packaging templates and design variants based on user-defined parameters such as product dimensions, volume requirements, and production constraints. Designers use parametric features to generate design variations, explore design options, and optimize packaging layouts for specific applications.
4.2 Design Automation:
ArtiosCAD offers automation features for streamlining repetitive tasks and optimizing design workflows. Designers use scripting languages such as JavaScript or Python to automate routine tasks such as dieline generation, layout optimization, and batch processing, improving efficiency and productivity in packaging design projects.
4.3 Material Optimization:
ArtiosCAD enables designers to optimize packaging designs for material efficiency, cost-effectiveness, and sustainability. They analyze material usage, nesting efficiency, and waste generation to minimize material consumption, reduce production costs, and minimize environmental impact throughout the product lifecycle.
Section 5: Best Practices and Tips for Packaging Design in ArtiosCAD
5.1 Design for Manufacturing:
Design packaging with manufacturability in mind, considering factors such as material properties, production processes, and equipment capabilities. Ensure that packaging designs are compatible with manufacturing methods such as die cutting, folding, gluing, and printing to facilitate efficient and cost-effective production.
5.2 Test and Validate Designs:
Validate packaging designs through physical prototypes, virtual simulations, and user testing to ensure functionality, usability, and consumer satisfaction. Conduct structural tests, drop tests, and compression tests to assess packaging strength, durability, and protective properties under real-world conditions.
5.3 Collaborate and Iterate:
Foster collaboration among design teams, suppliers, and stakeholders throughout the packaging design process. Solicit feedback, incorporate suggestions, and iterate on designs iteratively to address concerns, refine details, and achieve consensus on design objectives and requirements.
Conclusion:
Designing packaging in ArtiosCAD provides designers and manufacturers with a powerful toolset for creating innovative, functional, and visually appealing packaging solutions. By mastering the principles, techniques, and best practices discussed in this guide, designers can leverage ArtiosCAD to streamline the packaging design process, optimize design performance, and deliver high-quality packaging solutions that meet customer expectations and business goals. With its intuitive interface, advanced features, and comprehensive capabilities, ArtiosCAD continues to be a preferred choice for packaging design and structural engineering in industries ranging from consumer goods and retail to food and beverage, pharmaceuticals, and beyond.