Introduction to MS Office: More Than Just Word and Excel
In the modern digital age, there is a significant possibility that you will use Microsoft Office, regardless of whether you are composing a straightforward letter, doing data analysis, or presenting a compelling presentation. This package of software, which is sometimes referred to as simply Microsoft Office, has become indispensible in homes, schools, and workplaces all around the globe. What exactly is Microsoft Office, and why has it continued to play such an important role in the way that we work and study?
So, let’s take a more in-depth look.
The Microsoft Office suite is what?
In its most basic form, Microsoft Office is a collection of software products that were designed to assist individuals in the creation, editing, management, and sharing of information and documents. When it was first presented in 1990, there were just a few applications available at the time. Over the course of many decades, it has developed into a robust suite that is capable of supporting a wide range of applications, including word processing, spreadsheets, databases, emails, and tools for collaboration.
In spite of the fact that the particular apps that are included might change depending on the version and the plan, the core of Microsoft Office often centers around a few well-known brands.
MS Office’s Most Important Tools and Features
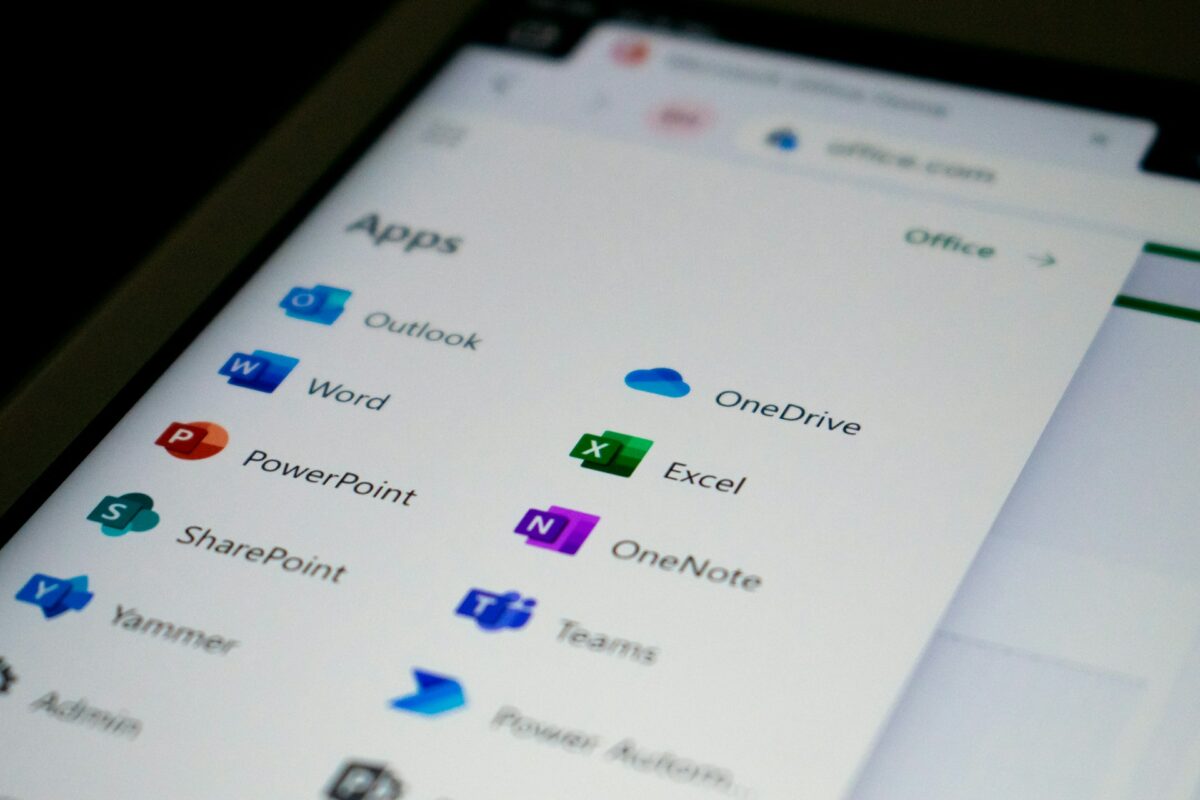
For the majority of people, the first things that come to mind when they think of Microsoft Office are Microsoft Word and Microsoft Excel. Word simplifies the process of writing and formatting text documents such as letters, resumes, and reports, while Excel assists in the management of data and the process of doing calculations via the use of spreadsheets.
Then there is Microsoft PowerPoint, which is widely used for the purpose of creating presentations that are both lively and visually interesting. These three applications have, on their own, been indispensable in environments such as schools, workplaces, and personal projects throughout the course of time.
- However, Microsoft Office does not end there. It is also included in several versions:
- Outlook, which allows users to manage their contacts, calendars, and emails.
- The ability to construct and administer database structures.
- For the purpose of developing marketing materials, brochures, and newsletters, a publisher is required.
- Utilize OneNote for the purpose of taking notes, organizing ideas, and working together.
- When taken as a whole, these technologies satisfy almost every need that is typical for both people and corporations.
What Makes Microsoft Office Stand Out
One of the reasons why Microsoft Office continues to be so successful is because it strikes a balance between capability and usability. Even inexperienced users may easily learn the fundamentals, while more experienced users can explore sophisticated capabilities such as mail merge in Word, complicated formulae and pivot tables in Excel, or multimedia effects in PowerPoint.
The cohesiveness of the programs is yet another one of their strengths. You may plan meetings straight from Outlook, copy charts from Excel into Word reports, and put notes from OneNote into PowerPoint slides. All of these features are available to you. Users may save time and maintain their organization with the aid of this smooth connection.
Adapting to Progress in Technology
Microsoft Office has developed throughout the years to accommodate the way that we operate in the modern day. At this point, desktop computers are no longer the only option. As a result of Office 365, which is now known as Microsoft 365, a significant number of its capabilities are accessible via the internet or as mobile applications. This implies that you are able to view and update your documents from almost any location, whether you are at home, at work, or when you are traveling between locations.
Integration with the cloud also makes collaboration simpler than it has ever been. It is possible for many individuals to work on the same document at the same time, contributing comments, making modifications, and seeing updates in real time.
Who Makes Use of Microsoft Office?
A more accurate response would be: virtually everyone. Word is used by students to compose essays, Excel is used to keep track of grades, and PowerPoint is used to illustrate projects. Businesses depend on Microsoft Word for drafting contracts and proposals, Microsoft Excel for doing financial analysis, and Microsoft Outlook for email communication. When it comes to designing flyers, creatives may utilize Publisher, while OneNote may be used to sketch out concepts.
Because of its versatility, Microsoft Office is likely to include a tool that may assist you in completing a variety of tasks, from composing a simple grocery list to developing a complicated financial model.
More than three decades have passed since the introduction of Microsoft Office, and there is a compelling reason why it continues to enjoy such widespread use. Every day, millions of individuals all around the globe are able to interact, analyze, and create with the assistance of this suite, which is dependable, packed with additional features, and easy to use.
Even if you are just starting out with Microsoft Office, delving into the fundamentals of Word, Excel, and PowerPoint may open up a whole new world of productivity for you. In addition, if you are already acquainted with it, delving further into its features may offer even more methods to simplify and improve the efficiency of your job.