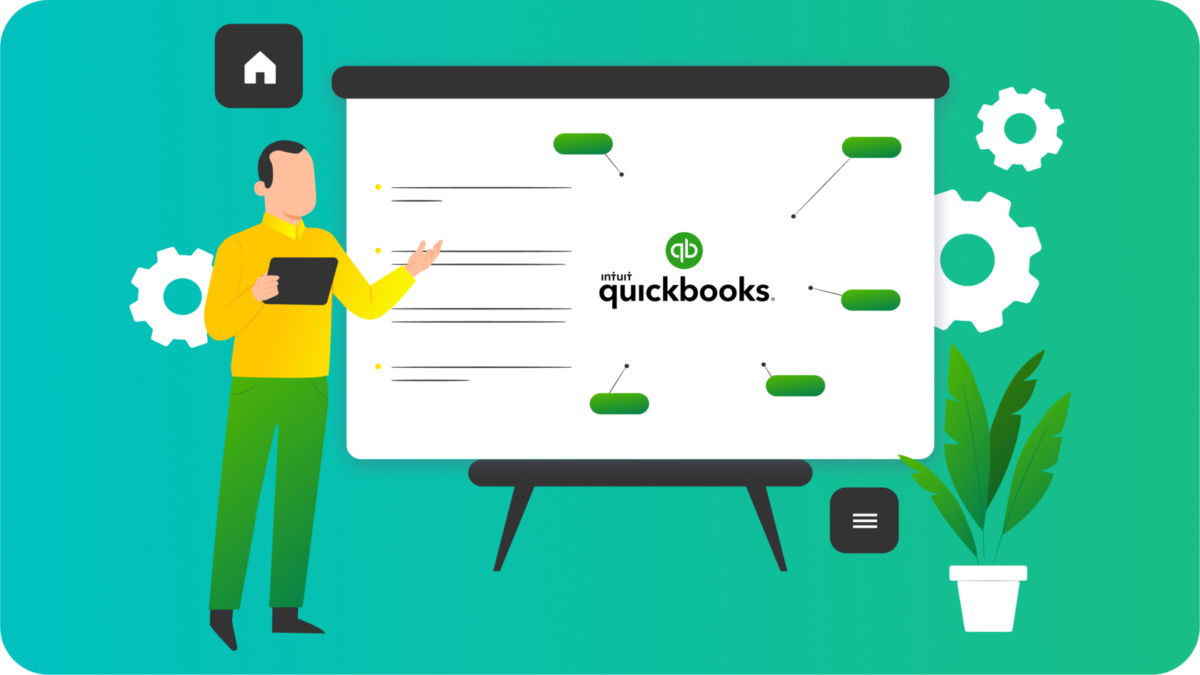
Categories
How To Guides

Mastering Mastery: A Comprehensive Guide to Polishing and Enhancing Tracks in Pro Tools

Introduction:

Mastering stands as the final frontier in the audio production process, where tracks are refined, polished, and optimized for distribution and playback across various platforms. Avid Pro Tools, a leading digital audio workstation, offers a comprehensive set of tools and features for mastering, allowing musicians, producers, and engineers to achieve professional-grade results in their recordings. In this exhaustive guide, we’ll embark on a deep dive into the world of mastering in Pro Tools, exploring its core principles, advanced techniques, and practical applications for music production, sound design, and audio post-production.

Understanding Mastering in Pro Tools:

Before delving into the specifics of mastering, let’s establish a foundational understanding of its core concepts and components:

  1. Mastering Goals: The primary goals of mastering include enhancing the overall sound quality, ensuring consistency across tracks, optimizing the playback experience across various platforms, and preparing tracks for distribution and release.
  2. Mastering Tools: Pro Tools provides a suite of mastering tools and features, including EQ, compression, limiting, stereo imaging, harmonic enhancement, and metering. These tools allow users to shape the tone, dynamics, spatial characteristics, and loudness of their tracks to achieve professional-grade results.
  3. Reference Tracks: Utilize reference tracks to calibrate monitoring systems, analyze frequency response, and compare the sonic characteristics of your tracks with commercially released material. Reference tracks serve as a benchmark for achieving competitive loudness, clarity, and impact in your mastering process.
  4. Playback Formats: Consider the intended playback format and platform for your mastered tracks, such as streaming services, digital downloads, vinyl records, or CD releases. Tailor your mastering process to optimize the sonic characteristics and loudness levels for the target playback medium.

Getting Started with Mastering:

Now that we have a foundational understanding of mastering in Pro Tools, let’s explore the step-by-step process of mastering tracks in your session:

  1. Preparation:
    • Consolidate and organize the tracks in your session, ensuring proper labeling, arrangement, and consistency across tracks. Address any technical issues, such as clipping, noise, or phase cancellation, before proceeding with the mastering process.
  2. Equalization (EQ):
    • Apply EQ to shape the frequency response of individual tracks and the overall mix. Use broad strokes to correct tonal balance and address frequency imbalances, then apply surgical EQ to remove resonances, enhance clarity, and create separation between tracks.
  3. Dynamic Processing:
    • Use dynamic processors such as compressors, limiters, and multi-band compressors to control the dynamics of individual tracks and the overall mix. Apply compression to even out volume fluctuations, enhance punch and impact, and glue tracks together in the mix.
  4. Stereo Imaging:
    • Enhance the stereo image and spatial characteristics of your tracks using stereo imaging tools and techniques. Use stereo wideners, panning, and spatial processing to create depth, width, and dimensionality in the mix, ensuring an immersive listening experience.
  5. Loudness Optimization:
    • Optimize the loudness levels of your tracks for competitive playback across various platforms and formats. Use peak normalization, loudness normalization, and dynamic range compression to achieve consistent loudness levels and maximize perceived volume without sacrificing dynamic range or clarity.
  6. Harmonic Enhancement:
    • Apply harmonic enhancement processing to add warmth, richness, and presence to your tracks. Use saturation, harmonic exciters, and tape emulation plugins to introduce harmonic distortion and coloration, enhancing the overall character and vibe of your recordings.

Advanced Mastering Techniques:

Once you’re comfortable with the basics, consider exploring some advanced mastering techniques to enhance your workflow and achieve professional-grade results:

  1. Multi-Band Processing:
    • Utilize multi-band compression and EQ to target specific frequency bands within the audio spectrum for independent processing. Split audio signals into multiple frequency bands using crossover filters, then apply different processing to each band to achieve precise control over tonal balance and dynamics.
  2. Mid-Side Processing:
    • Implement mid-side processing techniques to control the balance and stereo width of your tracks. Split audio signals into mid (center) and side (stereo) components using mid-side encoding, then apply different processing to each component to sculpt the stereo image and enhance spatial characteristics.
  3. Dynamic EQ:
    • Use dynamic EQ processing to apply EQ changes dynamically in response to the audio signal. Target specific frequency ranges with dynamic EQ bands, then set threshold, ratio, and attack/release parameters to shape the tonal balance and control resonances in real-time.

Practical Applications of Mastering:

Mastering in Pro Tools finds wide-ranging applications across various fields of audio production, including:

  1. Music Production: Master music recordings to achieve competitive loudness, clarity, and impact in the mix. Enhance the overall sound quality and coherence of your tracks, ensuring consistency and professionalism across your music releases.
  2. Sound Design: Master sound effects, dialogue, and music for film, television, and multimedia projects. Optimize the playback experience across various platforms and formats, ensuring clarity, immersion, and impact in your audio productions.
  3. Audio Post-Production: Master dialogue, sound effects, and music for audio post-production workflows in film, television, and video games. Prepare audio tracks for final delivery and distribution, ensuring compatibility, consistency, and quality in your audio mixes.

Conclusion:

Mastering in Pro Tools represents the final stage in the audio production process, where tracks are refined, polished, and optimized for distribution and playback across various platforms. By mastering the art of mastering, users can achieve professional-grade results in their music production, sound design, and audio post-production projects.

Whether you’re preparing music releases, enhancing soundscapes, or delivering audio for film and television, Pro Tools provides the tools, features, and flexibility you need to achieve your creative vision. So, dive in, experiment, and let the boundless possibilities of mastering in Pro Tools elevate your audio productions to new heights.

Categories
How To Guides

Maximizing Viewer Engagement: The Ultimate Guide to Optimizing Your YouTube Videos for Watch Time and Audience Retention

In the highly competitive landscape of YouTube content creation, capturing and maintaining viewer attention is essential for success. With watch time and audience retention being key metrics that directly impact video performance and channel growth, optimizing your YouTube videos to maximize these metrics is crucial. By understanding the factors that influence watch time and audience retention, implementing effective strategies, and leveraging best practices, creators can create engaging content that keeps viewers glued to their screens and drives long-term success on the platform. In this comprehensive guide, we’ll explore everything you need to know about optimizing your YouTube videos for watch time and audience retention.

Understanding the Importance of Watch Time and Audience Retention

Before diving into optimization strategies, let’s first understand why watch time and audience retention are critical metrics on YouTube:

Why Watch Time and Audience Retention Matter:

  1. YouTube Algorithm Ranking: Watch time and audience retention are key factors that influence the YouTube algorithm’s ranking of videos in search results, recommendations, and suggested videos. Videos with higher watch time and retention are more likely to be promoted by the algorithm and reach a wider audience.
  2. Engagement and Viewer Satisfaction: High watch time and audience retention indicate that viewers are engaged and satisfied with your content. This signals to YouTube that your videos are valuable and worth promoting to more viewers.
  3. Monetization Opportunities: Watch time is a primary eligibility requirement for YouTube’s Partner Program and monetization features such as ads and channel memberships. By optimizing watch time and retention, creators can unlock additional monetization opportunities and generate revenue from their videos.

Strategies for Optimizing Watch Time and Audience Retention

Now that we understand the importance of watch time and audience retention, let’s explore strategies and best practices for optimizing these metrics:

1. Create Compelling Introductions:

Capture viewers’ attention from the start by creating compelling introductions that hook them into watching the rest of the video. Use engaging visuals, intriguing hooks, or compelling questions to pique curiosity and encourage viewers to keep watching.

2. Maintain a Consistent Pace:

Keep your content engaging and dynamic by maintaining a consistent pace throughout the video. Avoid long pauses, excessive repetition, or slow-moving segments that could cause viewers to lose interest or click away.

3. Deliver Value Throughout:

Ensure that your video provides continuous value to viewers from start to finish. Keep the content relevant, informative, and entertaining, and avoid filler or unnecessary tangents that could detract from the overall viewing experience.

4. Use Visual and Audio Cues:

Incorporate visual and audio cues to maintain viewer engagement and guide their attention throughout the video. Use graphics, animations, or sound effects to emphasize key points, transitions, or important information.

5. Optimize Video Length:

Pay attention to the length of your videos and aim to strike a balance between providing comprehensive content and keeping viewers engaged. Test different video lengths to see what works best for your audience and content niche, but generally aim to keep videos concise and focused to avoid viewer fatigue.

6. Utilize Chapter Markers:

Take advantage of YouTube’s chapter markers feature to break longer videos into easily digestible segments. This allows viewers to navigate to specific sections of interest and helps maintain engagement by providing a structured viewing experience.

7. Analyze Audience Retention Data:

Regularly monitor and analyze audience retention data in YouTube Analytics to identify patterns, trends, and areas for improvement. Pay attention to drop-off points and viewer behavior to understand where viewers are losing interest and adjust your content accordingly.

Best Practices for Optimizing Watch Time and Audience Retention

As you optimize your YouTube videos for watch time and audience retention, keep these best practices in mind to maximize effectiveness and impact:

1. Focus on Quality Over Quantity:

Prioritize quality content that provides genuine value to your audience over quantity or clickbait. Focus on creating videos that are informative, entertaining, and engaging, and avoid sacrificing quality for the sake of churning out more content.

2. Know Your Audience:

Understand your target audience’s preferences, interests, and behaviors, and tailor your content to meet their needs. Use viewer feedback, comments, and analytics data to gain insights into what resonates with your audience and adjust your content strategy accordingly.

3. Test and Iterate:

Experiment with different video formats, styles, and content strategies to see what works best for your audience. Test variations, track performance metrics, and iterate on your approach based on what you learn from the testing process.

4. Encourage Engagement:

Encourage viewer engagement by asking questions, prompting comments, and inviting viewers to interact with your content. Respond to comments, questions, and feedback from viewers to foster a sense of community and connection with your audience.

5. Optimize Thumbnails and Titles:

Create eye-catching thumbnails and compelling titles that accurately represent the content of your video and entice viewers to click and watch. Use bold imagery, clear text, and intriguing visuals to grab attention and encourage clicks.

6. Promote Cross-Video Viewing:

Encourage viewers to watch more of your content by promoting related videos, playlists, or subscribe buttons within your videos. Use end screens, cards, or verbal calls-to-action to guide viewers to explore more of your channel’s content.

Conclusion: Elevating Your YouTube Videos with Optimal Watch Time and Audience Retention

Optimizing watch time and audience retention is essential for maximizing the performance and success of your YouTube videos. By creating compelling content, maintaining viewer engagement, and analyzing audience behavior, creators can enhance the viewing experience, increase visibility, and drive growth on their channel. So, embrace these strategies and best practices, put them into action, and watch as your videos captivate audiences, keep them coming back for more, and propel your channel to new heights of success on YouTube.

Categories
How To Guides

Mastering A/B Testing: The Comprehensive Guide to Experimenting with Different Video Formats on Your YouTube Channel

In the ever-evolving landscape of online content creation and marketing, staying ahead of the curve requires a commitment to experimentation and optimization. A/B testing, also known as split testing, offers creators a powerful methodology for comparing and analyzing the performance of different video formats, allowing them to identify what resonates best with their audience and optimize their content strategy accordingly. By systematically testing variations in video formats, creators can uncover valuable insights, improve engagement metrics, and ultimately drive growth and success on their YouTube channel. In this comprehensive guide, we’ll delve into the strategies, best practices, and creative techniques for conducting A/B testing with different video formats on your YouTube channel.

Understanding the Importance of A/B Testing Video Formats

Before diving into the specifics of A/B testing, let’s explore why testing different video formats is crucial for optimizing your content strategy:

Why A/B Testing Video Formats Matters:

  1. Audience Preferences: Different audiences may have varying preferences for video formats, such as tutorials, vlogs, reviews, or animations. A/B testing allows creators to understand which formats resonate best with their specific audience.
  2. Engagement Metrics: Video formats can have a significant impact on engagement metrics such as watch time, click-through rate (CTR), and audience retention. A/B testing enables creators to identify which formats drive higher engagement and viewer satisfaction.
  3. Optimizing Performance: By identifying the most effective video formats, creators can optimize their content strategy to focus on producing the types of videos that perform best with their audience, leading to improved channel growth and success.

Strategies for Conducting A/B Testing with Different Video Formats

Now that we understand the importance of A/B testing video formats, let’s explore strategies and best practices for conducting effective experiments:

1. Define Your Objectives:

Start by defining clear and specific objectives for your A/B testing experiments. Determine what metrics you want to measure (e.g., watch time, CTR, audience retention) and what outcomes you hope to achieve (e.g., increased engagement, higher subscriber growth).

2. Select Variation Factors:

Identify the specific elements of video formats that you want to test. This could include factors such as video length, content structure, visual style, narrative approach, or use of graphics and animations.

3. Create Test Variations:

Develop multiple variations of your videos, each representing a different format or approach. Ensure that each variation is distinct enough to provide meaningful insights, but also comparable in terms of content and quality.

4. Implement Randomization:

Randomly assign viewers to different test variations to ensure unbiased results. This can be achieved by using YouTube’s built-in A/B testing tools or by manually segmenting your audience using external methods such as URL parameters or custom audience lists.

5. Monitor Performance Metrics:

Track and analyze key performance metrics for each test variation, such as watch time, CTR, and audience retention. Use YouTube Analytics or other analytics tools to gather data and compare the performance of each variation.

6. Interpret Results:

Evaluate the results of your A/B testing experiments to identify patterns, trends, and insights. Determine which video formats perform best in terms of engagement metrics and audience response.

Best Practices for A/B Testing Video Formats

As you conduct A/B testing with different video formats, keep these best practices in mind to maximize effectiveness and impact:

1. Test One Variable at a Time:

Focus on testing one variable (e.g., video format) at a time to isolate its impact on performance metrics. Testing multiple variables simultaneously can make it difficult to determine which factor is driving the observed results.

2. Use a Large Sample Size:

Ensure that your A/B testing experiments have a sufficiently large sample size to generate statistically significant results. This helps reduce the margin of error and increases the reliability of your findings.

3. Test Across Multiple Videos:

Conduct A/B testing across multiple videos to gather a diverse range of data and insights. Testing variations across different videos helps account for factors such as audience preferences, content topics, and video context.

4. Iterate Based on Results:

Use the insights gained from your A/B testing experiments to inform future content strategy decisions. Iterate on your video formats, content structure, and production techniques based on what you learn from the testing process.

5. Be Patient and Persistent:

A/B testing requires patience and persistence, as meaningful insights may take time to emerge. Stay committed to the process and continue testing variations to refine your content strategy and maximize performance over time.

Conclusion: Elevating Your Content Strategy with A/B Testing

A/B testing offers creators a powerful methodology for optimizing their content strategy and driving growth and success on their YouTube channel. By systematically testing different video formats, creators can uncover valuable insights, improve engagement metrics, and deliver content that resonates with their audience. So, embrace the power of A/B testing, put these strategies and best practices into action, and watch as your content strategy evolves, your audience engagement increases, and your channel reaches new heights of success.