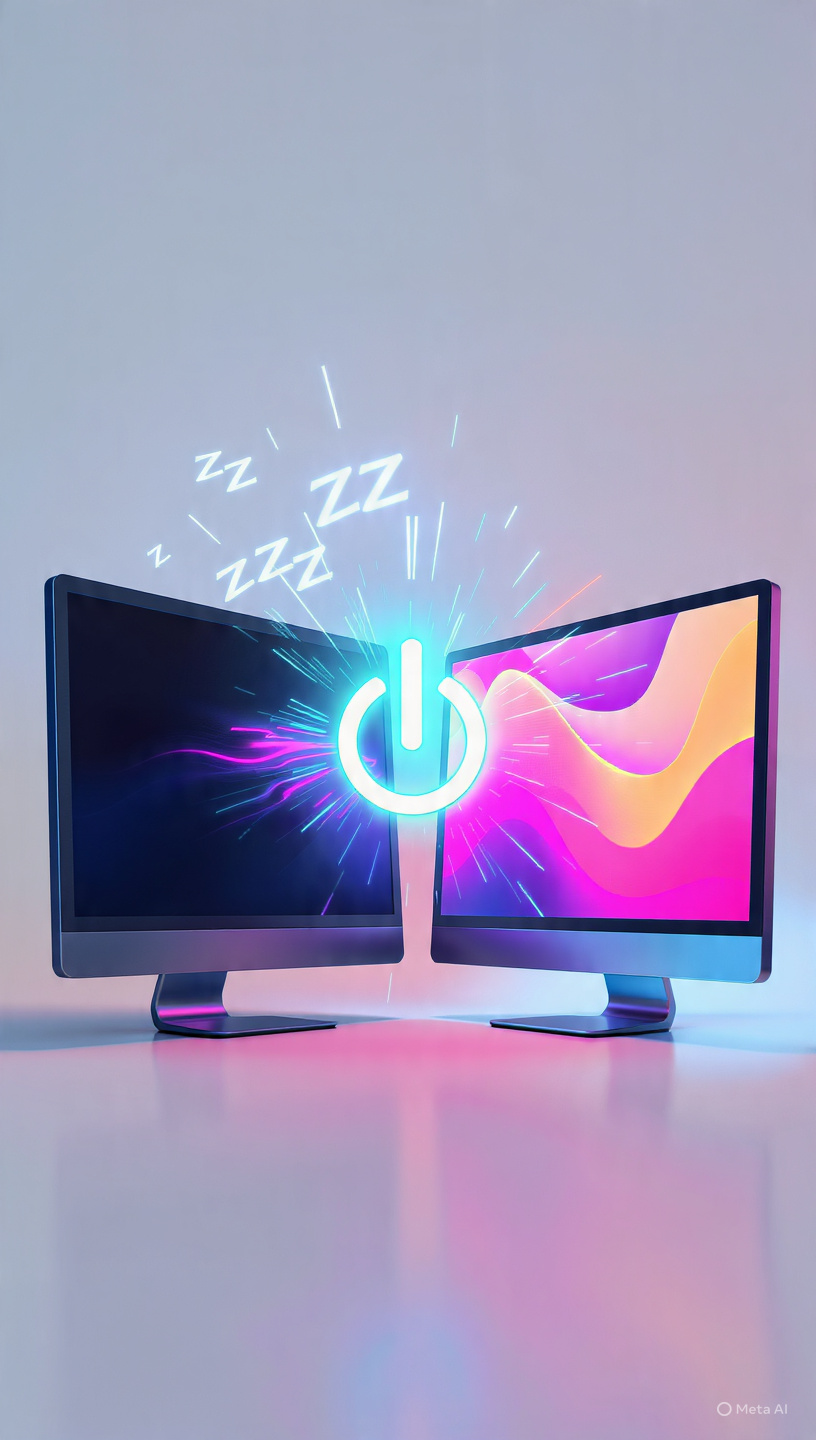
Categories
How To Guides

Mastering the Art of Composition: A Comprehensive Guide to Compositing Footage in Adobe After Effects

Introduction:

Compositing footage is a fundamental aspect of creating professional-looking videos, motion graphics, and visual effects in Adobe After Effects. Whether you’re blending multiple video clips, integrating visual elements, or adding digital effects to your compositions, mastering the art of compositing allows you to combine disparate elements seamlessly and create stunning visuals that captivate and engage viewers. In this extensive guide, we’ll explore the step-by-step process of compositing footage in Adobe After Effects, covering everything from basic compositing techniques to advanced integration methods, to help you unlock the full potential of your creative vision.

Understanding Compositing in Adobe After Effects:

Compositing in Adobe After Effects involves combining multiple layers of footage, graphics, effects, and elements to create a cohesive and visually compelling composition. Each layer in a composition contributes to the overall appearance and visual narrative of the final video, with elements such as video footage, images, text, shapes, and effects being manipulated, positioned, and blended together to achieve desired visual effects or storytelling objectives. After Effects provides a robust set of compositing tools and features, including layer blending modes, masking, track mattes, keying, and motion tracking, that empower users to create complex and dynamic compositions with precision and control.

Key Elements of Compositing in Adobe After Effects:

Understanding compositing in Adobe After Effects involves understanding several key elements, including:

  1. Layers: Layers are the building blocks of compositing in After Effects, representing individual elements or components within a composition. Each layer can contain video footage, images, text, shapes, adjustment layers, or effects, with layers stacked in a specific order to determine their visibility and appearance in the composition. Layers can be manipulated, positioned, and animated independently to create complex visual effects and compositions.
  2. Blending Modes: Blending modes determine how layers interact and combine with each other in a composition, influencing factors such as transparency, luminance, and color. After Effects provides a variety of blending modes, including Normal, Multiply, Screen, Overlay, and Add, each producing different compositing effects when applied to layers. Experimenting with blending modes allows users to achieve creative and artistic effects by blending layers in different ways.
  3. Masks: Masks are shapes or paths that define the visibility or transparency of a layer in a composition, allowing users to selectively reveal or conceal portions of the layer. After Effects supports various types of masks, including rectangular masks, elliptical masks, freeform masks, and pen tool masks, which can be used to create precise and intricate masking effects. Masks can be animated, feathered, inverted, or modified over time to create dynamic masking effects and transitions.
  4. Track Mattes: Track mattes are layers used to control the visibility or transparency of another layer in a composition based on its alpha channel or luminance values. After Effects supports alpha matte and luma matte track mattes, which allow users to create complex compositing effects by using one layer to define the transparency or luminance of another layer. Track mattes can be used to create transitions, reveals, and visual effects that react to the content of other layers.
  5. Keying: Keying is the process of removing or isolating specific colors or elements from a video footage layer to create transparency or transparency effects. After Effects provides a range of keying tools and effects, including the Keylight effect, the Color Key effect, and the Difference Matte effect, which allow users to remove green screens, blue screens, or other background elements from footage and composite foreground elements seamlessly into new environments.

Step-by-Step Guide to Compositing Footage in Adobe After Effects:

Follow these step-by-step instructions to composite footage in Adobe After Effects:

  1. Import Footage: Start by importing the footage you want to composite into your After Effects project. Go to the File menu and select “Import” to import video clips, images, or other assets into your project. Alternatively, you can drag and drop files directly into the Project panel to import them.
  2. Create a New Composition: Once you’ve imported your footage, create a new composition by selecting “Composition” > “New Composition” from the menu. Set the composition settings, including resolution, frame rate, duration, and background color, according to your project requirements.
  3. Arrange Layers: Arrange your footage layers, graphics, text, or other elements within the composition panel to create the desired composition. Drag and drop layers from the Project panel into the Composition panel to add them to the composition, and use the Selection tool to move, resize, or rotate layers as needed.
  4. Apply Effects and Adjustments: Apply effects, adjustments, or transformations to your footage layers or other elements to achieve desired visual effects or enhancements. Use the Effects & Presets panel to browse and apply built-in effects, such as color correction, blurs, glows, or distortions, to your layers. Adjust effect properties in the Effect Controls panel to customize the appearance or behavior of effects.
  5. Use Blending Modes: Experiment with blending modes to blend layers together and create interesting compositing effects. Select a layer in the Timeline panel, and choose a blending mode from the dropdown menu in the Layer panel to apply the blending mode to the layer. Adjust the opacity or fill settings of layers to control their transparency and blending with underlying layers.
  6. Create Masks: Use masks to selectively reveal or conceal portions of your footage layers or other elements. Select a layer in the Timeline panel, and use the Shape tool or Pen tool to draw masks directly in the Composition panel. Adjust mask properties, such as feathering, expansion, or opacity, to create smooth and seamless masking effects.
  7. Apply Track Mattes: Use track mattes to control the visibility or transparency of one layer based on the alpha channel or luminance values of another layer. Create a new solid layer in the composition, and position it above the layer you want to use as the matte. Set the track matte of the layer you want to mask to “Alpha Matte” or “Luma Matte” and choose the matte layer from the dropdown menu.
  8. Keying: If you need to remove or isolate specific colors or elements from your footage, use keying tools and effects to create transparency or transparency effects. Apply keying effects, such as the Keylight effect or the Color Key effect, to your footage layer, and adjust effect settings to remove unwanted background elements and create transparency.
  9. Preview and Refine: Preview your composition in the Composition panel to assess its appearance and visual impact. Scrub the playhead along the timeline to see how layers interact and animate over time, and make any necessary adjustments or refinements to effects, masks, or settings to achieve the desired compositing effect.
  10. Render and Export: Once you’re satisfied with your composition, render and export it as a video file or image sequence. Select “Composition” > “Add to Render Queue” from the menu to add the composition to the render queue. Configure render settings, including output format, resolution, codec, and destination, and click “Render” to export the composition.

Best Practices for Compositing Footage in Adobe After Effects:

To achieve professional-looking compositing results in Adobe After Effects, consider the following best practices:

  1. Plan Your Composition: Before you start compositing, plan out the composition and visual effects you want to achieve. Consider factors such as layer order, blending modes, masking, and keying techniques to create the desired visual impact and storytelling effect.
  2. Organize Your Project: Keep your After Effects project organized by using folders, labels, and naming conventions to group and categorize assets, layers, and compositions. This makes it easier to navigate and manage complex projects and facilitates collaboration with team members.
  3. Use Pre-Compositions: Break down complex compositions into smaller, manageable components by using pre-compositions. Pre-compositions allow you to group layers together and treat them as a single unit within larger compositions, simplifying the compositing process and improving performance.
  4. Experiment and Iterate: Don’t be afraid to experiment with different compositing techniques, effects, and settings to achieve the desired visual effect. Iterate on your compositions, previewing and refining them until you achieve the desired look and feel.
  5. Optimize Performance: Be mindful of the performance impact of effects, layers, and compositions on your project. Consider disabling or adjusting effects that are not essential to the final composition to improve playback performance and responsiveness.
  6. Seek Feedback: Solicit feedback from colleagues, clients, or peers to gain different perspectives on your compositions and identify areas for improvement. Be open to constructive criticism and suggestions for enhancing your compositing work.

Conclusion:

In conclusion, compositing footage in Adobe After Effects is a powerful and versatile process that allows users to combine multiple elements, effects, and visual elements to create stunning compositions and visual effects. By understanding the principles of compositing, mastering the tools and techniques of After Effects, and following best practices for compositing, you can unlock the full potential of your creative vision and produce professional-quality videos, motion graphics, and visual effects that captivate and engage audiences. So, dive into the world of compositing, experiment with different techniques and effects, and unleash your creativity to create compelling and visually stunning compositions that leave a lasting impression.

Categories
How To Guides

Mastering Effects: A Comprehensive Guide to Applying and Customizing Effects in Adobe After Effects

Introduction:

Effects are essential tools in Adobe After Effects, allowing users to enhance, stylize, and transform their video footage, animations, and motion graphics with creative visual effects and enhancements. Whether used to add realism, create visual interest, or convey emotion, effects play a crucial role in shaping the look and feel of motion projects. In this extensive guide, we’ll delve into the intricacies of applying and customizing effects in Adobe After Effects, covering everything from basic effect application to advanced customization techniques, to help you unlock the full potential of effects in your creative endeavors.

Understanding Effects in Adobe After Effects:

Effects in Adobe After Effects are tools or filters that modify the appearance, behavior, or properties of layers or compositions within a project. Effects can be applied to individual layers, adjustment layers, or entire compositions, and can range from simple adjustments, such as color correction or blurring, to complex visual effects, such as particle simulations or motion tracking. After Effects provides a vast library of built-in effects, as well as the ability to create custom effects using scripting or third-party plugins, giving users a wide range of creative possibilities for enhancing their projects.

Key Elements of Effects in Adobe After Effects:

Understanding effects in Adobe After Effects involves understanding several key elements, including:

  1. Effect Categories: Effects in After Effects are organized into categories based on their functionality or purpose. Common effect categories include Color Correction, Blur & Sharpen, Distort, Stylize, Keying, Simulation, and Time. Each category contains a variety of effects that can be applied to layers or compositions to achieve specific visual effects or enhancements.
  2. Effect Properties: Effects in After Effects have adjustable properties or parameters that control their appearance, behavior, or intensity. These properties can be modified to customize the effect and achieve desired visual effects or enhancements. Common effect properties include sliders, checkboxes, dropdown menus, and numerical inputs that allow users to control parameters such as intensity, color, size, speed, or direction.
  3. Effect Stacking: Effects in After Effects can be stacked or combined to create complex visual effects or transformations. Multiple effects can be applied to a single layer or adjustment layer, with each effect contributing to the overall appearance or behavior of the layer. Effects are applied in a specific order, with the topmost effect in the Effect Controls panel being applied first, followed by subsequent effects in the order they are listed.
  4. Presets: After Effects includes a library of effect presets, which are pre-configured settings or configurations of effects that can be applied to layers or compositions with a single click. Presets provide a quick and easy way to apply common visual effects or enhancements without having to manually adjust effect properties. Users can also create their own custom presets to save and reuse effect configurations across projects.

Step-by-Step Guide to Applying and Customizing Effects in Adobe After Effects:

Follow these step-by-step instructions to apply and customize effects in Adobe After Effects:

  1. Select Your Layer: Begin by selecting the layer or layers to which you want to apply effects in the Composition panel. This could be a video footage layer, image layer, text layer, shape layer, or adjustment layer.
  2. Apply an Effect: With the desired layer selected, navigate to the Effects & Presets panel, which can be accessed from the Window menu if not already visible. In the Effects & Presets panel, browse or search for the desired effect by category or keyword. Once you’ve found the effect you want to apply, click and drag it onto the selected layer in the Composition panel.
  3. Adjust Effect Properties: After applying an effect to a layer, its properties or parameters will appear in the Effect Controls panel, which can be accessed from the Window menu if not already visible. In the Effect Controls panel, you’ll find a list of effect properties that can be adjusted to customize the appearance, behavior, or intensity of the effect. Use sliders, checkboxes, dropdown menus, or numerical inputs to modify effect properties as desired.
  4. Customize Effect Stacking: To create more complex visual effects or transformations, stack or combine multiple effects on a single layer or adjustment layer. Apply additional effects to the layer by dragging them from the Effects & Presets panel onto the layer in the Composition panel. Adjust the order of effects in the Effect Controls panel by dragging them up or down in the list to change the stacking order and influence the final appearance of the layer.
  5. Preview Effect: After applying and customizing effects, preview the effect in the Composition panel to assess its appearance and impact on the layer or composition. Scrub the playhead along the timeline to see how the effect evolves over time, and make any necessary adjustments or refinements to effect properties to achieve the desired visual effect or enhancement.
  6. Save Custom Presets: If you’ve created a custom effect configuration that you want to reuse across projects, save it as a custom preset. In the Effect Controls panel, click the “Animation Presets” dropdown menu and select “Save Animation Preset.” Enter a name for the preset, choose a location to save it, and click “Save” to save the custom preset for future use.
  7. Apply Adjustment Layers: To apply effects to multiple layers simultaneously or to create non-destructive effects that can be easily modified or adjusted later, use adjustment layers. Create a new adjustment layer by selecting “Layer” > “New” > “Adjustment Layer” from the menu, and apply effects to the adjustment layer as you would to a regular layer. The effects applied to the adjustment layer will affect all layers below it in the layer stack.

Best Practices for Applying and Customizing Effects in Adobe After Effects:

To maximize the effectiveness of effects in Adobe After Effects, consider the following best practices:

  1. Experiment and Explore: Don’t be afraid to experiment with different effects, effect combinations, and effect settings to discover new creative possibilities. Explore the Effects & Presets panel to browse through the extensive library of built-in effects and presets, and experiment with applying effects to different layers and compositions to see how they interact and influence the overall appearance of your project.
  2. Use Adjustment Layers: Take advantage of adjustment layers to apply effects to multiple layers simultaneously or to create non-destructive effects that can be easily modified or adjusted later. By applying effects to adjustment layers, you can maintain flexibility and control over the visual appearance of your project, allowing you to experiment with different effect settings or combinations without affecting the original layers.
  3. Fine-Tune Effect Properties: Pay attention to the details when adjusting effect properties, and take the time to fine-tune the settings to achieve the desired visual effect or enhancement. Experiment with different values for effect properties, such as intensity, color, size, or speed, and observe how they affect the appearance of the effect. Use the Preview panel to preview the effect in real-time and make adjustments accordingly.
  4. Consider Visual Hierarchy: When stacking multiple effects on a layer or adjustment layer, consider the visual hierarchy and order of effects to achieve the desired visual impact. Arrange effects in the Effect Controls panel in the order that best achieves the desired effect stacking, with effects that have a larger influence on the appearance or behavior of the layer placed higher in the stacking order.
  5. Optimize Performance: Be mindful of the performance impact of effects on your project, especially when working with complex or computationally intensive effects. Consider disabling or adjusting effects that are not essential to the visual appearance of your project to improve playback performance and responsiveness. Use the Render Queue to render and preview your project to assess the performance impact of effects and ensure smooth playback.

Conclusion:

In conclusion, applying and customizing effects in Adobe After Effects is a fundamental skill that allows users to enhance, stylize, and transform their video projects with creative visual effects and enhancements. By understanding the principles of effects, mastering the tools and techniques of After Effects, and following best practices for effect application and customization, you can unlock the full potential of effects in your creative endeavors and achieve compelling and visually stunning results. So, dive into the world of effects, experiment with different effect settings and combinations, and unleash your creativity to create captivating and immersive motion projects that captivate and inspire audiences.

Categories
How To Guides

Crafting Elegance: A Detailed Guide to Designing Lower Third Graphics in Adobe After Effects

Introduction:

Lower third graphics are essential elements in video production, providing context, information, and visual polish to enhance viewer engagement and comprehension. Whether used in documentaries, news broadcasts, interviews, or online videos, lower thirds serve as on-screen overlays that display pertinent information such as names, titles, or captions without interrupting the main content. Adobe After Effects offers a wealth of tools and features to create stylish and professional-looking lower third graphics that complement your video projects seamlessly. In this extensive guide, we’ll explore the step-by-step process of designing lower third graphics in Adobe After Effects, covering everything from design principles to animation techniques, to help you craft polished and effective lower thirds that elevate your video productions.

Understanding Lower Third Graphics in Adobe After Effects:

Lower third graphics are graphical overlays that appear in the lower portion of the screen during video playback, typically containing text, graphics, or both. In Adobe After Effects, lower thirds are created using a combination of text layers, shape layers, effects, and animation techniques to achieve desired visual styles and motion effects. Lower thirds serve various purposes, such as identifying speakers, providing context or information, branding content, or guiding viewer attention, and are essential components of professional video productions.

Key Elements of Lower Third Graphics in Adobe After Effects:

Creating lower third graphics in Adobe After Effects involves understanding several key elements, including:

  1. Composition: Composition is the arrangement and organization of elements within the lower third graphic, determining the visual hierarchy, balance, and readability of the information presented. Consider factors such as text placement, font selection, color contrast, and graphic elements to create visually appealing and effective lower thirds that complement your video content.
  2. Text Layers: Text layers are the primary components of lower third graphics, containing textual information such as names, titles, captions, or descriptions. Use the Text tool in After Effects to create text layers, and customize the text properties, including font, size, style, alignment, color, and tracking, to achieve desired typography and legibility.
  3. Shape Layers: Shape layers are versatile elements that can be used to create graphic elements, backgrounds, borders, or decorative accents within lower third graphics. Use the Shape tool in After Effects to create shape layers, and customize the shape properties, including fill color, stroke color, stroke width, and opacity, to enhance the visual appeal and composition of the lower third.
  4. Effects and Enhancements: Effects and enhancements can add depth, texture, and visual interest to lower third graphics, enriching the overall look and feel of the design. Experiment with effects such as shadows, glows, gradients, or blurs to add dimension and polish to text and graphic elements, and use motion graphics techniques such as animation presets, transitions, or keyframing to create dynamic motion effects that draw viewer attention.

Step-by-Step Guide to Creating Lower Third Graphics in Adobe After Effects:

Follow these step-by-step instructions to create lower third graphics in Adobe After Effects:

  1. Plan Your Design: Begin by planning the layout, typography, and visual style of your lower third graphic based on the content and context of your video project. Consider factors such as text placement, font selection, color scheme, and graphic elements to create a cohesive and visually appealing design that complements your video content.
  2. Create a New Composition: Once you’ve planned your design, create a new composition in After Effects by selecting “Composition” > “New Composition” from the menu. Set the composition settings, including resolution, frame rate, duration, and background color, according to your project requirements.
  3. Add Text Layers: Use the Text tool in After Effects to create text layers for the textual information you want to include in the lower third graphic. Click and drag to create a text box in the Composition panel, and type or paste the desired text into the text box. Customize the text properties, such as font, size, style, alignment, color, and tracking, to achieve the desired typography and legibility for your lower third.
  4. Create Shape Layers: Use the Shape tool in After Effects to create shape layers for graphic elements, backgrounds, borders, or decorative accents within the lower third graphic. Click and drag to draw shapes directly in the Composition panel, and customize the shape properties, such as fill color, stroke color, stroke width, and opacity, to enhance the visual appeal and composition of the lower third.
  5. Arrange and Composite Layers: Arrange the text layers and shape layers within the Composition panel to create the desired layout and composition for the lower third graphic. Use the Selection tool to move, resize, rotate, or scale layers as needed, and use the Transform properties in the Timeline panel to adjust layer properties, such as position, scale, rotation, opacity, and anchor point.
  6. Apply Effects and Enhancements: Enhance your lower third graphic by applying effects and enhancements to text and shape layers. Experiment with effects such as shadows, glows, gradients, or blurs to add depth and dimension to text and graphic elements, and use motion graphics techniques such as animation presets, transitions, or keyframing to create dynamic motion effects that draw viewer attention.
  7. Preview and Refine: Preview the lower third graphic in the Composition panel to assess its appearance, readability, and composition. Make any necessary adjustments or refinements to the layout, typography, color scheme, effects, or motion effects to achieve the desired visual impact and complement your video content effectively.
  8. Export Graphic: Once you’re satisfied with the lower third graphic, export it as a standalone graphic file or as part of your video project. To export the lower third graphic as a standalone graphic file, select the composition containing the lower third graphic in the Project panel, and choose “Composition” > “Save Frame As” > “File” from the menu. To export the lower third graphic as part of your video project, render and export the composition containing the lower third graphic as a video file by selecting “Composition” > “Add to Render Queue” from the menu and configuring the render settings, including output format, resolution, and codec options.

Best Practices for Creating Lower Third Graphics in Adobe After Effects:

To create compelling and effective lower third graphics in Adobe After Effects, consider the following best practices:

  1. Keep it Simple: Focus on conveying essential information clearly and concisely through your lower third graphic, and avoid cluttering the design with unnecessary text or graphic elements. Keep the layout clean, balanced, and easy to read, and prioritize readability and visual clarity in your design choices.
  2. Maintain Consistency: Maintain consistency with your brand’s identity and visual style when designing lower third graphics. Use colors, fonts, and graphic elements that align with your brand’s aesthetic and messaging, and ensure that the lower third graphic complements the overall look and feel of your video content.
  3. Consider Timing and Duration: Consider the timing and duration of the lower third graphic within your video project, and ensure that it appears at appropriate moments and remains on-screen for a suitable duration to convey the intended information effectively. Avoid prolonged or intrusive lower third graphics that may distract or disrupt the flow of your video content.
  4. Test and Iterate: Test your lower third graphic in different viewing environments and playback conditions to ensure that it performs as intended and resonates with your audience. Solicit feedback from colleagues, clients, or focus groups, and be open to revising and refining your lower third graphic based on constructive criticism and user testing.
  5. Optimize for Viewing Platforms: Consider the platform and device on which your video content will be viewed, and optimize your lower third graphic accordingly. Ensure that the lower third graphic remains legible and visually appealing across different screen sizes, aspect ratios, and viewing resolutions, and adjust the layout, typography, and graphic elements as needed to accommodate varying viewing conditions.

Conclusion:

In conclusion, designing lower third graphics in Adobe After Effects is a creative and rewarding process that allows video producers and motion graphic designers to enhance their video projects with professional-looking overlays that provide context, information, and visual polish. By understanding the principles of design, mastering the tools and techniques of After Effects, and following best practices for lower third design, you can create polished and effective lower thirds that elevate your video productions and engage your audience effectively. So, dive into the world of lower third design, experiment with different layouts, typography, and effects, and unleash your creativity to create compelling and memorable lower third graphics that enhance your video content and leave a lasting impression.