Categories
How To Guides

Mastering Clip Properties: A Comprehensive Guide to Adjusting Clip Properties in DaVinci Resolve

Introduction: Adjusting clip properties is a fundamental aspect of the video editing process, allowing editors to fine-tune various aspects of their footage to achieve the desired look and feel. DaVinci Resolve provides a comprehensive set of tools and features for adjusting clip properties, empowering editors to manipulate aspects such as color, size, speed, and more with precision and control. In this extensive guide, we’ll explore the intricacies of adjusting clip properties in DaVinci Resolve, offering step-by-step tutorials, expert tips, and real-world examples to help you master this essential aspect of video editing.

Section 1: Understanding Clip Properties Before delving into the specifics of adjusting clip properties in DaVinci Resolve, it’s important to understand what clip properties are and how they affect your footage. This section provides an overview of clip properties, including common parameters and their impact on the editing process.

  • Defining Clip Properties: Explore the concept of clip properties, which refer to various attributes and settings associated with individual video clips in DaVinci Resolve. Understand how clip properties encompass aspects such as color, size, speed, audio levels, and more, and how adjusting these properties can influence the visual and auditory presentation of your footage.
  • Key Parameters: Familiarize yourself with key parameters that govern clip properties in DaVinci Resolve. Learn about parameters such as exposure, white balance, contrast, saturation, sharpness, speed, scale, position, rotation, opacity, and audio levels, and understand how they contribute to the overall look and feel of your video clips.

Section 2: Adjusting Clip Properties in the Edit Page DaVinci Resolve offers a range of tools and features for adjusting clip properties directly within the Edit page, providing editors with flexibility and control over their editing process. This section provides step-by-step tutorials and demonstrations for adjusting clip properties in the Edit page.

  • Color Correction: Learn how to perform basic color correction on your video clips in DaVinci Resolve. Explore techniques for adjusting exposure, white balance, contrast, saturation, and sharpness to achieve a balanced and visually appealing look for your footage. Discover how to use the Color page and color grading tools to fine-tune color and tone adjustments with precision.
  • Speed Changes: Discover how to adjust the speed of your video clips in DaVinci Resolve to create slow-motion or fast-motion effects. Learn how to change clip speed, maintain audio pitch, and customize speed ramps for smooth transitions between different playback speeds. Explore techniques for creating dynamic and engaging visual effects using speed changes.
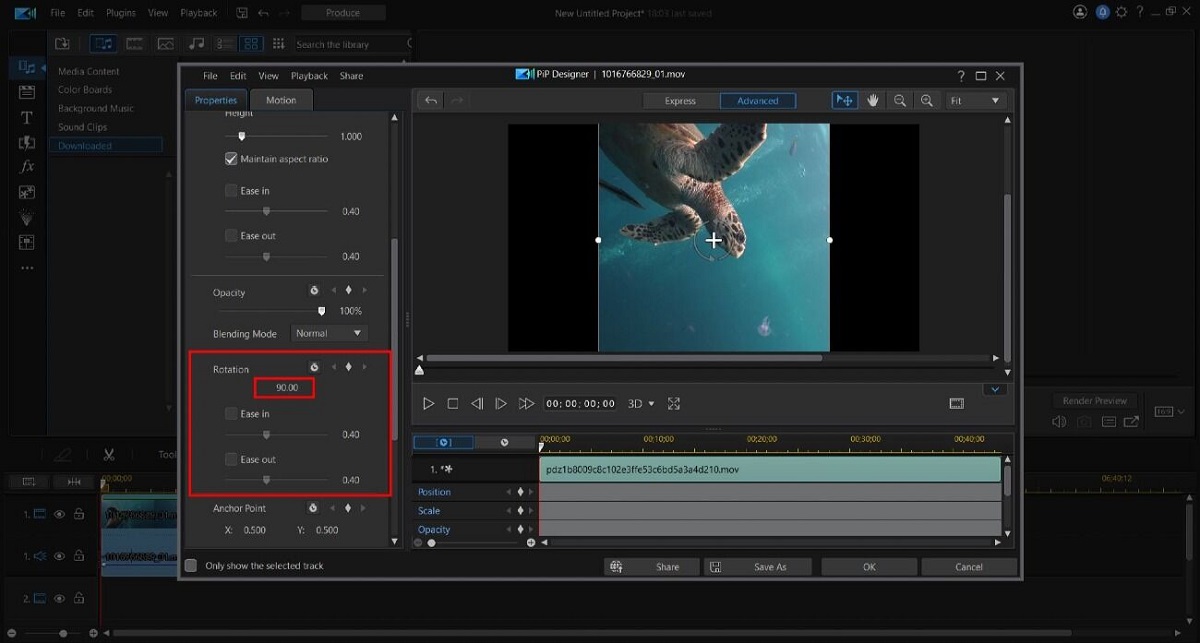
  • Transformations: Explore techniques for applying transformations to your video clips in DaVinci Resolve. Learn how to adjust clip scale, position, rotation, and opacity to reframe, resize, and reposition clips within your project. Discover how to create dynamic compositions and visual effects using transformation controls.

Section 3: Adjusting Clip Properties in the Color Page In addition to the Edit page, DaVinci Resolve offers advanced tools and features for adjusting clip properties in the Color page, allowing editors to perform precise color grading and correction on their footage. This section delves into techniques for adjusting clip properties in the Color page.

  • Advanced Color Correction: Delve into advanced color correction techniques in DaVinci Resolve’s Color page. Learn how to use color grading tools such as primaries wheels, curves, qualifiers, and power windows to achieve precise color adjustments and creative looks for your footage. Explore techniques for matching shots, creating stylized looks, and achieving consistent color grading across your project.
  • Secondary Color Correction: Discover how to perform secondary color correction in DaVinci Resolve to isolate and adjust specific colors or areas within your footage. Learn how to use secondary color grading tools such as qualifiers, masks, and tracking to target and manipulate specific elements within your clips. Explore techniques for enhancing skin tones, adjusting skies, and correcting color casts with precision.

Section 4: Real-World Applications and Case Studies Gain inspiration and insight from real-world examples and case studies that demonstrate the creative potential and practical applications of adjusting clip properties in DaVinci Resolve. This section showcases innovative editing techniques employed in diverse contexts, from narrative films and documentaries to commercials and music videos.

  • Narrative Filmmaking: Explore how filmmakers use advanced clip property adjustments in DaVinci Resolve to enhance the visual storytelling and aesthetics of narrative film projects. Learn how to manipulate color, speed, and transformations to create mood, atmosphere, and visual impact that supports the narrative and engages the audience.
  • Documentary Editing: Discover how documentary editors leverage clip property adjustments in DaVinci Resolve to enhance the storytelling and clarity of documentary projects. Learn how to perform subtle color corrections, speed changes, and transformations to improve visual continuity, clarify information, and maintain audience engagement throughout the documentary.
  • Commercial Production: Explore how commercial editors use clip property adjustments in DaVinci Resolve to create polished and visually compelling commercials that captivate audiences and promote products or brands effectively. Learn how to use color grading, speed changes, and transformations to enhance product shots, create dynamic transitions, and convey brand identity with precision and impact.

Section 5: Conclusion Adjusting clip properties in DaVinci Resolve is a powerful and versatile tool for enhancing your video projects with precision and control. By mastering the techniques and principles outlined in this guide, you can unlock a world of creative possibilities and elevate your editing prowess to new heights of excellence. Embrace the creative potential of clip property adjustments, and let DaVinci Resolve be your canvas for bringing your vision to life with precision, finesse, and impact.

Categories
How To Guides

Unlocking Creativity: A Comprehensive Guide to Using the Effects Library in DaVinci Resolve

Introduction: The Effects Library in DaVinci Resolve serves as a treasure trove of creative tools and resources, offering a vast array of effects, transitions, titles, and generators to enhance your video projects. Whether you’re a seasoned professional or a novice editor, understanding how to effectively navigate and utilize the Effects Library can elevate your editing skills and bring your creative vision to life. In this extensive guide, we’ll explore the intricacies of using the Effects Library in DaVinci Resolve, providing step-by-step tutorials, expert tips, and real-world examples to help you unleash your creativity and achieve stunning results.

Section 1: Exploring the Effects Library Before diving into the specifics of using the Effects Library, it’s important to understand its purpose and layout. This section provides an overview of the Effects Library in DaVinci Resolve, including its categories, subcategories, and organization features.

  • Understanding the Effects Library: Explore the concept of the Effects Library, which houses a diverse collection of effects, transitions, titles, and generators for enhancing your video projects. Learn how the Effects Library is organized into categories such as Effects, Transitions, Titles, and Generators, making it easy to locate specific types of effects.
  • Layout and Navigation: Familiarize yourself with the layout and navigation features of the Effects Library in DaVinci Resolve. Discover how to browse through the different categories and subcategories, preview effects and transitions, and access additional options and settings.

Section 2: Using Effects and Transitions The Effects Library in DaVinci Resolve offers a wide range of effects and transitions to add visual flair and polish to your video projects. This section provides step-by-step tutorials and demonstrations for using effects and transitions from the Effects Library.

  • Applying Effects: Learn how to apply effects to your video clips using the Effects Library in DaVinci Resolve. Explore techniques for browsing and previewing effects, applying effects to individual clips or entire tracks, and customizing effect parameters to achieve the desired look and feel.
  • Adding Transitions: Discover how to add transitions between video clips using the Transitions category in the Effects Library. Learn about different types of transitions, such as cuts, fades, wipes, and dissolves, and explore techniques for applying transitions, adjusting duration and timing, and customizing transition properties.

Section 3: Creating Titles and Graphics In addition to effects and transitions, the Effects Library in DaVinci Resolve also offers a variety of tools for creating titles, graphics, and other visual elements. This section delves into techniques for using titles and generators from the Effects Library.

  • Designing Titles: Learn how to create custom titles and text elements using the Titles category in the Effects Library. Explore techniques for choosing and customizing title templates, adding text, adjusting font styles and colors, and animating title elements for dynamic visual impact.
  • Generating Graphics: Discover how to use generators from the Effects Library to create custom graphics and visual elements for your video projects. Learn how to add shapes, backgrounds, and other graphic elements to your timeline, and explore techniques for customizing properties such as size, color, and opacity.

Section 4: Real-World Applications and Case Studies Gain inspiration and insight from real-world examples and case studies that demonstrate the creative potential and practical applications of the Effects Library in DaVinci Resolve. This section showcases innovative effects, transitions, titles, and generators employed in diverse editing projects.

  • Narrative Filmmaking: Explore how filmmakers use effects and transitions from the Effects Library to enhance the storytelling and visual aesthetics of narrative film projects. Learn how to create mood and atmosphere, convey emotions, and guide the viewer’s attention through creative use of effects and transitions.
  • Documentary Editing: Discover how documentary editors leverage titles and graphics from the Effects Library to convey information, add context, and enhance the storytelling in documentary projects. Learn how to create lower thirds, captions, and other informational graphics, and explore techniques for integrating titles seamlessly into documentary edits.
  • Commercial Production: Explore how commercial editors use effects and transitions from the Effects Library to create polished and engaging commercials that captivate audiences. Learn how to add visual flair, highlight product features, and create eye-catching transitions that enhance the commercial appeal of advertising projects.

Section 5: Conclusion The Effects Library in DaVinci Resolve is a powerful and versatile tool for enhancing your video projects with creative effects, transitions, titles, and graphics. By mastering the techniques and principles outlined in this guide, you can unlock a world of creative possibilities and elevate your editing prowess to new heights of excellence. Embrace the creative potential of the Effects Library, and let DaVinci Resolve be your canvas for bringing your vision to life with precision, finesse, and impact.

Categories
How To Guides

Mastering Media Management: A Comprehensive Guide to Managing Media in the Media Pool of DaVinci Resolve

Introduction: Efficient media management is the backbone of any successful video editing workflow. DaVinci Resolve offers a robust set of tools for managing media assets within its Media Pool, providing editors with the means to organize, import, categorize, and manipulate their media with precision and efficiency. In this comprehensive guide, we will delve into the intricacies of managing media in the Media Pool of DaVinci Resolve, offering detailed tutorials, expert tips, and real-world examples to help you optimize your editing workflow and achieve professional results.

Section 1: Understanding the Media Pool Before diving into the specifics of managing media in the Media Pool, it’s essential to understand its role and functionality within DaVinci Resolve. This section provides an overview of the Media Pool, including its purpose, layout, and organizational features.

  • Defining the Media Pool: Explore the concept of the Media Pool in DaVinci Resolve, which serves as the central hub for all media assets used in your editing projects. Understand how the Media Pool allows you to import, organize, categorize, and manage various types of media, including video clips, audio files, images, and more.
  • Layout and Organization: Familiarize yourself with the layout and organization features of the Media Pool. Learn about the different tabs and views available in the Media Pool, such as the List View and Thumbnail View, as well as options for organizing media assets into bins, folders, and smart bins.

Section 2: Importing Media into the Media Pool The first step in managing media in the Media Pool is importing your media assets into DaVinci Resolve. This section provides step-by-step tutorials and demonstrations for importing media into the Media Pool.

  • Importing Media Files: Learn how to import media files into the Media Pool from various sources, including your computer’s hard drive, external storage devices, and network drives. Explore techniques for importing individual files, entire folders, and media from other projects.
  • Supported Media Formats: Discover the supported media formats in DaVinci Resolve and learn how to ensure compatibility when importing media into the Media Pool. Understand the importance of using supported codecs, file formats, and resolutions to avoid playback issues and ensure optimal performance.

Section 3: Organizing and Managing Media Assets Once your media assets are imported into the Media Pool, it’s essential to organize and manage them effectively to streamline your editing workflow. This section delves into techniques for organizing and managing media assets in the Media Pool.

  • Creating Bins and Folders: Learn how to create bins and folders in the Media Pool to organize and categorize your media assets. Explore techniques for creating nested bins, renaming bins, and organizing media assets hierarchically for easy access and retrieval.
  • Using Smart Bins: Discover how to use smart bins in DaVinci Resolve to automatically categorize and organize media assets based on predefined criteria. Learn how to set up smart bin rules and filters to automatically sort media assets by attributes such as file type, duration, resolution, and more.
  • Applying Metadata and Keywords: Explore techniques for applying metadata and keywords to your media assets to improve organization and searchability. Learn how to add metadata tags, descriptions, and other annotations to your media assets, and discover how to use keyword tags to categorize and label media assets for easy retrieval.

Section 4: Editing and Manipulating Media Assets In addition to organizing and managing media assets, the Media Pool in DaVinci Resolve also provides tools for editing and manipulating your media with precision and efficiency. This section explores techniques for editing and manipulating media assets in the Media Pool.

  • Trimming and Splitting Clips: Learn how to trim and split clips directly within the Media Pool to prepare them for editing in the timeline. Explore techniques for setting in and out points, trimming clip boundaries, and splitting clips into segments for further manipulation.
  • Previewing and Scrubbing Media: Discover how to preview and scrub through media assets in the Media Pool to quickly locate specific frames or moments within your footage. Learn how to use the playback controls and scrubbing tools to navigate through your media assets with precision and efficiency.
  • Renaming and Managing Clips: Explore techniques for renaming and managing clips in the Media Pool to maintain a clean and organized project structure. Learn how to rename clips, delete unused media, and manage media file paths to ensure project integrity and compatibility.

Section 5: Real-World Applications and Case Studies Gain inspiration and insight from real-world examples and case studies that demonstrate the practical applications of managing media in the Media Pool of DaVinci Resolve. This section showcases innovative media management techniques employed in diverse editing projects.

  • Narrative Filmmaking: Explore how filmmakers use advanced media management techniques in DaVinci Resolve to organize and manage media assets for narrative film projects. Learn how to categorize footage by scene, character, or location, and discover techniques for creating a streamlined editing workflow that enhances storytelling.
  • Documentary Editing: Discover how documentary filmmakers leverage media management tools in DaVinci Resolve to efficiently manage vast amounts of footage and archival material. Learn how to organize interviews, B-roll footage, and other assets by topic, subject, or theme, and explore techniques for creating compelling documentaries that inform and inspire viewers.
  • Commercial Production: Explore how commercial editors use media management techniques in DaVinci Resolve to organize and manage media assets for commercial projects. Learn how to categorize product shots, graphics, and other assets by category or campaign, and discover techniques for creating polished commercial edits that captivate audiences.

Section 6: Conclusion Effective media management is essential for a smooth and efficient editing workflow, and mastering the art of managing media in the Media Pool of DaVinci Resolve is key to achieving success in your editing projects. By mastering the techniques and principles outlined in this guide, you can unlock a world of creative possibilities and elevate your editing prowess to new heights of excellence. Embrace the power of media management tools in DaVinci Resolve, and let them be your allies in organizing and managing media assets with precision, efficiency, and creativity.