LabVIEW, celebrated for its intuitive graphical programming interface, offers a robust set of tools and functionalities to streamline application development across various domains. Among these tools, error handling mechanisms stand out as critical components that enable developers to detect, propagate, and handle errors gracefully. In this extensive guide, we’ll delve into the intricacies of implementing error handling in LabVIEW, exploring techniques for detecting errors, propagating errors, and implementing robust error recovery strategies.
Understanding Error Handling in LabVIEW:
Before diving into practical applications, let’s establish a clear understanding of error handling in LabVIEW:
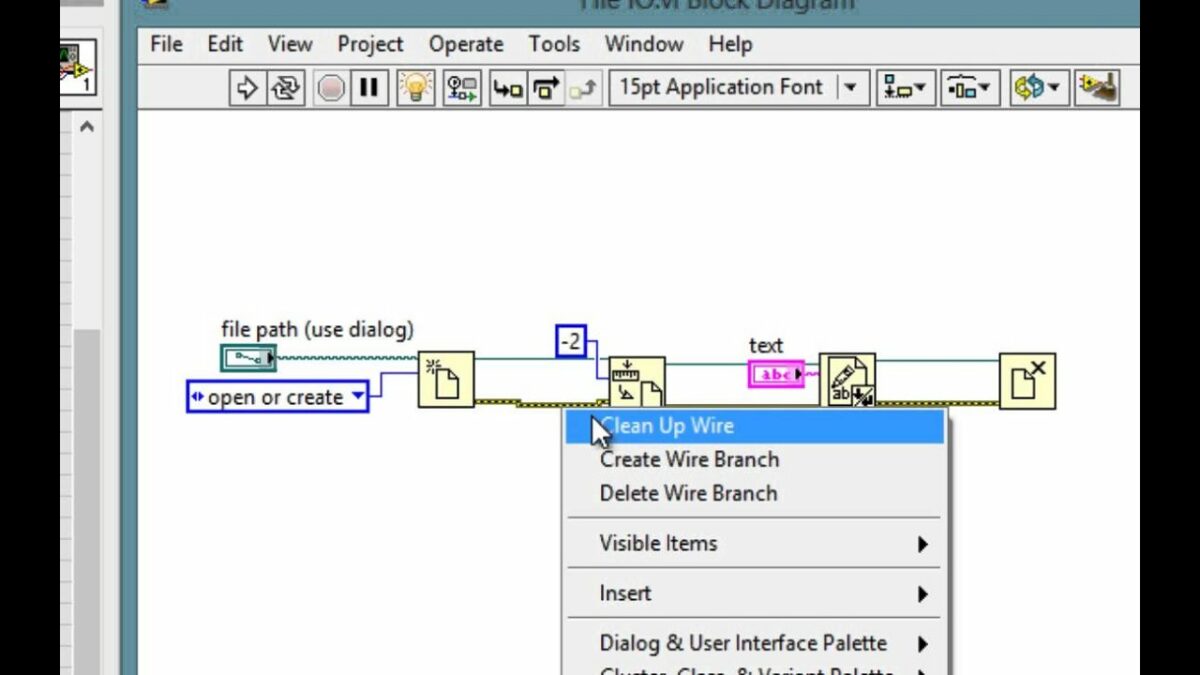
- Error Clusters: Error handling in LabVIEW revolves around the concept of error clusters, which are special data structures used to convey error information between nodes and subVIs. An error cluster typically consists of an error code, error source, and error message, providing valuable context about the nature and origin of the error.
- Error Propagation: Error propagation involves passing error clusters between nodes and subVIs to propagate error information up the call chain. When an error occurs within a VI or subVI, it can be propagated to the calling VI or subVI, allowing higher-level components to handle or respond to the error appropriately.
- Error Handling Nodes: LabVIEW provides a variety of built-in error handling nodes and functions, such as “Error Handler”, “Error Cluster Constant”, “Error Cluster To String”, and “Error Code (Hex)”, for working with error clusters. These nodes allow developers to manipulate error clusters, extract error information, and implement custom error handling logic.
Implementing Error Handling in LabVIEW: Step-by-Step Guide:
Now, let’s explore the practical aspects of implementing error handling in LabVIEW:
- Error Cluster Wiring: Begin by ensuring that error clusters are properly wired between nodes and subVIs within your LabVIEW application. Connect the error output terminals of nodes that can produce errors to the error input terminals of subsequent nodes or subVIs to propagate error information.
- Error Checking: Implement error checking logic within each node or subVI to detect and handle errors as they occur. Use conditional structures, such as “Case Structure” or “Event Structure”, to check for error conditions and branch execution paths based on the presence or absence of errors.
- Error Handling: Handle errors appropriately within your LabVIEW application based on the severity and impact of the error. Depending on the context and requirements of your application, you may choose to log errors to a file, display error messages to the user, retry failed operations, or gracefully terminate the application.
- Error Propagation: Propagate errors up the call chain to higher-level components or calling VIs to ensure that errors are handled at the appropriate level of abstraction. Use error clusters to pass error information between VIs, allowing higher-level components to respond to errors and take corrective actions as needed.
- Custom Error Handling: Implement custom error handling routines or subVIs to encapsulate error recovery strategies and promote code reuse. Define standardized error handling interfaces and conventions within your LabVIEW applications to facilitate error detection, propagation, and recovery across modules and subsystems.
Best Practices for Error Handling in LabVIEW:
To maximize the effectiveness of error handling in your LabVIEW applications, consider the following best practices:
- Consistent Error Handling: Adopt consistent error handling practices and conventions across your LabVIEW applications to ensure uniformity and maintainability. Define standardized error codes, messages, and recovery strategies to streamline error detection and resolution.
- Error Logging and Reporting: Implement robust error logging and reporting mechanisms to record error information for diagnostic purposes. Log error details, including error codes, timestamps, and contextual information, to facilitate troubleshooting and debugging of LabVIEW applications.
- Graceful Degradation: Design LabVIEW applications to gracefully degrade in the presence of errors, allowing critical functionality to continue operating despite non-fatal errors. Implement fallback mechanisms, failover strategies, or recovery procedures to mitigate the impact of errors on application performance and usability.
- Unit Testing and Validation: Validate error handling logic through comprehensive unit testing and validation procedures to ensure that errors are detected, propagated, and handled correctly under various scenarios. Use automated testing frameworks, mock objects, and simulation tools to simulate error conditions and verify error handling behavior.
- Documentation and Training: Document error handling procedures, guidelines, and best practices in project documentation and training materials to educate developers and stakeholders. Provide clear instructions, examples, and case studies to demonstrate proper error handling techniques and promote adherence to established standards.
Conclusion:
Error handling is a critical aspect of LabVIEW programming, enabling developers to detect, propagate, and handle errors effectively in their applications. By mastering the techniques for implementing error handling in LabVIEW, developers can design robust, reliable, and maintainable applications that meet the demands of modern engineering and scientific workflows.
Through this comprehensive guide, we have explored the fundamentals of error handling in LabVIEW, including practical implementation steps, best practices, and guidelines for effective error detection, propagation, and recovery. By following these guidelines and leveraging LabVIEW’s built-in error handling capabilities, developers can design resilient, fault-tolerant applications that deliver exceptional performance and reliability in diverse environments.