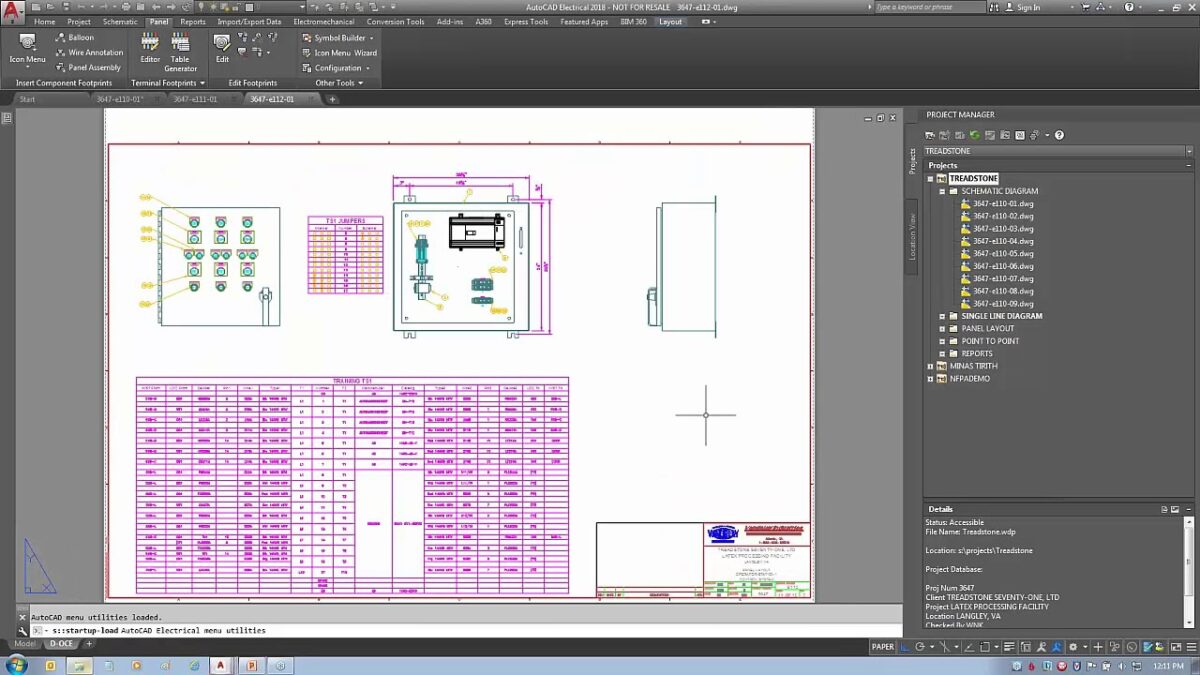
Project management is a critical aspect of electrical design, encompassing various tasks such as organizing project files, managing design elements, and collaborating with team members. In Autodesk Electrical, the Project Manager tool provides a centralized platform for managing project data, facilitating efficient workflows, and ensuring project organization and consistency. In this comprehensive guide, we will explore the intricacies of using the Project Manager in Autodesk Electrical, providing detailed instructions, best practices, and expert tips to help you master this essential aspect of electrical design.
Understanding the Significance of the Project Manager
The Project Manager in Autodesk Electrical offers several key benefits for electrical design projects:
- Organization: The Project Manager provides a centralized location for organizing project files, drawings, and related documents, enhancing project organization and efficiency.
- Navigation: Users can easily navigate between project folders, drawings, and design elements, streamlining access to project data and resources.
- Collaboration: The Project Manager facilitates collaboration among design team members by enabling file sharing, version control, and access management.
Using the Project Manager in Autodesk Electrical
Now, let’s delve into the step-by-step process of using the Project Manager within Autodesk Electrical:
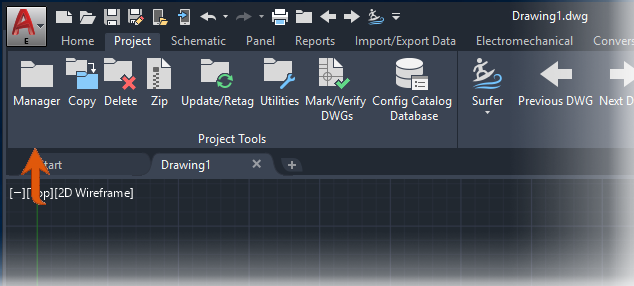
Step 1: Accessing the Project Manager
- Menu Navigation: Navigate to the “Project Manager” menu or toolbar within Autodesk Electrical to access the Project Manager tool.
- Workspace Configuration: Set up the workspace to display the Project Manager interface, which typically includes options for project navigation and file management.
Step 2: Creating and Organizing Project Folders
- New Project: Create a new project folder within the Project Manager to organize project files and drawings.
- Folder Structure: Establish a folder structure that reflects the hierarchy and organization of the design project, such as dividing folders by project phase, discipline, or subsystem.
Step 3: Managing Project Files
- Adding Files: Add project files, drawings, and documents to the appropriate folders within the Project Manager.
- File Naming: Adopt consistent file naming conventions to ensure clarity and organization within the project folders.
Step 4: Navigating Project Data
- Drawing Navigation: Navigate between drawings and design elements within the project folders using the Project Manager interface.
- Preview: Preview drawings and documents within the Project Manager to quickly review content and identify specific files.
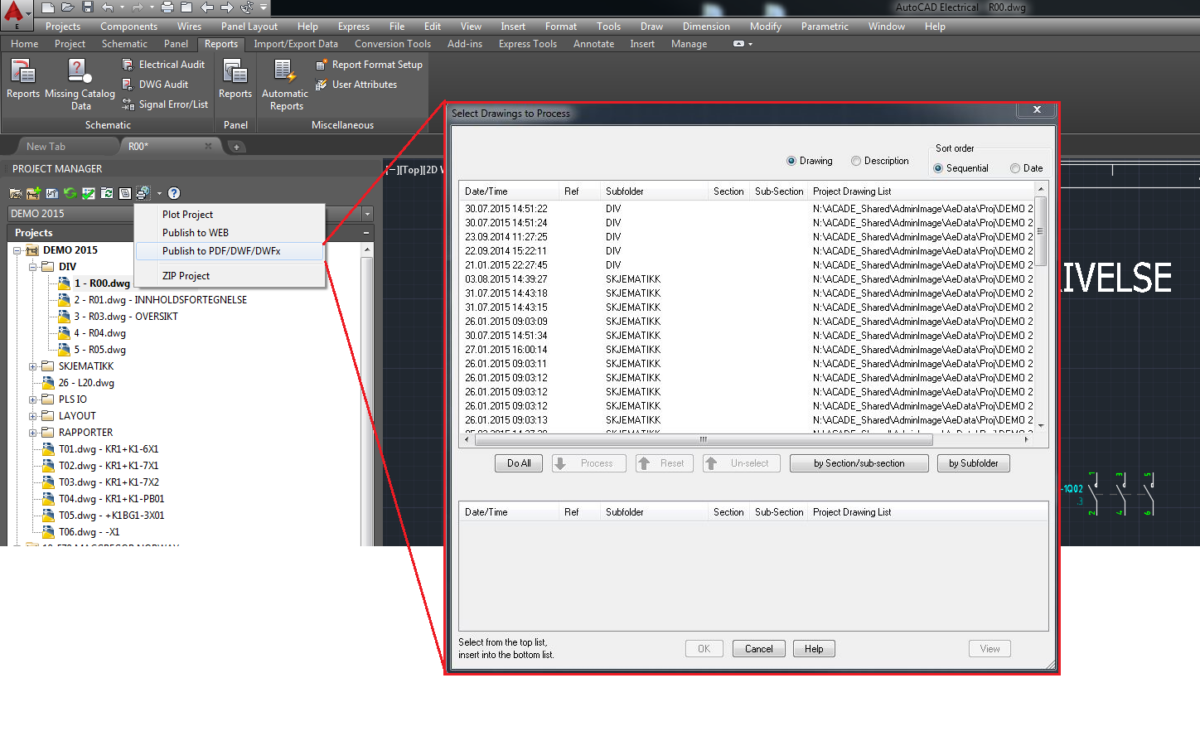
Step 5: Collaborating with Team Members
- File Sharing: Share project files and drawings with team members, engineers, and stakeholders using collaboration features within Autodesk Electrical.
- Version Control: Implement version control procedures to track changes, revisions, and updates to project files and drawings.
Best Practices for Using the Project Manager
To optimize the use of the Project Manager in Autodesk Electrical, consider the following best practices:
Organization and Structure
- Folder Hierarchy: Establish a clear and intuitive folder hierarchy within the Project Manager to facilitate easy navigation and retrieval of project data.
- File Naming Conventions: Adopt standardized file naming conventions to ensure consistency and clarity across project folders and files.
Collaboration and Communication
- Team Coordination: Coordinate with design team members, engineers, and stakeholders to establish collaboration protocols and communication channels within the Project Manager.
- Documentation Sharing: Share project documentation, drawings, and reports within the Project Manager to facilitate collaboration and feedback.
Training and Education
- Training Programs: Provide training and education to design team members on the use of the Project Manager tool, including navigation, file management, and collaboration features.
- Documentation: Document project management procedures, guidelines, and best practices for reference by design team members.
Conclusion
The Project Manager in Autodesk Electrical is a powerful tool for organizing, managing, and collaborating on electrical design projects. By following the steps outlined in this guide and adhering to best practices, you can master the use of the Project Manager, streamline project workflows, and ensure organization and consistency across project files and documents. Whether you’re working on small-scale projects or large-scale design initiatives, proficiency in using the Project Manager will enable you to optimize project management processes, enhance collaboration, and deliver high-quality electrical designs that meet project requirements and exceed client expectations.