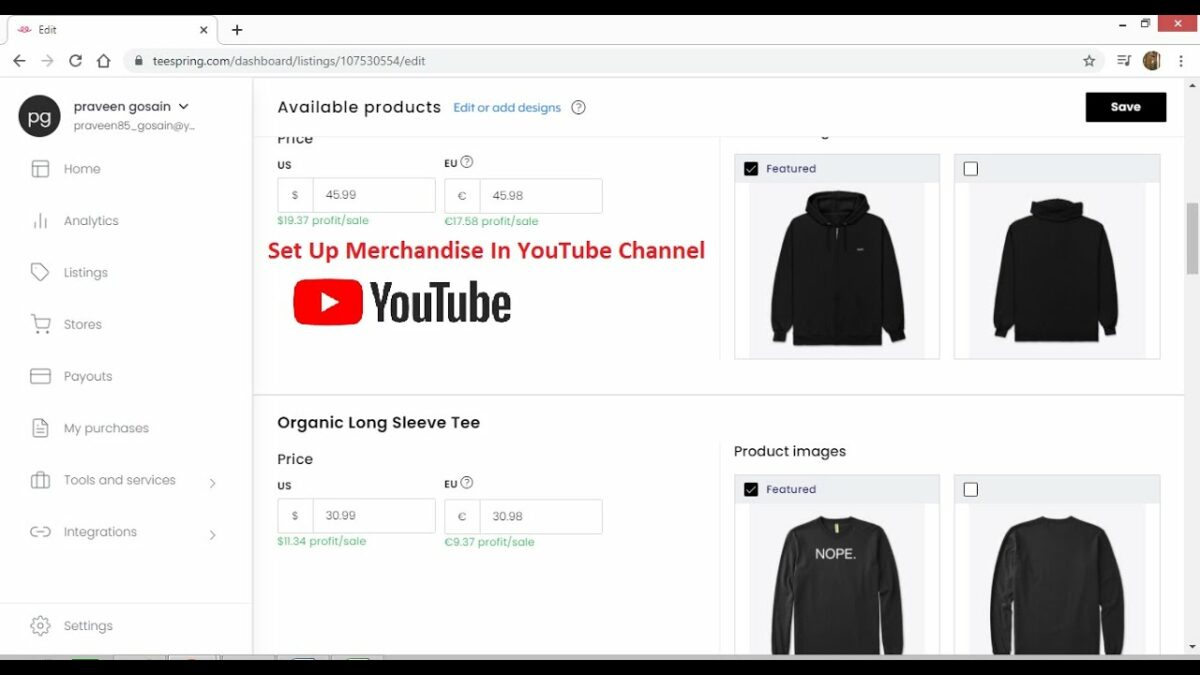
In the dynamic landscape of online content creation, diversifying revenue streams is essential for creators seeking to monetize their channels and build sustainable income streams. Selling merchandise offers creators a unique opportunity to engage with their audience, showcase their brand, and generate additional revenue beyond traditional advertising and sponsorship deals. Teespring, a leading platform for creating and selling custom merchandise, provides creators with the tools and resources needed to design, promote, and sell branded products to their audience directly from their YouTube channel. Whether you’re a seasoned content creator, aspiring YouTuber, or business leveraging YouTube as a marketing platform, understanding how to sell merchandise on your YouTube channel using Teespring is essential for maximizing revenue and fostering audience engagement.
In this extensive guide, we will embark on a comprehensive journey through the intricacies of selling merchandise on your YouTube channel using Teespring. From understanding the benefits of selling merchandise to setting up your Teespring store and promoting your products, this guide will equip you with the knowledge and tools needed to leverage merchandising effectively and achieve success on YouTube.
Understanding the Benefits of Selling Merchandise
Before delving into the process of selling merchandise on your YouTube channel using Teespring, it’s essential to understand the benefits that merchandising can offer to creators and their audience:
- Diversified Revenue Stream: Selling merchandise provides creators with an additional source of revenue beyond traditional advertising and sponsorship deals. Creators can generate income from product sales, complementing their existing revenue streams and providing a more stable income.
- Audience Engagement and Brand Building: Merchandise allows creators to engage with their audience on a deeper level and showcase their brand identity. Branded products create a sense of community among fans and serve as a tangible representation of the creator’s content and values.
- Customization and Creativity: Platforms like Teespring offer creators the ability to design custom merchandise tailored to their audience’s interests and preferences. Creators can unleash their creativity and design unique products, including apparel, accessories, and home goods, that resonate with their fan base.
- Promotional Opportunities: Merchandise serves as a promotional tool for creators, helping to increase brand visibility and reach a wider audience. Fans who wear or use branded products become walking advertisements for the creator, attracting new viewers and driving traffic to their channel.
Steps to Selling Merchandise on Your YouTube Channel Using Teespring
Now that we understand the benefits of selling merchandise, let’s explore the steps to setting up your Teespring store and selling merchandise on your YouTube channel:
1. Create a Teespring Account
- Sign Up for Teespring: Visit the Teespring website and sign up for an account using your email address or social media credentials. Follow the prompts to create your account and verify your email address.
- Set Up Your Profile: Complete your Teespring profile by providing information about yourself, including your name, location, and payment preferences. Customize your profile with a profile picture and bio to personalize your brand identity.
2. Design Your Merchandise
- Explore Product Options: Browse the range of products available on Teespring, including apparel, accessories, home goods, and more. Consider the preferences and interests of your audience when selecting products to offer in your store.
- Create Designs: Use Teespring’s design tools to create custom designs for your merchandise, including graphics, logos, slogans, and artwork. Experiment with different design elements and styles to create products that resonate with your audience.
- Preview and Customize: Preview your designs on different product mockups to see how they will look when printed. Customize product colors, sizes, and styles to offer a variety of options for your audience.
3. Set Up Your Teespring Store
- Create Your Store: Set up your Teespring store by selecting a store name, URL, and branding elements. Customize your store layout and design to match your channel’s branding and aesthetic.
- Organize Your Products: Organize your merchandise into categories and collections to make it easy for viewers to browse and discover products in your store. Use descriptive titles and thumbnails to showcase each product effectively.
4. Integrate Teespring with Your YouTube Channel
- Access YouTube Studio: Log in to your YouTube account and access YouTube Studio, the dashboard for managing your channel settings and content.
- Navigate to Merchandise Shelf: In YouTube Studio, navigate to the “Monetization” tab and select “Merchandise” to access settings related to your Teespring store.
- Connect Your Teespring Account: Follow the prompts to connect your Teespring account to your YouTube channel. Verify your account details and grant permission for YouTube to access your Teespring store.
5. Promote Your Merchandise
- Announce Merchandise Launch: Inform your audience about the launch of your merchandise store through video announcements, community posts, and social media. Create excitement and anticipation around your products to encourage sales.
- Showcase Products in Videos: Showcase your merchandise in your YouTube videos by wearing or using products, featuring them in background settings, and incorporating them into your content naturally. Highlight the benefits and features of each product to entice viewers to make a purchase.
6. Monitor Sales and Analytics
- Track Sales Performance: Monitor sales and analytics data in your Teespring dashboard to track the performance of your merchandise store. Analyze sales trends, revenue, and customer behavior to identify opportunities for growth and optimization.
- Optimize Your Merchandise: Use insights from sales data to optimize your merchandise offerings, pricing, and marketing strategies. Experiment with different product designs, pricing tiers, and promotional tactics to maximize sales and revenue.
Best Practices and Considerations
As you set up your Teespring store and start selling merchandise on your YouTube channel, keep the following best practices and considerations in mind:
- Quality and Branding: Maintain high-quality standards for your merchandise and ensure that products are printed and shipped promptly to customers. Invest in branding and packaging to create a premium experience for customers and reinforce your brand identity.
- Engage with Your Audience: Engage with your audience regularly to promote your merchandise and encourage sales. Create content that showcases your products and highlights their features, benefits, and uses.
- Offer Exclusive Products: Create exclusive products and limited-edition collections to incentivize purchases and reward loyal fans. Offer special discounts, promotions, and giveaways to encourage repeat purchases and foster customer loyalty.
- Monitor Feedback and Reviews: Monitor customer feedback and reviews to identify areas for improvement and address any issues or concerns promptly. Use feedback to refine your product offerings, improve customer satisfaction, and build a positive reputation for your brand.
Conclusion
Selling merchandise on your YouTube channel using Teespring offers creators a powerful tool for engaging with their audience, generating additional revenue, and building a thriving brand. By understanding the benefits of selling merchandise, setting up your Teespring store, promoting your products, and engaging with your audience effectively, you can leverage merchandising to maximize revenue and create a lasting impact on YouTube.
Remember to prioritize quality, branding, and customer satisfaction when selling merchandise, and always strive to create products that resonate with your audience and reflect your brand identity. With dedication, creativity, and strategic execution, you can build a successful merchandise business on YouTube and unlock new opportunities for growth and monetization.
So, create your Teespring store, design your merchandise, and start selling products on your YouTube channel today. With the right approach and mindset, you can leverage merchandising to elevate your content, engage with your audience, and achieve success on YouTube. Happy selling!


