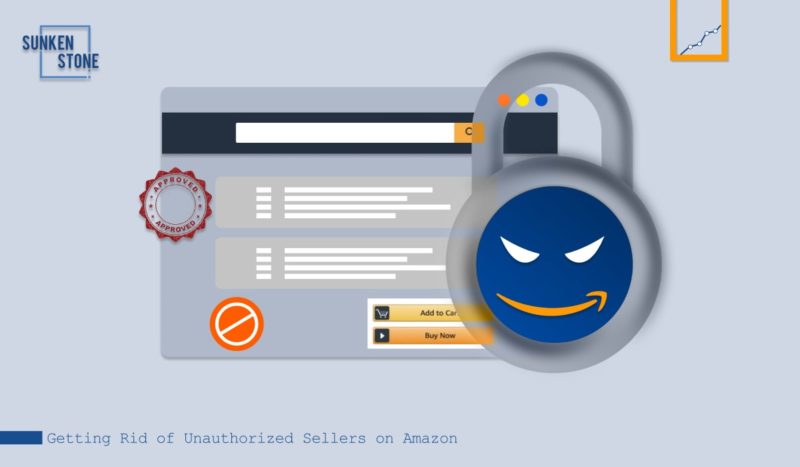
Categories
How To Guides Windows 10

Bridging the Eras: A Comprehensive Guide on How to Make Windows 10 Look and Feel Like Windows 7

Introduction:

Windows 10, Microsoft’s modern operating system, introduced numerous advancements in functionality and design. However, for users who have a fondness for the classic Windows 7 interface, there’s a desire to recapture the look and feel of that era. In this extensive guide, we will explore the intricacies of transforming Windows 10 to resemble Windows 7, providing users with a step-by-step walkthrough, insights into the benefits of this customization, and tips for achieving a nostalgic and familiar computing experience.

Understanding the Nostalgia for Windows 7:

Windows 7, known for its simplicity, familiarity, and stability, remains a beloved operating system among many users. While Windows 10 offers advanced features and security enhancements, some users prefer the classic aesthetic and user interface of Windows 7. Transforming Windows 10 to look and feel like its predecessor can provide a sense of nostalgia and comfort for those who appreciate the earlier design.

Methods to Make Windows 10 Look and Feel Like Windows 7:

Customizing Windows 10 to resemble Windows 7 involves a combination of visual adjustments, tweaks, and third-party tools. The following methods outline how to achieve this nostalgic transformation seamlessly:

Method 1: Classic Shell (Now Open-Shell)

  1. Download Open-Shell:
    • Visit the Open-Shell (formerly Classic Shell) website and download the application.
  2. Install Open-Shell:
    • Run the installer and follow the on-screen instructions to install Open-Shell.
  3. Configure Start Menu:
    • Open the Open-Shell settings and customize the Start Menu to resemble the classic Windows 7 Start Menu.
  4. Adjust Taskbar Settings:
    • Explore additional settings in Open-Shell to adjust the Taskbar appearance and behavior.

Method 2: Taskbar and Start Menu Properties

  1. Right-Click on the Taskbar:
    • Right-click on the taskbar and select “Taskbar settings.”
  2. Adjust Taskbar and Start Menu:
    • Customize the Taskbar and Start Menu settings to resemble Windows 7, including icon behaviors, transparency, and color.

Method 3: Windows Theme and Color Settings

  1. Open Settings:
    • Press “Windows key + I” to open the Settings app.
  2. Navigate to Personalization:
    • In the Settings app, select “Personalization.”
  3. Choose Themes:
    • Navigate to the “Themes” section and select a theme that resembles the Windows 7 interface.
  4. Adjust Colors:
    • Customize colors to match the Windows 7 color scheme for window borders, taskbar, and Start Menu.

Method 4: Icon Pack and System Icons

  1. Download Windows 7 Icon Pack:
    • Search for and download a Windows 7 icon pack from a trusted source.
  2. Apply Icon Pack:
    • Use a third-party tool or manually replace system icons with those from the Windows 7 icon pack.

Method 5: Window Borders and Title Bars

  1. Install Third-Party Themes:
    • Download and install third-party themes that replicate the window borders and title bars of Windows 7.
  2. Apply Theme:
    • Use a tool like UltraUXThemePatcher to apply the third-party theme.

Method 6: System Font and Text Size

  1. Open Settings:
    • Press “Windows key + I” to open the Settings app.
  2. Navigate to Ease of Access:
    • In the Settings app, select “Ease of Access.”
  3. Adjust Text Size:
    • Customize the text size to resemble the font size used in Windows 7.

Method 7: Disable Live Tiles and Cortana

  1. Right-Click on Start:
    • Right-click on the Start button and select “Unpin from Start” for Live Tiles.
  2. Configure Cortana:
    • If desired, configure or disable Cortana to resemble the classic Windows 7 desktop experience.

Considerations and Additional Tips:

  1. Backup Important Data:
    • Before making extensive changes, consider creating a backup or restore point in case any issues arise during customization.
  2. Check Third-Party Theme Compatibility:
    • Ensure that third-party themes and customization tools are compatible with your Windows 10 version to prevent system instability.
  3. Regularly Update Customization Tools:
    • If using third-party tools, check for updates regularly to ensure compatibility with Windows 10 updates.
  4. Explore Classic Wallpaper:
    • Search for classic Windows 7 wallpapers or themes to enhance the nostalgic visual experience.
  5. Community Forums and Discussions:
    • Engage with Windows 10 community forums and discussions to share experiences, discover additional customization tips, and troubleshoot any issues related to transforming Windows 10 to look and feel like Windows 7.

Conclusion:

Transforming Windows 10 to resemble Windows 7 is a nostalgic journey for users who appreciate the classic interface of the earlier operating system. By following the comprehensive methods outlined in this guide, users can effortlessly recapture the look and feel of Windows 7, creating a familiar and comforting computing environment. Embrace the versatility of Windows 10, explore customization possibilities, and immerse yourself in a digital experience that combines the best of both eras. Windows 10 is not just an operating system—it’s a canvas for personal expression and creativity, and transforming it into a Windows 7-like interface is a delightful way to bridge the past with the present.

Categories
How To Guides Windows 10

Crafting Your Textscape: A Comprehensive Guide on How to Change the Default Windows Font in Windows 10

Introduction:

Windows 10, Microsoft’s versatile operating system, provides users with a multitude of customization options to personalize their computing experience. Among these options is the ability to change the default Windows font, allowing users to create a unique and visually appealing textscape. In this extensive guide, we will delve into the intricacies of changing the default Windows font in Windows 10, providing users with a step-by-step walkthrough, insights into the benefits of font customization, and tips for achieving a more personalized and aesthetically pleasing digital environment.

Understanding the Impact of Font Customization:

Fonts play a crucial role in shaping the visual identity of the Windows interface. Changing the default Windows font can have several benefits, both in terms of aesthetics and usability:

  1. Personalization:
    • Changing the default font allows users to personalize their computing experience, creating a unique and visually appealing interface.
  2. Enhanced Readability:
    • Choosing a font that suits your preferences and enhances readability can contribute to a more comfortable and user-friendly experience.
  3. Visual Consistency:
    • Customizing the default font ensures visual consistency across different applications, providing a cohesive and harmonious appearance.
  4. Aesthetic Appeal:
    • Fonts have a significant impact on the overall aesthetic of the interface. Choosing a font that aligns with your design preferences contributes to a more visually pleasing environment.
  5. Usability for Accessibility:
    • Certain fonts are designed with accessibility in mind, offering improved legibility for users with visual impairments. Customizing the default font can enhance the overall usability of the system.

Methods to Change the Default Windows Font in Windows 10:

Windows 10 offers users multiple approaches to change the default font, providing flexibility based on individual preferences. The following methods outline how to customize the default Windows font seamlessly:

Method 1: Using Registry Editor

  1. Open Registry Editor:
    • Press “Windows key + R” to open the Run dialog.
    • Type “regedit” and press Enter to open the Registry Editor.
  2. Navigate to Font Settings:
    • In the Registry Editor, navigate to:
      HKEY_LOCAL_MACHINE\SOFTWARE\Microsoft\Windows NT\CurrentVersion\Fonts
  3. Modify Font Entries:
    • Locate the font entries, such as “Segoe UI (TrueType),” and double-click on them.
    • Change the font file name to the desired font. Ensure that the font file is installed on your system.
  4. Restart Your System:
    • Close the Registry Editor and restart your system for the changes to take effect.

Method 2: Using Control Panel

  1. Open Control Panel:
    • Press “Windows key + X” and select “Control Panel” from the context menu.
  2. Navigate to Font Settings:
    • In Control Panel, click on “Appearance and Personalization.”
  3. Choose Change Font Settings:
    • Click on “Fonts” to open the Fonts settings.
  4. Select Default Font:
    • In the Fonts window, select the desired font for various items, such as icons, menu, message box, etc.
  5. Apply Changes:
    • Click “Apply” and then “OK” to apply the changes.

Method 3: Using Third-Party Tools

  1. Download Font Management Tool:
    • Explore third-party font management tools that provide advanced customization options.
  2. Install and Configure:
    • Download and install the font management tool of your choice.
    • Use the tool’s interface to select and set the default Windows font.
  3. Follow Tool-Specific Instructions:
    • Refer to the documentation or user guide provided by the font management tool for specific instructions on changing the default font.

Considerations and Additional Tips:

  1. Backup Registry:
    • Before making changes in the Registry Editor, consider creating a backup to avoid potential issues. This ensures that you can restore the original settings if needed.
  2. Font File Compatibility:
    • Ensure that the font file you choose is compatible with Windows 10 and properly installed on your system.
  3. Test Readability:
    • After changing the default font, test the readability across various applications to ensure it meets your preferences and usability requirements.
  4. Restore Default Settings:
    • If you encounter issues or wish to revert to the default font, use the font settings in Control Panel to restore the original configurations.
  5. Explore Font Libraries:
    • Explore reputable font libraries to discover a wide range of fonts that suit your design preferences. Ensure that the chosen font supports the characters needed for your language.
  6. Community Forums and Discussions:
    • Engage with Windows 10 community forums and discussions to share experiences, discover additional font customization tips, and troubleshoot any issues related to changing the default Windows font.

Conclusion:

Changing the default Windows font in Windows 10 is a powerful customization that allows users to shape the visual identity of their digital environment. By following the comprehensive methods outlined in this guide, users can effortlessly create a more personalized, aesthetically pleasing, and readable interface. Embrace the versatility of Windows 10, explore font options that resonate with your preferences, and immerse yourself in a digital environment that truly reflects your style. Windows 10 is not just an operating system—it’s a canvas for personal expression and creativity, and changing the default Windows font is a key element in crafting your unique digital experience.

Categories
How To Guides Windows 10

Serenity in Silence: A Comprehensive Guide on How to Turn Off Notification and System Sounds in Windows 10

Introduction:

Windows 10, Microsoft’s feature-rich operating system, aims to provide users with a seamless and personalized computing experience. While notifications and system sounds are essential for keeping users informed, there are instances where turning them off becomes necessary for enhanced focus, productivity, or simply enjoying a quieter computing environment. In this extensive guide, we will explore the intricacies of turning off notification and system sounds in Windows 10, offering users a step-by-step walkthrough, insights into the benefits of sound customization, and tips for achieving a more serene and distraction-free digital experience.

Understanding the Need for Sound Customization:

Notifications and system sounds are designed to alert users to important events, updates, or system actions. However, there are scenarios where users may prefer a more muted environment, such as during meetings, while working on creative tasks, or simply when seeking a quieter computing experience. Here are some reasons why turning off notification and system sounds can be beneficial:

  1. Enhanced Focus:
    • Disabling sounds can contribute to enhanced focus, especially when working on tasks that require concentration or creative thinking.
  2. Reduced Distractions:
    • Eliminating notification sounds helps reduce distractions, allowing users to maintain a more peaceful and focused workflow.
  3. Privacy and Confidentiality:
    • Turning off sounds can be crucial for maintaining privacy, especially in shared or public spaces, where audible notifications may inadvertently disclose sensitive information.
  4. Customized User Experience:
    • Sound customization allows users to tailor their computing experience to their preferences, creating a more personalized and enjoyable digital environment.

Methods to Turn Off Notification and System Sounds in Windows 10:

Windows 10 provides users with versatile options to control and customize notification and system sounds. The following methods outline how to achieve a quieter computing environment seamlessly:

Method 1: Using Sound Settings

  1. Open Settings:
    • Press “Windows key + I” to open the Settings app.
  2. Navigate to System:
    • In the Settings app, select “System.”
  3. Choose Sound:
    • In the left sidebar, click on “Sound.”
  4. Adjust System Sounds:
    • Scroll down to the “Advanced sound options” section.
    • Adjust the master volume slider to control the overall system volume.
    • Toggle off the switch for “Play a sound when a notification arrives” to turn off notification sounds.
  5. Customize App Notifications:
    • Click on “App volume and device preferences” to customize sound settings for individual apps.

Method 2: Using Notification Settings

  1. Open Settings:
    • Press “Windows key + I” to open the Settings app.
  2. Navigate to System:
    • In the Settings app, select “System.”
  3. Choose Notifications & actions:
    • In the left sidebar, click on “Notifications & actions.”
  4. Toggle Off Notifications:
    • Toggle off the switch for “Get notifications from apps and other senders” to globally turn off notifications.
  5. Customize App Notifications:
    • Below, customize notification settings for individual apps by toggling their switches.

Method 3: Using Control Panel

  1. Open Control Panel:
    • Press “Windows key + X” and select “Control Panel” from the context menu.
  2. Navigate to Sound Settings:
    • In Control Panel, click on “Hardware and Sound.”
  3. Choose Sound:
    • Click on “Sound” to open the Sound settings.
  4. Adjust System Sounds:
    • In the “Sounds” tab, scroll through the Program Events list.
    • Select individual events and choose “(None)” from the Sounds dropdown menu to turn off specific system sounds.
    • Click “Apply” and “OK” to save changes.

Considerations and Additional Tips:

  1. Selective Sound Disabling:
    • While turning off all sounds might be suitable for some scenarios, users can selectively disable sounds for specific events or applications, maintaining essential alerts.
  2. Scheduled Sound Settings:
    • Consider using scheduled sound settings to automate sound adjustments during specific times, ensuring a seamless transition between audible and silent modes.
  3. Accessibility Features:
    • Explore Windows 10 accessibility features, such as visual alerts or subtitles, as alternatives to audible notifications.
  4. Third-Party Apps:
    • Users seeking more advanced sound management options can explore third-party apps that provide extensive control over notification and system sounds.
  5. Regularly Review Settings:
    • Periodically review your sound settings to ensure they align with your current preferences and computing needs.
  6. Community Forums and Discussions:
    • Engage with Windows 10 community forums and discussions to share experiences, discover additional sound customization tips, and troubleshoot any issues related to turning off notification and system sounds.

Conclusion:

Turning off notification and system sounds in Windows 10 is a practical customization that allows users to create a more serene and focused computing environment. By following the comprehensive methods outlined in this guide, users can effortlessly tailor their sound settings to align with their preferences and specific scenarios. Embrace the versatility of Windows 10, achieve a more peaceful digital experience, and immerse yourself in a distraction-free environment. Windows 10 is not just an operating system—it’s a platform that adapts to your needs, offering a world of customization possibilities for a more enjoyable and personalized computing journey.