Introduction
QuickBooks offers a robust platform for managing your finances, but its true power lies in customization. Templates, the backbone of your QuickBooks documents, can be tailored to perfectly reflect your business’s unique style and information needs. This in-depth guide will walk you through the process of customizing various QuickBooks templates, from invoices and estimates to sales receipts and beyond.
Understanding QuickBooks Templates
Before diving into customization, let’s clarify what templates are and their significance:
- What are templates? Pre-designed formats for creating documents like invoices, estimates, sales receipts, and more.
- Why customize? To enhance professionalism, improve efficiency, and accurately reflect your brand identity.
- Template types: QuickBooks offers a variety of templates, including standard, custom, and imported.
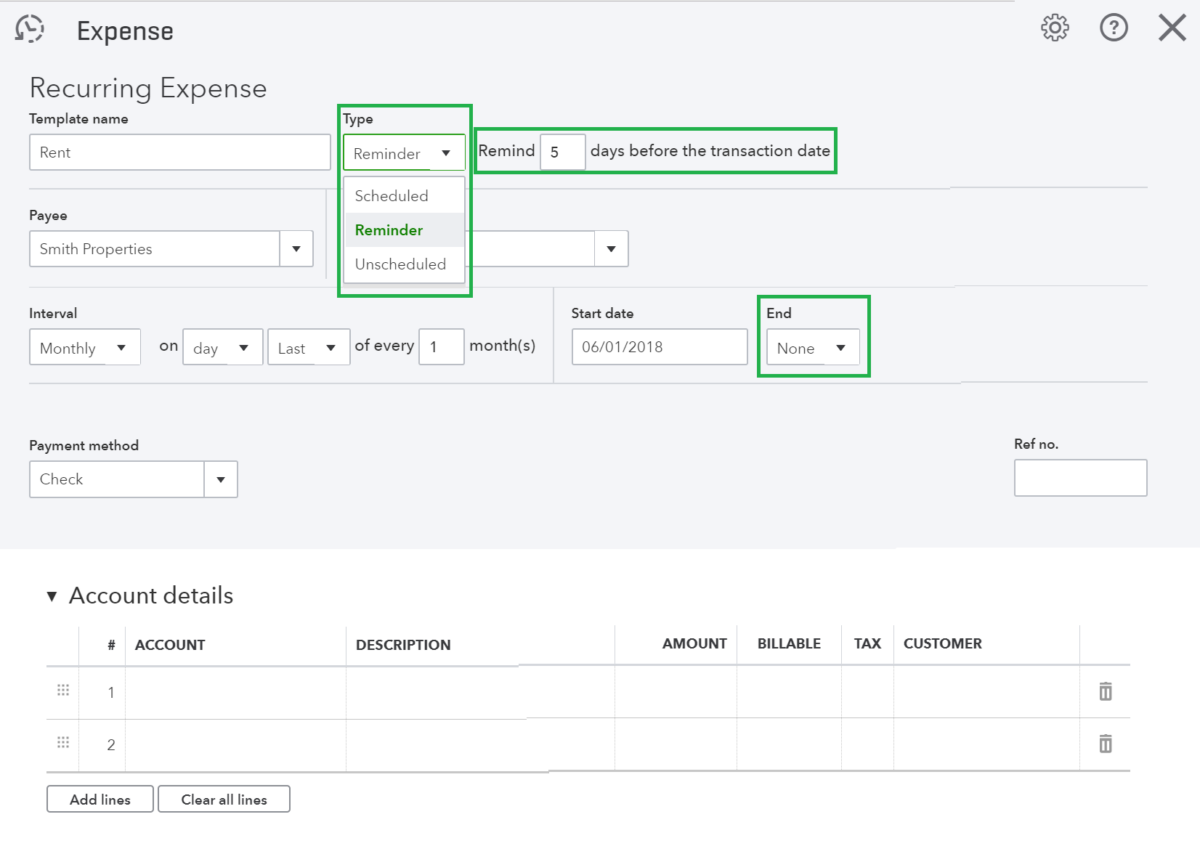
Customizing Invoices, Estimates, and Sales Receipts
These are the most commonly customized templates. Here’s a detailed breakdown:
QuickBooks Online
- Access Custom Form Styles: Navigate to the Gear icon, then Account and Settings. Under the Sales tab, click Customize Look and Feel.
- Create a New Style: Click the New Style button and choose the document type (invoice, estimate, or sales receipt).
- Design Tab: Customize the layout, colors, fonts, and logo.
- Content Tab: Adjust the information displayed on the document.
- Email Tab: Customize the email content and appearance.
- Save and Apply: Save your template and assign it as a default or for specific customers.
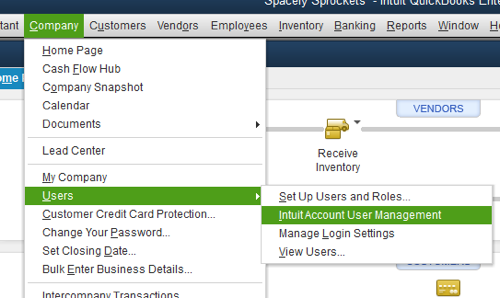
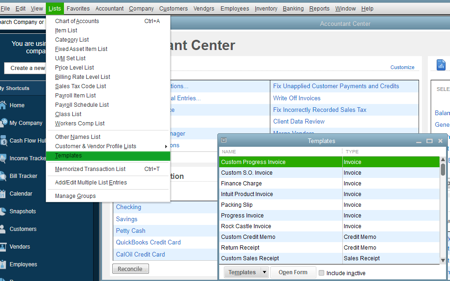
QuickBooks Desktop
- Access Templates: The exact steps vary based on your QuickBooks Desktop version. Generally, you’ll find template options under the File or Edit menu.
- Create a New Template: Start with a blank template or modify an existing one.
- Customize Layout: Use the template editor to adjust margins, columns, and sections.
- Add Fields: Insert QuickBooks fields to automatically populate data.
- Design Elements: Incorporate your logo, company information, and custom graphics.
- Save and Assign: Save the template and assign it to specific customers or as a default.
Advanced Customization Techniques
For more intricate designs, explore these options:
Using Custom Graphics
- Create High-Quality Images: Design logos, headers, and footers that align with your brand.
- Optimize Image Size: Ensure images load quickly without affecting document size.
- Proper Placement: Position graphics strategically for visual appeal and readability.
Conditional Formatting
- Highlight Specific Information: Use conditional formatting to emphasize important details.
- Create Rules: Define conditions based on data values (e.g., overdue invoices).
- Enhance Readability: Improve document clarity with visual cues.
Custom Fields
- Gather Additional Data: Create custom fields to collect specific information.
- Enhance Reporting: Use custom fields for better data analysis.
- Integrate with Other Systems: Connect custom fields to external databases.
Tips for Effective Template Customization
- Maintain Consistency: Use consistent fonts, colors, and styling across all templates.
- Prioritize Readability: Ensure text and graphics are easy to read and understand.
- Test Thoroughly: Print and preview templates to identify any issues.
- Backup Templates: Regularly save template backups to prevent data loss.
- Leverage Online Resources: Explore third-party templates and customization tools.
Beyond Invoices, Estimates, and Sales Receipts
QuickBooks offers templates for various other documents, such as:
- Purchase Orders: Customize layouts for efficient supplier management.
- Checks: Create professional-looking checks with your company information.
- Statements: Design customer-friendly statements that clearly outline balances.
- Reports: Customize report formats for better data visualization.
Troubleshooting Common Issues
- Template Not Displaying Correctly: Check printer settings, browser compatibility, and template file integrity.
- Custom Fields Missing Data: Verify data accuracy, field mapping, and template design.
- Slow Performance: Optimize image sizes, limit complex formatting, and update QuickBooks.
Conclusion
Mastering QuickBooks template customization is a game-changer for businesses seeking to enhance professionalism and efficiency. By following the guidelines outlined in this comprehensive guide, you can create templates that perfectly align with your brand identity and streamline your financial operations.