System Restore is a valuable feature in Windows 8 that allows users to restore their computer’s system files and settings to a previous state, effectively reversing changes that may have caused system instability or other issues. Whether you’ve installed a problematic program, encountered a system error, or experienced performance issues after a recent change, System Restore provides a convenient way to revert your computer to a known working state without affecting your personal files. In this extensive guide, we’ll explore everything you need to know about using System Restore in Windows 8, from accessing the System Restore utility to performing system restores and troubleshooting common issues.
Understanding System Restore:
System Restore is a feature in Windows that creates and saves snapshots of your computer’s system files and settings at regular intervals or before significant changes, such as software installations or updates. These snapshots, known as restore points, allow you to roll back your system to a previous state if you encounter problems or errors. System Restore does not affect your personal files, such as documents, photos, and videos, but it can help resolve issues related to system stability, performance, and functionality.
Accessing System Restore:
To access System Restore in Windows 8, follow these steps:
- Open System Properties: Press the Windows key + X to open the Power User menu, then click or tap on “System.” Alternatively, you can right-click on “Computer” in File Explorer and select “Properties.”
- Access System Protection: In the System window, click or tap on “System protection” in the left pane. This opens the System Properties dialog box with the System Protection tab selected.
- Open System Restore: In the System Protection tab, click or tap on “System Restore.” This opens the System Restore utility, which allows you to restore your computer to a previous state using available restore points.
Performing a System Restore:
To perform a system restore using System Restore in Windows 8, follow these steps:
- Start System Restore: In the System Restore utility, click or tap on “Next” to begin the system restore process.
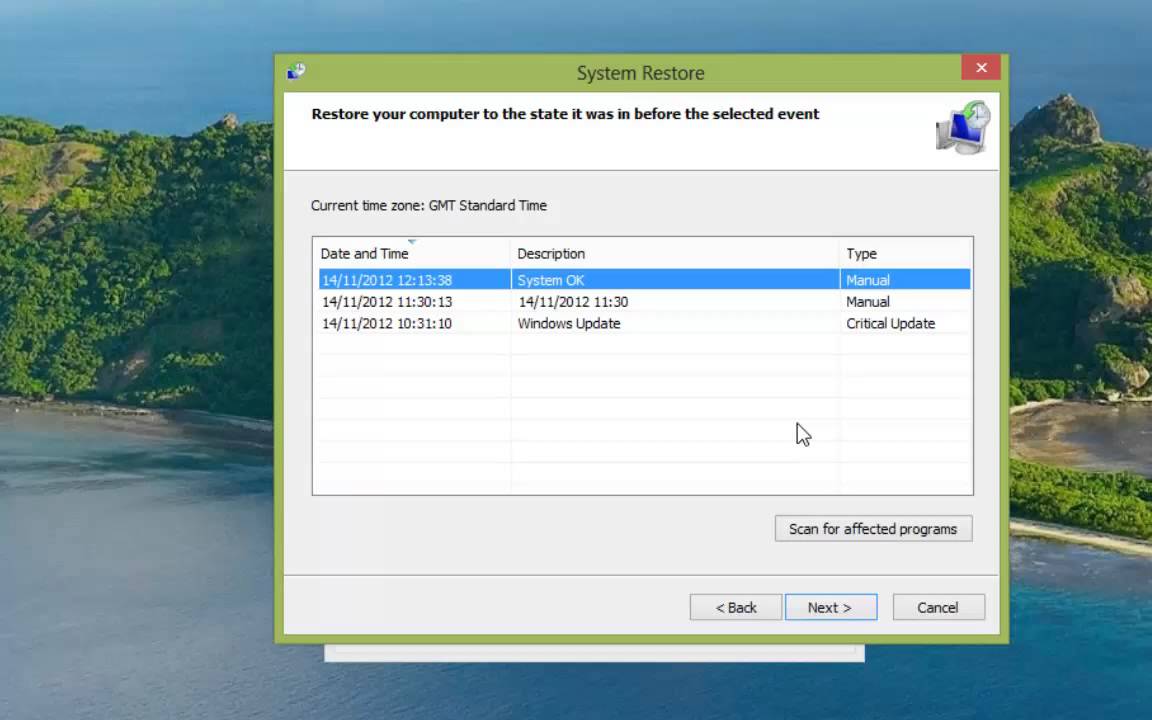
- Select Restore Point: You’ll see a list of available restore points, along with their descriptions and dates of creation. Choose a restore point that corresponds to a time when your computer was functioning correctly, then click or tap on “Next.”
- Confirm Restore Point: Review the details of the selected restore point to ensure that it’s the correct one, then click or tap on “Finish” to confirm your selection.
- Begin Restore Process: Before proceeding, make sure to save any open files and close all programs. Once you’re ready, click or tap on “Yes” to confirm that you want to proceed with the system restore. Your computer will restart and begin the restore process.
- Wait for Completion: The system restore process may take some time to complete, depending on the complexity of the restore point and the speed of your computer. During the process, your computer will restart multiple times as it restores system files and settings.
- Completion: Once the system restore process is complete, your computer will restart, and you’ll see a confirmation message indicating that the restore was successful. Click or tap on “Close” to exit the System Restore utility.
Troubleshooting System Restore Issues:
If you encounter problems or errors while using System Restore in Windows 8, here are some troubleshooting steps you can take:
- Check Disk Space: Make sure that you have enough free disk space available on your system drive (usually the C: drive) to create and store restore points. Insufficient disk space may prevent System Restore from functioning properly.
- Disable Antivirus Software: Sometimes, antivirus software or security programs can interfere with System Restore operations. Temporarily disable antivirus software before performing a system restore, and then re-enable it afterward.
- Run System Restore in Safe Mode: If you’re having trouble accessing System Restore or encountering errors during the restore process, try running System Restore in Safe Mode. To do this, restart your computer and press the F8 key repeatedly during startup to access the Advanced Boot Options menu. From there, select “Safe Mode with Command Prompt” and then run the System Restore utility from the command prompt.
- Check System Restore Settings: Verify that System Restore is enabled and configured correctly on your computer. You can check System Restore settings in the System Properties dialog box under the System Protection tab.
- Run System File Checker: Use the System File Checker (SFC) tool to scan for and repair corrupted system files that may be causing issues with System Restore. Open Command Prompt as an administrator and run the command “sfc /scannow” to initiate the scan.
Conclusion:
System Restore is a valuable feature in Windows 8 that allows users to restore their computer’s system files and settings to a previous state, effectively reversing changes that may have caused system instability or other issues. By accessing the System Restore utility, selecting an appropriate restore point, and performing a system restore, you can resolve problems related to software installations, updates, and other changes with ease. However, it’s essential to understand how System Restore works and to follow best practices for using it effectively. By following the steps outlined in this guide and troubleshooting common issues as needed, you can make the most of System Restore in Windows 8 and keep your computer running smoothly and reliably.