Categories
How To Guides Microsoft Office

Mastering Visual Enhancements: A Comprehensive Guide to Creating Watermarks in Microsoft Word

In the realm of document design, visual elements play a crucial role in enhancing the aesthetic appeal, professionalism, and security of content. Watermarks, in particular, serve as versatile tools for adding branding, confidentiality statements, or decorative motifs to documents. Whether you’re creating reports, proposals, or presentations, a well-designed watermark can elevate the visual impact and convey important information to your audience. In this extensive guide, we’ll explore the intricacies of creating watermarks in Microsoft Word, empowering you to enhance your document’s visual appeal and functionality with precision and ease.

Understanding the Significance of Watermarks:

Before delving into the practical aspects of creating watermarks, it’s crucial to grasp the significance of these visual elements in document design. Watermarks serve multiple purposes, including:

  • Branding and identification: Watermarks allow organizations to add their logo, name, or slogan to documents, reinforcing brand recognition and identity.
  • Document security: Watermarks can include confidentiality statements, copyright notices, or other security features to deter unauthorized copying or distribution of sensitive documents.
  • Visual enhancement: Watermarks add visual interest and professionalism to documents, enhancing their overall appearance and appeal.

By incorporating watermarks into your document design strategy, you can create documents that are not only visually appealing but also informative, secure, and reflective of your organization’s identity and values.

Basic Watermark Creation:

Creating a watermark in Microsoft Word is a straightforward process that can be accomplished using built-in tools and features. Here’s how to do it:

  1. Access Watermark Options:
    • Open Microsoft Word and navigate to the “Design” tab located in the top menu bar.
    • In the “Page Background” group, you’ll find the “Watermark” button. Click on this button to access watermark options.
  2. Choose a Built-in Watermark:
    • In the watermark options menu, you’ll see a gallery of built-in watermark designs, including text-based and image-based options.
    • Browse through the available designs and choose the one that best suits your document’s style and purpose. Click on the desired watermark to apply it to your document.
  3. Customize Watermark Text (Optional):
    • If you selected a text-based watermark, you can customize the text, font, size, color, and orientation to align with your document’s branding and requirements.
    • Double-click on the watermark to edit the text directly, or right-click on it and choose “Edit Watermark” from the context menu to access formatting options.
  4. Adjust Watermark Transparency (Optional):
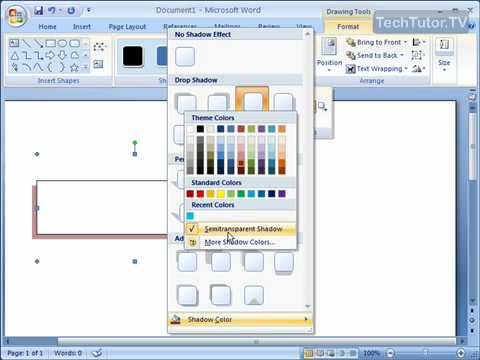
    • To adjust the transparency of the watermark and make it more subtle or prominent, you can modify the transparency settings.
    • Right-click on the watermark, choose “Format Watermark” from the context menu, and adjust the transparency slider to the desired level.

Advanced Watermark Customization:

While basic watermark creation suffices for most scenarios, Microsoft Word offers advanced features and customization options to further enhance the appearance and functionality of watermarks. Here are some additional features you may explore:

  1. Create Custom Watermark:
    • If the built-in watermark designs don’t meet your requirements, you can create a custom watermark from scratch using text boxes, shapes, images, and other design elements.
    • Arrange and format the elements to create a unique and visually appealing watermark that reflects your organization’s branding and messaging.
  2. Apply Watermark to Specific Pages:
    • Word allows users to apply watermarks selectively to specific pages or sections within a document. This feature is particularly useful for adding confidential or draft watermarks to certain pages while leaving others unaffected.
    • Navigate to the “Design” tab, click on “Watermark,” and choose “Custom Watermark.” In the dialog box, select the “Apply to” dropdown menu and choose the desired option.
  3. Save Watermark as Template:
    • Once you’ve created a custom watermark or modified an existing one, you can save it as a template for future use.
    • Right-click on the watermark, choose “Save as Picture” from the context menu, and save the image file in a location where you can easily access it for future documents.

Best Practices for Watermark Usage:

While watermarks offer versatility and visual enhancement in document design, it’s essential to use them judiciously and in accordance with best practices. Here are some tips to consider:

  1. Keep it Subtle:
    • Avoid using overly distracting or intrusive watermarks that detract from the readability and professionalism of the document. Keep the watermark subtle and unobtrusive while still conveying the desired message or branding.
  2. Ensure Legibility:
    • If using a text-based watermark, ensure that the text is legible and easy to read against the background of the document. Choose a font, size, and color that provide sufficient contrast and visibility.
  3. Maintain Branding Consistency:
    • Ensure that the watermark aligns with your organization’s branding guidelines in terms of colors, fonts, logo placement, and overall aesthetic. Consistent branding enhances recognition and reinforces brand identity.
  4. Test Across Devices:
    • Before finalizing your document, test the appearance and visibility of the watermark across different devices, screen resolutions, and printing settings to ensure that it renders correctly and maintains its visual integrity.

Conclusion:

Creating a watermark in Microsoft Word is a fundamental skill for enhancing document visual appeal, security, and branding. By mastering the basic creation process, exploring advanced customization options, and adhering to best practices for watermark usage, you can create documents that are not only visually appealing but also informative, secure, and reflective of your organization’s identity and values. Whether you’re creating reports, presentations, or marketing materials, a well-designed watermark adds professionalism, credibility, and visual interest to your documents, making them more memorable and impactful. So, the next time you embark on a document creation journey in Word, remember to leverage the power of watermarks to enhance your document’s visual appeal and functionality, and make a lasting impression on your audience.

Categories
How To Guides Microsoft Office

Crafting the First Impression: A Comprehensive Guide to Inserting a Cover Page in Microsoft Word

In the vast realm of document design, the cover page serves as the gateway to your content, setting the tone, conveying essential information, and making a memorable first impression on your audience. Whether you’re creating reports, proposals, or manuscripts, a well-designed cover page can captivate readers’ attention and establish the credibility and professionalism of your document. In this extensive guide, we’ll explore the intricacies of inserting a cover page in Microsoft Word, empowering you to create compelling and visually appealing cover pages with ease and precision.

Understanding the Significance of a Cover Page:

Before delving into the practical aspects of inserting a cover page, it’s crucial to grasp the significance of this introductory element in document design. A cover page serves multiple purposes, including:

  • Introducing the document: The cover page provides essential details such as the title, author’s name, date, and organization, giving readers an overview of the document’s contents and context.
  • Establishing branding: A well-designed cover page reinforces the organization’s branding and visual identity, fostering recognition and trust among stakeholders and audiences.
  • Creating a professional impression: A visually appealing and well-organized cover page conveys professionalism and attention to detail, enhancing the document’s credibility and authority.

By incorporating a cover page into your document design strategy, you can create documents that command attention, convey information effectively, and leave a lasting impression on your audience.

Basic Cover Page Insertion:

Inserting a cover page in Microsoft Word is a straightforward process that can be accomplished using built-in templates and features. Here’s how to do it:

  1. Access Cover Page Templates:
    • Open Microsoft Word and create a new document or open an existing one where you want to insert the cover page.
    • Navigate to the “Insert” tab located in the top menu bar.
    • In the “Pages” group, click on the “Cover Page” button to access a gallery of cover page templates.
  2. Select a Cover Page Template:
    • Browse through the available cover page templates in the gallery and choose the one that best suits your document’s style and content.
    • Click on the desired template to insert it into your document. The cover page will be added as the first page of the document, with placeholders for the title, author, and other details.
  3. Customize Cover Page Elements:
    • After inserting the cover page template, you can customize the text, fonts, colors, and layout to align with your document’s branding and requirements.
    • Click on the text placeholders to edit the title, author’s name, date, and other details. Use the formatting options in the “Home” tab to adjust the font size, style, alignment, and spacing as needed.
  4. Add Additional Content:
    • Depending on your document’s content and purpose, you may choose to add additional elements to the cover page, such as a logo, image, or brief summary of the document.
    • Insert images or logos by navigating to the “Insert” tab and selecting “Pictures” or “Online Pictures.” Use text boxes to add additional text or information.

Advanced Cover Page Customization:

While basic cover page insertion suffices for most scenarios, Microsoft Word offers advanced features and customization options to further enhance the appearance and functionality of cover pages. Here are some additional features you may explore:

  1. Create a Custom Cover Page:
    • If the built-in templates don’t meet your requirements, you can create a custom cover page from scratch using text boxes, shapes, images, and other design elements.
    • Arrange and format the elements to create a visually appealing and professional-looking cover page that reflects your document’s theme and branding.
  2. Save Cover Page as Template:
    • Once you’ve customized a cover page to your liking, you can save it as a template for future use. Simply select the cover page, right-click, and choose “Save as Template” from the context menu. Give your template a descriptive name and save it in the appropriate location.
  3. Apply Page Numbering:
    • If your document requires page numbering, you can add page numbers to the cover page and subsequent pages using Word’s built-in page numbering feature.
    • Navigate to the “Insert” tab, click on “Page Number,” and choose the desired location and format for the page numbers.

Best Practices for Cover Page Design:

While inserting a cover page is relatively straightforward, it’s essential to adhere to best practices for cover page design to ensure effectiveness and professionalism. Here are some tips to consider:

  1. Keep it Simple and Clear:
    • Avoid cluttering the cover page with excessive text or graphics. Keep the design clean, simple, and focused on conveying essential information to the reader.
  2. Maintain Branding Consistency:
    • Ensure that the cover page aligns with your organization’s branding guidelines in terms of colors, fonts, logo placement, and overall aesthetic.
  3. Use High-Quality Images:
    • If incorporating images or logos, use high-quality, high-resolution graphics to maintain visual clarity and professionalism.
  4. Proofread Carefully:
    • Double-check all text on the cover page for accuracy, spelling, and grammar errors. A well-proofread cover page reflects attention to detail and professionalism.

Conclusion:

Inserting a cover page in Microsoft Word is a fundamental step in creating professional, visually appealing documents that make a strong first impression on your audience. By mastering the basic insertion process, exploring advanced customization options, and adhering to best practices for cover page design, you can create cover pages that effectively convey essential information, reflect your organization’s branding, and set the stage for the content that follows. Whether you’re creating reports, proposals, or presentations, a well-designed cover page enhances the document’s credibility, professionalism, and impact, leaving a positive impression on your readers. So, the next time you embark on a document creation journey in Word, remember to leverage the power of cover pages to captivate your audience’s attention and set the stage for success.

Categories
How To Guides Microsoft Office

Mastering the CHOOSE Function in Excel: A Comprehensive Guide

Excel is renowned for its vast array of functions designed to streamline data manipulation and analysis tasks. One such function is CHOOSE, a versatile tool that allows users to select a value from a list of options based on a specified index number. Understanding how to effectively use the CHOOSE function can significantly enhance your ability to organize and manipulate data in Excel. In this comprehensive guide, we’ll explore everything you need to know about using the CHOOSE function, from basic syntax to advanced techniques and real-world applications.

Table of Contents

  1. Introduction
  2. Benefits of Using the CHOOSE Function
  3. Basic Syntax and Usage
  4. Practical Examples
    • Simple Value Selection
    • Dynamic Value Selection
    • Text and Numeric Options
  5. Advanced Techniques
    • Nesting CHOOSE with Other Functions
    • Dynamic Index Number Generation
    • Handling Errors and Edge Cases
  6. Handling Errors
    • Common Errors and Troubleshooting
    • Ensuring Data Integrity
  7. Tips and Tricks
    • Using CHOOSE for Conditional Formatting
    • Optimizing Performance with CHOOSE
    • Incorporating CHOOSE into Array Formulas
  8. Real-World Applications
    • Financial Modeling
    • Data Analysis
    • Reporting
  9. Best Practices
    • Structuring Data for CHOOSE
    • Documenting CHOOSE Formulas
    • Testing and Validating Results
  10. Conclusion

1. Introduction

The CHOOSE function in Excel provides a powerful way to select a value from a list of options based on a specified index number. This flexibility makes it a valuable tool for a wide range of tasks, from simple value selection to more complex data manipulation and analysis.

2. Benefits of Using the CHOOSE Function

  • Flexibility: Choose from a list of options based on a specified index number.
  • Simplicity: Streamline data manipulation tasks with a single CHOOSE formula.
  • Efficiency: Perform dynamic value selection without the need for complex nested IF statements.
  • Versatility: Use CHOOSE in a variety of scenarios, from basic data validation to advanced data analysis.

3. Basic Syntax and Usage

The basic syntax of the CHOOSE function is as follows:

excel

=CHOOSE(index_num, value1, [value2], ...)
  • index_num: The index number that specifies which value to return.
  • value1, value2, …: The list of values from which to choose.

4. Practical Examples

Simple Value Selection

To select a value from a list of options based on a specified index number:

excel

=CHOOSE(2, "Option 1", "Option 2", "Option 3")

This formula returns “Option 2” because it corresponds to the second index number.

Dynamic Value Selection

To dynamically select a value based on a variable index number:

excel

=CHOOSE(A1, "Low", "Medium", "High")

If cell A1 contains a number between 1 and 3, this formula will return the corresponding value (“Low”, “Medium”, or “High”).

Text and Numeric Options

To choose from a mix of text and numeric options:

excel

=CHOOSE(3, "Red", "Green", 5, 10, 15)

This formula returns the number 5 because it corresponds to the third index number.

5. Advanced Techniques

Nesting CHOOSE with Other Functions

To nest the CHOOSE function within other functions for more complex scenarios:

excel

=VLOOKUP(A1, CHOOSE(B1, Range1, Range2, Range3), 2, FALSE)

This formula uses CHOOSE to dynamically select the lookup range based on the value in cell B1.

Dynamic Index Number Generation

To generate the index number dynamically based on certain criteria:

excel

=CHOOSE(MATCH("Option 2", A1:A3, 0), "Value 1", "Value 2", "Value 3")

This formula uses MATCH to find the position of “Option 2” in the specified range, which determines the index number for CHOOSE.

Handling Errors and Edge Cases

To handle errors or edge cases gracefully:

excel

=IFERROR(CHOOSE(A1, "Option 1", "Option 2", "Option 3"), "Invalid Index")

This formula uses IFERROR to display a custom message (“Invalid Index”) if the index number in cell A1 is not valid.

6. Handling Errors

Common Errors and Troubleshooting

  • #VALUE! Error: This error occurs if the index_num argument is not a valid number.
  • #NUM! Error: This error occurs if the index number exceeds the number of options available.
  • #N/A Error: This error occurs if the index number is not found in the list of options.

Ensuring Data Integrity

Regularly review and validate CHOOSE formulas to ensure that they are returning the expected results and handling errors appropriately.

7. Tips and Tricks

Using CHOOSE for Conditional Formatting

Utilize CHOOSE in conjunction with conditional formatting to dynamically apply formatting based on specific criteria or index numbers.

Optimizing Performance with CHOOSE

When working with large datasets, consider optimizing performance by minimizing the number of options in the CHOOSE function or using alternative lookup methods for faster calculations.

Incorporating CHOOSE into Array Formulas

Take advantage of CHOOSE in array formulas to perform bulk operations or calculations across multiple rows or columns.

8. Real-World Applications

Financial Modeling

Use CHOOSE to categorize financial data into predefined buckets or ranges based on specific criteria or index numbers.

Data Analysis

Apply CHOOSE in data analysis scenarios to segment or classify data into different groups for further analysis or reporting.

Reporting

Incorporate CHOOSE into reporting templates or dashboards to dynamically display different metrics or key performance indicators (KPIs) based on user selections or predefined criteria.

9. Best Practices

Structuring Data for CHOOSE

Organize data in a structured format with clear options and index numbers to facilitate the use of the CHOOSE function.

Documenting CHOOSE Formulas

Document CHOOSE formulas with comments or annotations to explain their purpose, inputs, and expected outputs for future reference.

Testing and Validating Results

Regularly test and validate CHOOSE formulas against known data points or scenarios to ensure accuracy and reliability in real-world applications.

10. Conclusion

The CHOOSE function in Excel is a versatile tool that offers a simple yet powerful way to select a value from a list of options based on a specified index number. By mastering the basic syntax and exploring advanced techniques, users can leverage CHOOSE to streamline data manipulation tasks, automate decision-making processes, and enhance the efficiency of their Excel workbooks. Whether used for basic value selection, dynamic data analysis, or complex reporting scenarios, CHOOSE provides a flexible and efficient solution for a wide range of Excel applications. With its versatility, simplicity, and effectiveness, the CHOOSE function empowers users to unlock the full potential of their data and derive actionable insights that drive informed decision-making and business success.