Introduction:
Portrait retouching has become an integral part of modern photography, with airbrushing skin being a crucial element to achieve flawless and professional-looking results. In this extensive guide, we will explore the advanced technique of airbrushing skin using Frequency Separation in Photoshop. Whether you’re a seasoned retoucher looking to elevate your skills or a beginner eager to learn, this tutorial aims to provide a comprehensive understanding of the Frequency Separation technique for achieving natural and stunning skin retouching.
Section 1: Understanding Frequency Separation
Subsection 1.1: What is Frequency Separation?
Frequency Separation is a powerful technique in Photoshop that allows retouchers to work independently on the color and texture details of an image. It involves separating high-frequency details (such as texture and fine details) from low-frequency details (such as color and tone). This separation enables precise adjustments without compromising the integrity of the overall image.
Subsection 1.2: Benefits of Frequency Separation
The key advantage of Frequency Separation is its ability to address specific aspects of an image independently, offering greater control over the retouching process. It allows retouchers to enhance skin texture while maintaining the natural color and tone, resulting in a polished and realistic final portrait.
Section 2: Preparing Your Workspace
Before delving into the intricacies of Frequency Separation, it’s essential to set up your workspace and organize your files for efficient and non-destructive editing.
Subsection 2.1: Importing and Duplicating Image Layers
Open your portrait image in Photoshop and create a duplicate layer. This duplicate layer will serve as the base for applying the Frequency Separation technique while preserving the original image for reference.
Subsection 2.2: Renaming Layers and Creating Groups
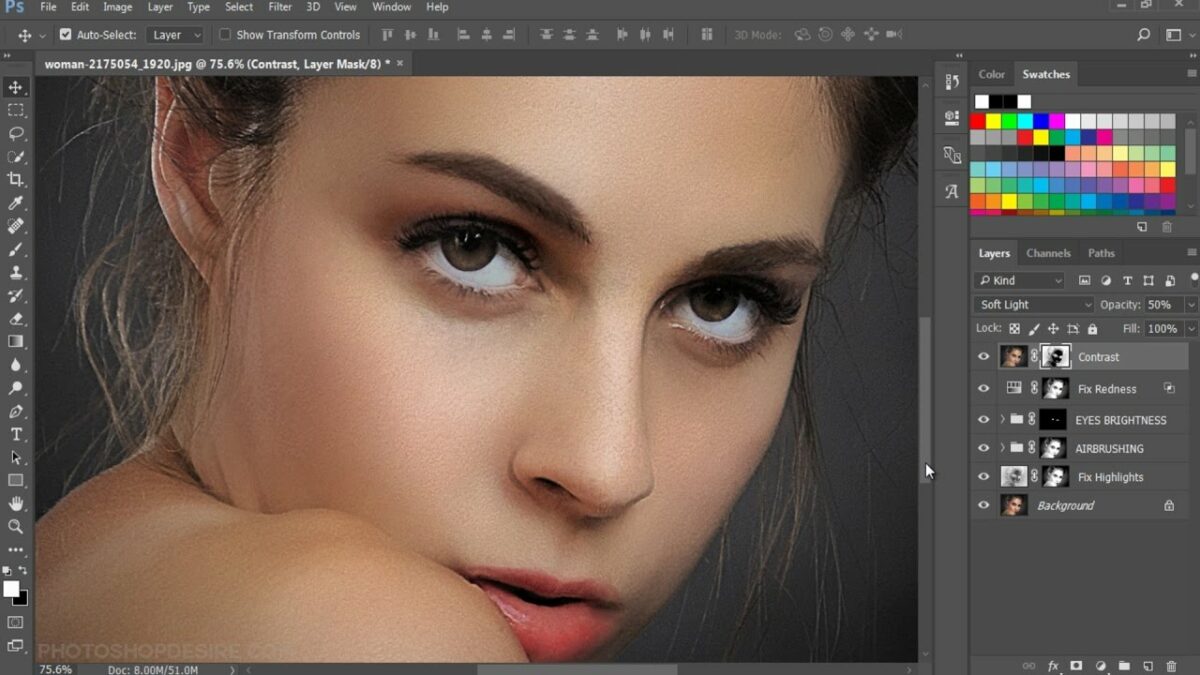
Organize your layers by renaming them appropriately. Create two groups: one for the low-frequency layer (color and tone) and one for the high-frequency layer (texture). This ensures a structured and easily navigable workspace.
Section 3: Applying Frequency Separation
Subsection 3.1: Calculating Low and High Frequencies
Use the “Apply Image” function in Photoshop to calculate the low and high frequencies. Set the blending mode to “Subtract” for the low-frequency layer, and adjust the scale and offset parameters. For the high-frequency layer, set the blending mode to “Linear Light.”
Subsection 3.2: Refining the Separation
Fine-tune the separation by using Gaussian Blur on the low-frequency layer. Adjust the radius until the skin tones and overall color appear smooth, leaving only the broader color and tone details. This step ensures a clean separation between color and texture.
Section 4: Airbrushing the Skin
Subsection 4.1: Selecting the Mixer Brush Tool
Activate the Mixer Brush tool in Photoshop. This tool simulates traditional airbrushing and blending techniques, making it ideal for achieving a smooth and natural look.
Subsection 4.2: Configuring Mixer Brush Settings
Adjust the settings of the Mixer Brush, including load, mix, and flow, to control the intensity and blending of the brush. Experiment with these settings to find the optimal configuration for your specific image and desired retouching effect.
Subsection 4.3: Painting on the Low-Frequency Layer
Focus on the low-frequency layer to airbrush the skin. Use a soft brush and gentle strokes to even out color variations, blemishes, or imperfections. Maintain a natural appearance by preserving the essential skin features.
Section 5: Refining Texture with the High-Frequency Layer
Subsection 5.1: Selecting the High-Frequency Layer
Switch to the high-frequency layer to refine skin texture. This layer contains fine details, such as pores and wrinkles, which can be enhanced or softened based on your retouching goals.
Subsection 5.2: Using the Clone Stamp and Healing Brush Tools
Utilize the Clone Stamp and Healing Brush tools to address specific texture issues. Clone Stamp can be used for replicating texture from one area to another, while Healing Brush helps to blend and smooth uneven texture seamlessly.
Subsection 5.3: Avoiding Over-Retouching
Exercise caution to avoid over-retouching the high-frequency layer, as excessive adjustments can lead to an unnatural and plastic appearance. Preserve the authentic texture of the skin while addressing minor imperfections.
Section 6: Dodging and Burning for Dimension
Subsection 6.1: Creating Dodge and Burn Layers
Implement Dodging and Burning to enhance dimension and contouring in the portrait. Create separate Dodge and Burn layers within each frequency group to maintain a non-destructive workflow.
Subsection 6.2: Using Soft Brushes with Low Opacity
Choose soft brushes with low opacity for Dodging and Burning. Gradually build up the effect by painting over areas where you want to enhance highlights (dodging) or deepen shadows (burning). This technique adds depth and three-dimensionality to the skin.
Section 7: Color Correction and Harmonization
Subsection 7.1: Adjusting Color with Hue/Saturation
Fine-tune the overall color of the skin by using the Hue/Saturation adjustment layer. Target specific color ranges to correct any color discrepancies and ensure a harmonious and natural-looking skin tone.
Subsection 7.2: Blending Colors with Curves Adjustment
Apply a Curves adjustment layer to refine color blending. Adjust the RGB curve and individual color channels to achieve a balanced and visually pleasing color harmony.
Section 8: Final Touches and Global Adjustments
Subsection 8.1: Inspecting the Retouched Image
Zoom in and inspect the retouched image at 100% to evaluate the skin details and overall quality. Make necessary adjustments or refinements to achieve a seamless and professional result.
Subsection 8.2: Applying Global Adjustments
Consider applying global adjustments, such as contrast, saturation, and sharpness, to the entire image. Use adjustment layers for these modifications to maintain a non-destructive workflow.
Section 9: Exporting the Airbrushed Portrait
Once satisfied with the airbrushing and retouching, export the final portrait for sharing, printing, or further use.
Subsection 9.1: Save As High-Resolution Image
Save the airbrushed portrait in a suitable format, such as JPEG or TIFF, ensuring it retains high resolution for optimal quality.
Subsection 9.2: Maintain Layered PSD File
Save a layered PSD file to preserve all the adjustments and retouching layers. This allows for future edits or refinements without loss of quality.
Section 10: Showcasing Your Airbrushed Portraits
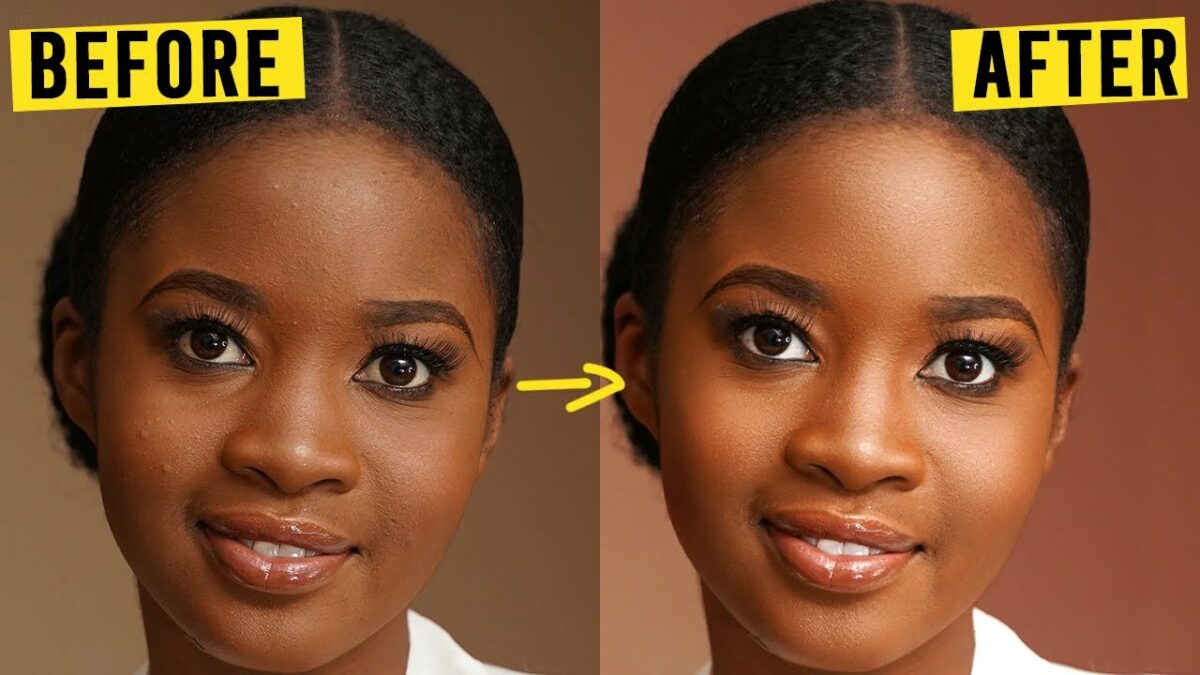
Celebrate your mastery of airbrushing skin with Frequency Separation by showcasing your final portraits. Share your work on photography platforms, social media, or incorporate it into your portfolio. Engage with the photography community, seek constructive feedback, and let your airbrushed portraits stand as a testament to your skill in achieving flawless and natural-looking skin retouching.
Conclusion:
Airbrushing skin with Frequency Separation in Photoshop is an advanced yet invaluable technique for achieving professional portrait retouching. By following the comprehensive steps and techniques outlined in this guide, you can confidently navigate the intricacies of Frequency Separation, ensuring natural and stunning results in your portrait work. May your airbrushed portraits captivate viewers with their flawless skin and authentic beauty, reflecting the essence of your subjects with grace and finesse.