In the vast realm of digital artistry, mastering the craft of creating a neon light effect in Photoshop is like wielding a vibrant beacon of creativity. Neon lights, with their mesmerizing glow and retro allure, add a touch of urban sophistication to any design. In this extensive tutorial, we will embark on a journey through the intricacies of crafting a stunning neon light effect in Photoshop, unraveling the magic of layer styles, blending modes, and luminous gradients.
Section 1: Introduction to Neon Aesthetics
1.1 The Allure of Neon Lights
Neon lights have a timeless appeal, evoking the spirit of bustling cityscapes, vibrant nightlife, and a touch of retro nostalgia. Recreating this visual marvel in Photoshop allows digital artists to infuse their designs with a luminous, dynamic quality.
1.2 Inspiration from Neon Signs
Before diving into the tutorial, gather inspiration from real-world neon signs. Note the vibrant colors, glowing edges, and how light interacts with surrounding surfaces. This observation will inform your digital recreation of the neon aesthetic.
Section 2: Setting the Photoshop Stage
2.1 Create a New Canvas
Begin by launching Photoshop and creating a new canvas. Consider a standard size like 1920×1080 pixels for versatility, but adjust according to your specific design requirements.
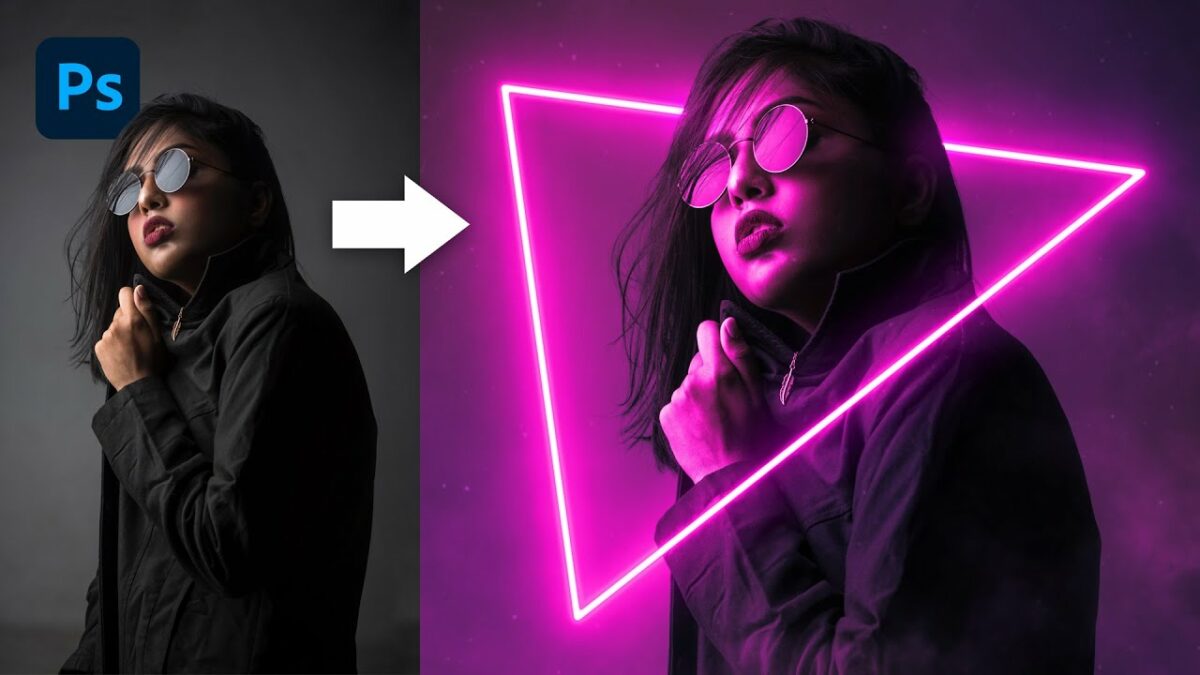
2.2 Dark Background for Contrast
To enhance the neon effect, set a dark background. This creates a stark contrast that allows the vibrant colors of the neon lights to pop and captivate the viewer.
Section 3: Crafting the Neon Text
3.1 Choose a Bold Font
Select a bold, sans-serif font to serve as the foundation for your neon text. Fonts like Bebas Neue, Neon Tubes, or any font that conveys a strong and modern aesthetic work well.
3.2 Type Your Text
Use the Text Tool (T) to type your desired text onto the canvas. Adjust the size, spacing, and positioning as needed. The choice of words and the overall composition will play a crucial role in the visual impact of your neon design.
Section 4: Neon Light Effect Layer Styles
4.1 Inner and Outer Glow
Navigate to the Layer Styles panel and apply both Inner and Outer Glow to your text layer. Experiment with colors that resonate with the neon aesthetic, such as vibrant blues, pinks, or electric greens. Adjust the glow size to achieve a balance between subtlety and vibrancy.
4.2 Bevel and Emboss for Depth
Add a Bevel and Emboss effect to simulate the three-dimensional quality of neon tubing. Adjust the settings to create a subtle contour that mimics the light-catching surfaces of real neon signs.
4.3 Color Overlay
Intensify the color of your neon text by applying a Color Overlay. This step allows you to fine-tune the hue and saturation, achieving the precise coloration that aligns with your neon vision.
Section 5: Creating the Glow
5.1 Duplicate the Text Layer
Duplicate your neon text layer to intensify the glow effect. This duplication serves as the glowing core of the neon lights, enhancing the luminosity.
5.2 Gaussian Blur for Radiance
Apply a Gaussian Blur to the duplicated text layer, blurring the edges to simulate the soft, radiant glow characteristic of neon lights. Adjust the blur radius to achieve the desired level of luminance.
Section 6: Adding Realism with Light Effects
6.1 Light Sources and Shadows
Consider the placement of imaginary light sources in your design. Add subtle shadows beneath the neon text to simulate the interaction of light with the surrounding environment. This step contributes to the overall realism of your neon light effect.
6.2 Light Flares for Sparkle
Introduce light flares strategically around your neon text to enhance the sparkle and authenticity. Use a soft brush with varying opacities to create natural-looking flares that emulate the play of light on glossy surfaces.
Section 7: Final Touches and Exporting
7.1 Fine-Tune Colors and Details
Review your design for any final adjustments. Fine-tune colors, adjust glow intensities, and ensure that the overall composition aligns with your vision of a captivating neon light effect.
7.2 Exporting the Final Image
Once satisfied with your neon masterpiece, save your Photoshop project and export the final image in your preferred format. Whether it’s for digital art, social media, or print, the exported image should retain the vibrant allure of neon lights.
Conclusion: A Radiant Glow of Creativity
In this comprehensive neon light effect Photoshop tutorial, you’ve harnessed the power of layer styles, gradients, and strategic effects to bring the mesmerizing glow of neon lights to your digital canvas. The allure of neon aesthetics lies not just in their luminosity but in the evocative atmosphere they create. As you continue to explore the vast possibilities within Photoshop, remember that crafting a neon light effect is not just a technical skill; it’s a radiant expression of creativity that transforms your designs into vibrant, captivating works of art. So, illuminate your imagination, experiment with colors, and let the neon glow of your digital creations captivate the world.