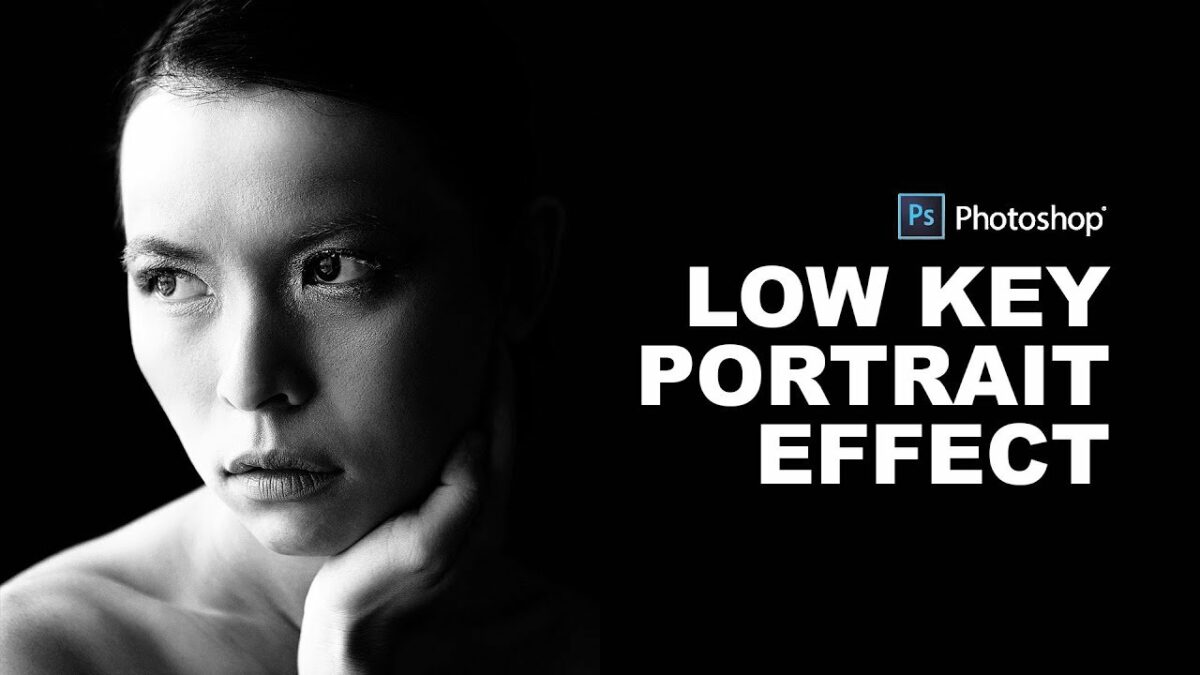
Categories
How To Guides Photoshop

Decoding the Canvas: A Comprehensive Exploration of Image Resolution and Its Impact on Print Quality

Introduction:

In the intricate world of digital imaging, where pixels weave the tapestry of visual narratives, the relationship between image resolution and print quality is pivotal. Photographers, designers, and digital artists navigate this terrain with the aim of translating digital visions into tangible prints. In this extensive guide, we embark on a journey to decode the intricacies of image resolution, exploring its significance, the science behind print quality, and the strategic considerations that elevate printed imagery into a realm of clarity and visual splendor.

Section 1: Understanding Image Resolution

  1. Defining Image Resolution:
    • Image resolution refers to the amount of detail or information contained in a digital image. In the context of print, resolution is measured in dots per inch (DPI) or pixels per inch (PPI), denoting the number of individual dots or pixels within one linear inch of an image.
  2. Pixel Dimensions and Resolution:
    • Pixel dimensions, often expressed as width x height in pixels, play a crucial role in determining image resolution. The combination of pixel dimensions and resolution influences the overall clarity and detail visible in a print.

Section 2: The Science of Print Quality

  1. The Printing Process:
    • Understanding how printers reproduce digital images is essential for comprehending print quality. Printers utilize tiny droplets of ink or toner to create dots on paper, and the density of these dots contributes to the perceived sharpness and detail.
  2. Halftoning:
    • In the printing process, continuous-tone images are translated into patterns of dots through a technique called halftoning. This process uses varying dot sizes and spacing to simulate different shades of gray or colors, creating the illusion of smooth gradients and tones.

Section 3: Optimal Image Resolution for Print

  1. Print Resolution Standards:
    • The industry standard for print resolution is often considered to be 300 DPI. This resolution provides a balance between image detail and file size, ensuring that the printed image appears sharp and clear to the human eye.
  2. Determining Print Size:
    • To calculate the optimal print size for a given image, the pixel dimensions can be divided by the desired DPI. For example, an image with dimensions of 2400 x 3000 pixels at 300 DPI would yield a print size of 8 x 10 inches.

Section 4: Common Print Sizes and Resolutions

  1. Print Sizes and Recommended Resolutions:
    • Different print sizes demand varying resolutions to maintain optimal print quality. Common print sizes, such as 4×6, 5×7, or 11×14 inches, each have corresponding recommended resolutions that ensure clarity and sharpness.

Section 5: Resampling for Print

  1. Resampling Considerations:
    • Resampling involves adjusting the pixel dimensions of an image, and it becomes relevant when preparing images for print. However, resampling should be approached with caution to avoid loss of image quality. Maintaining the original image’s pixel count is often preferred.
  2. Upsampling Techniques:
    • When upsampling is unavoidable, employing interpolation methods like bicubic or Lanczos resampling can help mitigate the loss of detail. These methods attempt to estimate pixel values based on surrounding pixels to enhance the appearance of the image.

Section 6: Preparing Images for High-Resolution Printing

  1. Capture in RAW Format:
    • To maximize image quality for print, capturing images in RAW format is recommended. RAW files contain more data and provide greater flexibility in post-processing without compromising image integrity.
  2. Color Space Considerations:
    • When preparing images for print, the Adobe RGB color space is often preferred over sRGB. Adobe RGB encompasses a broader range of colors, allowing for more accurate color representation in the print.
  3. Soft Proofing:
    • Soft proofing involves simulating how an image will look when printed. Photoshop’s soft proofing feature allows users to preview how colors, tones, and details will appear on the final printed output, helping to make informed adjustments.

Section 7: Print Quality and Print Media

  1. Paper Selection:
    • The choice of print media significantly influences print quality. Different types of paper, such as glossy, matte, or fine art papers, interact with ink or toner in unique ways, affecting the perceived sharpness and color vibrancy.
  2. Understanding Dot Gain:
    • Dot gain refers to the phenomenon where printed dots appear larger than their digital counterparts. Understanding dot gain is crucial for making adjustments in the printing process to maintain image fidelity.

Section 8: Strategic Considerations for Professional Printing

  1. Collaborating with Print Labs:
    • Professional print labs offer advanced printing technologies and expertise. Collaborating with print professionals ensures access to high-quality printing processes, color calibration, and the selection of optimal print media.
  2. Proofing and Test Prints:
    • Before committing to large-scale prints, creating test prints or proofs is advisable. This allows for the evaluation of color accuracy, sharpness, and overall print quality before producing the final output.

Section 9: Overcoming Common Print Challenges

  1. Dealing with Compression Artifacts:
    • Compression artifacts can degrade print quality. To mitigate this, avoid excessive compression when saving images for print and work with high-resolution originals to ensure optimal results.
  2. Addressing Banding Issues:
    • Banding, or visible color transitions, can occur in smooth gradients. Increasing the bit depth of an image to 16 bits per channel can reduce the likelihood of banding, especially in prints with subtle tonal variations.

Section 10: Navigating Print-Related Myths

  1. Myth: Higher Megapixels Guarantee Better Prints:
    • While higher megapixels contribute to potential image detail, the quality of the lens, sensor, and overall camera system also plays a crucial role in determining print quality.
  2. Myth: Printers Only Support 300 DPI:
    • Modern printers can achieve impressive print quality at resolutions beyond 300 DPI. However, the 300 DPI standard is often recommended as a practical balance between quality and file size.

Conclusion: Elevating the Art of Print through Image Resolution

In conclusion, the art of print is a delicate dance between image resolution and print quality. This comprehensive guide has unraveled the significance of image resolution, delved into the science behind print quality, and explored strategic considerations for achieving stunning prints. As photographers, designers, and digital artists strive to transform digital visions into tangible masterpieces, the mastery of image resolution becomes an indispensable tool. Whether preparing images for high-resolution printing, collaborating with print labs, or overcoming common challenges, the knowledge embedded in this guide empowers creators to navigate the intricate landscape of print with precision and artistic intent. As technology advances and creative boundaries expand, the synergy between image resolution and print quality remains at the forefront of elevating the visual narrative through the timeless medium of printed imagery.

Categories
How To Guides Photoshop

Unveiling the Essence: A Comprehensive Exploration of Image Pixels in Photoshop

Introduction:

In the ever-evolving realm of digital imaging, where creativity meets pixels on a canvas, understanding the fundamental building blocks of an image is paramount. Pixels serve as the mosaic pieces that form the visual tapestry in Adobe Photoshop, allowing photographers, designers, and digital artists to bring their creative visions to life. In this extensive guide, we embark on a journey to unravel the intricacies of image pixels in Photoshop, exploring their significance, properties, and the transformative role they play in the world of visual storytelling.

Section 1: The Pixel Foundation – What are Image Pixels?

  1. Defining Pixels:
    • At its core, a pixel (short for picture element) is the smallest unit of a digital image. Pixels are the building blocks that collectively form the visual representation of an image. In Photoshop, each pixel holds specific color information, contributing to the overall composition.
  2. Resolution and Pixel Density:
    • Image resolution refers to the number of pixels packed into a given space. Higher resolution images have more pixels per inch (PPI), resulting in greater detail. Understanding resolution is crucial for tasks such as print preparation or web display.
  3. Color Information in Pixels:
    • Pixels in Photoshop store color information based on the chosen color mode (e.g., RGB or CMYK). Each pixel is assigned specific values for its color components, contributing to the overall color composition of the image.

Section 2: Pixel Dimensions and Aspect Ratio

  1. Pixel Dimensions:
    • Pixel dimensions refer to the width and height of an image, measured in pixels. The total number of pixels in an image is calculated by multiplying these dimensions. Understanding pixel dimensions is essential for tasks like resizing and cropping.
  2. Aspect Ratio:
    • The aspect ratio is the proportional relationship between the width and height of an image. Maintaining the aspect ratio ensures that the image does not appear distorted when resized. Photoshop provides tools to adjust and constrain aspect ratios during editing.

Section 3: Image Size and File Size

  1. Image Size in Photoshop:
    • Image size in Photoshop is a combination of pixel dimensions and resolution. The physical size of an image is determined by both the number of pixels and the density of those pixels. This plays a crucial role in determining how an image will appear in different mediums.
  2. File Size and Compression:
    • File size is the amount of digital space an image occupies. Compression techniques, such as JPEG compression, reduce file size by discarding some image information. Balancing file size with image quality is a consideration when preparing images for different purposes.

Section 4: Zooming In – Understanding Pixel Enlargement and Detail

  1. Zooming and Pixel Visibility:
    • When zooming in on an image in Photoshop, individual pixels become visible. This level of zoom allows for detailed editing, pixel-level adjustments, and precise control over image elements.
  2. Enlarging Pixels:
    • Enlarging pixels, especially in low-resolution images, can lead to a loss of detail and a pixelated appearance. Techniques such as upscaling algorithms and sharpening can be employed to enhance the visual quality when enlarging pixels.

Section 5: Pixel Editing Tools in Photoshop

  1. The Brush Tool:
    • The brush tool in Photoshop is a fundamental pixel editing tool. It allows for precise painting, retouching, and detailing by manipulating individual pixels. Brush settings, such as hardness and opacity, influence pixel behavior.
  2. Clone Stamp Tool:
    • The clone stamp tool is used for pixel-based cloning and retouching. It copies pixels from one area of an image and pastes them onto another, providing a powerful tool for removing imperfections or duplicating elements.
  3. Pixel-Based Filters:
    • Photoshop offers a plethora of pixel-based filters that can be applied to enhance or alter images. From blurring to sharpening, these filters operate on the pixel level, transforming the visual characteristics of an image.

Section 6: Pixel Perfection – Strategies for Retouching and Enhancement

  1. Non-Destructive Editing:
    • Non-destructive editing techniques in Photoshop allow for pixel manipulation without permanently altering the original image. Smart Objects, adjustment layers, and masks preserve the flexibility to refine edits later in the workflow.
  2. High Bit-Depth Editing:
    • Working with images in higher bit depths, such as 16-bit, provides more color information per pixel. This can be advantageous for maintaining image quality during extensive edits, reducing the risk of color banding and loss of detail.
  3. Precision in Pixel Alignment:
    • Achieving pixel-perfect results often involves precise alignment. Photoshop’s grid, guides, and snapping features assist in aligning elements to the pixel grid, ensuring clean compositions and avoiding subpixel rendering artifacts.

Section 7: Pixel Export and Image Output

  1. Exporting for Web:
    • When preparing images for the web, considerations such as image compression, file format (e.g., JPEG or PNG), and pixel dimensions become crucial. Balancing file size with image quality is essential for optimal web display.
  2. Print Resolution and Dots Per Inch (DPI):
    • Print preparation involves adjusting image resolution to match the printing process. Determining the appropriate dots per inch (DPI) ensures that the image translates accurately onto paper, maintaining detail and sharpness.

Section 8: Common Myths and Misconceptions Debunked

As we navigate the pixel landscape in Photoshop, it’s essential to address common myths and misconceptions:

  1. Myth: Higher Resolution Always Means Better Quality:
    • While higher resolution can enhance image detail, it doesn’t inherently guarantee better quality. The quality also depends on factors such as image source, editing techniques, and the intended output medium.
  2. Myth: Zooming Enhances Image Quality:
    • Zooming in on an image in Photoshop reveals individual pixels but doesn’t enhance the inherent quality of the image. It allows for detailed editing but doesn’t add additional information beyond the original image resolution.

Conclusion: Mastering the Pixel Palette in Photoshop

In conclusion, mastering the pixel palette in Adobe Photoshop is an essential skill for those navigating the dynamic landscape of digital imaging. This comprehensive guide has unraveled the significance of image pixels, explored their properties, and delved into their transformative role in the world of visual storytelling. As photographers, designers, and digital artists continue to push the boundaries of creativity, the mastery of pixels empowers precise editing, pixel-perfect compositions, and the realization of captivating visual narratives. In the ever-evolving realm of Photoshop, where every pixel contributes to the visual symphony, the knowledge and skills surrounding image pixels stand as the cornerstone for crafting imagery that resonates with clarity and impact.

Categories
How To Guides Photoshop

Unleashing Creativity: A Comprehensive Guide to Unlocking the Full Power of Basic Selections in Photoshop

Introduction:

Adobe Photoshop, a cornerstone in the world of digital imaging, empowers users to transform their creative visions into reality. At the heart of this transformative process lies the power of selections – a fundamental feature that allows for precise control over elements within an image. In this extensive guide, we will embark on a journey to unlock the full power of basic selections in Photoshop, exploring techniques, tools, and applications that enable designers and photographers to elevate their craft to new heights.

Section 1: The Fundamental Role of Selections

Selections in Photoshop serve as a cornerstone for various tasks, ranging from simple edits to complex compositions. Whether isolating objects, adjusting specific areas, or creating intricate masks, mastering basic selections is essential for unlocking the full potential of Photoshop’s editing capabilities.

Section 2: Introduction to Basic Selection Tools

Photoshop offers an array of selection tools that cater to different needs and scenarios. The fundamental tools include the Marquee Selection, Lasso Selection, and Magic Wand. Understanding the strengths and applications of each tool lays the groundwork for harnessing the full power of selections.

Section 3: Marquee Selections for Simplicity and Precision

The Marquee Selection tool, represented by the Rectangular Marquee and Elliptical Marquee, excels in creating simple geometric selections. Ideal for selecting squares, rectangles, circles, or ovals, the Marquee Selection tool provides a quick and straightforward way to isolate specific areas within an image.

Section 4: Freeform Precision with the Lasso Selection

The Lasso Selection tool, available in three variations – Lasso, Polygonal Lasso, and Magnetic Lasso – caters to scenarios requiring freeform precision. Whether outlining irregular shapes or tracing specific contours, the Lasso Selection tools offer flexibility and control for a wide range of selection needs.

Section 5: Magic Wand for Effortless Color-Based Selections

The Magic Wand tool simplifies color-based selections, making it efficient for isolating areas with similar tones or hues. With customizable tolerance settings, the Magic Wand enables users to achieve quick and accurate selections based on color similarity, streamlining the editing process.

Section 6: Mastering Selection Tool Options

Each basic selection tool in Photoshop comes with a range of customizable options that enhance precision and control. Exploring options such as feathering, anti-aliasing, and interpolation allows users to tailor selections to specific project requirements, ensuring a seamless integration of isolated elements.

Section 7: Combining and Refining Selections

Photoshop empowers users to combine, subtract, and refine selections seamlessly. By holding the Shift key to add to a selection or the Alt (Option on Mac) key to subtract from a selection, users can sculpt and fine-tune their selections with surgical precision. The ability to combine and refine selections enhances creative freedom and accuracy.

Section 8: Exploring Advanced Selection Techniques

Beyond the basics, Photoshop offers advanced selection techniques that unlock new dimensions of creative expression. Techniques such as using the Pen tool for precise paths, utilizing Channels for complex selections, or employing the Select and Mask workspace for detailed refinement provide additional tools for the discerning designer.

Section 9: Harnessing the Power of Layer Masks

Layer Masks, closely intertwined with selections, provide a non-destructive approach to editing. By using selections to create masks, designers can selectively reveal or conceal portions of an image, allowing for nuanced adjustments and seamless blending. Understanding the synergy between selections and masks amplifies creative possibilities.

Section 10: Applying Selections to Common Editing Tasks

The power of basic selections extends to a myriad of common editing tasks. Whether it’s isolating a subject for compositing, adjusting exposure in specific areas, or enhancing colors selectively, mastering basic selections equips users with the agility to tackle diverse editing challenges with finesse.

Section 11: Automating Selections with Actions

Photoshop’s Actions feature allows users to automate repetitive tasks, including selections. By recording and playing back a series of selection steps, designers can save time and ensure consistency in their workflows. Automation enhances efficiency, enabling users to focus on the creative aspects of their projects.

Section 12: Saving and Reusing Selections

The ability to save and reuse selections is a valuable aspect of mastering basic selections in Photoshop. Utilizing the Save Selection feature allows users to preserve selections for future use, streamlining workflows and maintaining consistency across multiple edits.

Section 13: Leveraging Third-Party Plugins for Selection Enhancement

To further enhance selection capabilities, designers can explore third-party plugins that extend Photoshop’s functionality. Plugins like Topaz Mask AI or Fluid Mask provide advanced algorithms for complex selections, offering additional tools for tackling intricate editing challenges.

Section 14: Navigating Selections in 3D and Video

Photoshop’s versatility extends beyond static images, allowing users to work with selections in 3D and video projects. Understanding how to apply selections in these contexts opens up new possibilities for creating dynamic and immersive visual experiences.

Section 15: Continuous Learning and Exploration

Mastering basic selections in Photoshop is an ongoing journey of learning and exploration. The software evolves, introducing new features and tools that expand the creative toolkit. Engaging in continuous learning through tutorials, workshops, and online resources ensures that designers stay at the forefront of Photoshop’s capabilities.

Conclusion:

Unlocking the full power of basic selections in Photoshop is a journey that transcends technical proficiency – it is an exploration of creative expression and visual storytelling. By delving into the nuances of selection tools, mastering advanced techniques, and applying selections to diverse editing tasks, designers and photographers can elevate their craft to new heights. This comprehensive guide serves as a roadmap for navigating the rich landscape of basic selections in Photoshop, encouraging users to unleash their creativity and transform their visions into compelling visual narratives.