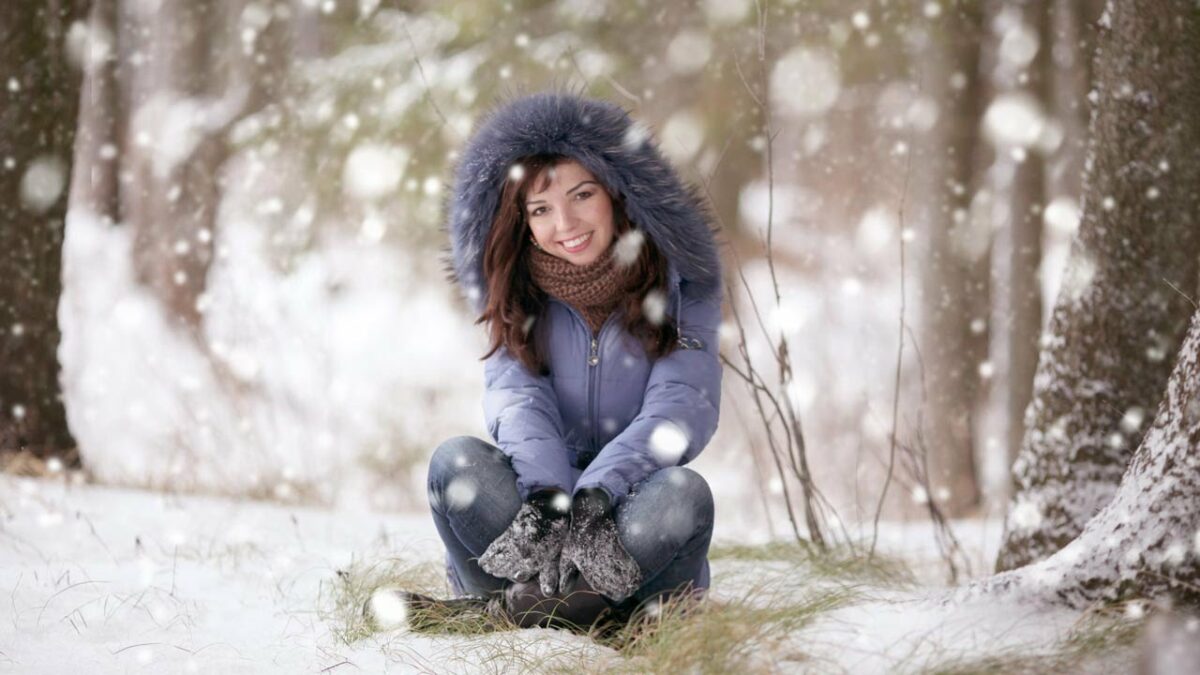
Categories
How To Guides Photoshop

Unveiling Precision: Mastering Image Sharpening with Unsharp Mask in Photoshop

Introduction:

In the realm of digital image editing, the pursuit of sharpness is a paramount objective for photographers, designers, and visual artists alike. Among the plethora of tools available in Adobe Photoshop, the Unsharp Mask (USM) filter stands out as a stalwart for achieving precise and controlled image sharpening. This extensive guide aims to unravel the mysteries of the Unsharp Mask, providing a comprehensive exploration of its features, applications, and advanced techniques to empower users in enhancing the clarity and detail of their images.

Understanding the Basics of Image Sharpening:

  1. The Role of Image Sharpness: Image sharpness is a critical element in visual communication, influencing the overall impact and legibility of photographs and graphics. Sharpening is employed to enhance fine details, refine edges, and elevate the overall visual acuity of an image.
  2. Common Causes of Image Blurring: Blurring in images can result from various factors, including camera shake, lens imperfections, and resizing. Identifying the cause of blurring is essential for applying targeted sharpening techniques.

Introduction to Unsharp Mask (USM) in Photoshop:

  1. Historical Context of Unsharp Mask: The Unsharp Mask technique originated in traditional darkroom photography. By intentionally introducing a blurred version of an image and subtracting it from the original, the process accentuated edges, creating the illusion of enhanced sharpness.
  2. Digital Implementation in Photoshop: In the digital realm, the Unsharp Mask in Photoshop became a staple for image sharpening. Its name, somewhat counterintuitive, stems from the traditional process of using a blurred “mask” to enhance perceived sharpness.

Optimal Workflow for Unsharp Mask:

  1. Preparing the Image for Sharpening: Before applying the Unsharp Mask, ensure that the image is properly preprocessed. Basic adjustments, color corrections, and noise reduction should be addressed to create a solid foundation for sharpening.
  2. Accessing Unsharp Mask: Navigate to the “Filter” menu in Photoshop, select “Sharpen,” and choose “Unsharp Mask.” This opens the Unsharp Mask dialog box, providing a range of controls for customization.
  3. Fine-Tuning Sharpening Settings: Adjust the three key parameters: “Amount,” “Radius,” and “Threshold.” The “Amount” determines the strength of the sharpening effect, “Radius” controls the size of the sharpening halo, and “Threshold” prevents sharpening of low-contrast areas.

Advanced Techniques for Unsharp Mask:

  1. Targeted Sharpening with Masks: Combine Unsharp Mask with layer masks to selectively apply sharpening to specific areas. This technique is particularly effective for preserving skin texture in portraits or enhancing details in specific regions of a landscape.
  2. High-Pass Filter and Blending Modes: Use the High-Pass filter to create a gray overlay representing image details. By adjusting the blending mode and opacity of this overlay, you can achieve a customizable sharpening effect, providing greater control over the final result.
  3. Applying Unsharp Mask Non-Destructively: Convert the layer to a smart object before applying Unsharp Mask for non-destructive sharpening. This preserves the original image data, allowing for adjustments even after sharpening has been applied.
  4. Batch Processing with Actions: For efficiency in workflows involving multiple images, create Photoshop actions to automate the application of Unsharp Mask with predefined settings. This ensures consistency across a series of images.

Preserving Natural Appearance and Avoiding Over-Sharpening:

  1. Balancing Sharpening and Realism: The goal of sharpening is to enhance details while maintaining a natural appearance. Strive for a balance that prevents over-sharpening, which can introduce artifacts and create an unnatural look.
  2. Previewing Sharpening Effects: Use the preview option in the Unsharp Mask dialog box to assess the sharpening effect at various zoom levels. This allows for real-time adjustments to achieve the desired level of sharpness.
  3. Observing Image at 100% Zoom: Evaluate the sharpening effect by zooming in to 100% view. This level of magnification provides a more accurate representation of how the sharpening will appear when the image is viewed at its actual size.

Conclusion:

Mastering the Unsharp Mask in Photoshop unveils a realm of possibilities for photographers and designers seeking to elevate the sharpness and detail of their images. As a versatile tool with a rich history and a robust set of features, Unsharp Mask empowers users to achieve precision in image sharpening. By understanding the nuances of its parameters, implementing advanced techniques, and adhering to best practices, creatives can navigate the intricacies of digital image sharpening with finesse. As technology advances and creative tools evolve, the Unsharp Mask remains a steadfast companion in the journey to create visually compelling and razor-sharp compositions.

Categories
How To Guides Photoshop

Mastering Layer Management: A Comprehensive Guide to Merging Layers in Photoshop Without Flattening Your Image

Introduction:

Adobe Photoshop, a cornerstone of digital image editing, empowers users with a myriad of tools for creative expression. Central to this creative process is the efficient management of layers, allowing for non-destructive editing and the preservation of original elements. Merging layers in Photoshop without flattening your image is a skill that enhances flexibility and creativity. In this extensive guide, we’ll explore the nuanced techniques and strategies for merging layers while maintaining the integrity of your composition.

Understanding the Importance of Layer Management:

  1. Non-Destructive Editing Philosophy: Photoshop’s layer-based structure adheres to the non-destructive editing philosophy, enabling users to make changes without altering the original image. Layers act as virtual sheets of transparency, allowing for precise adjustments and edits.
  2. Flexibility for Revisions: The ability to work with layers grants unparalleled flexibility when it comes to revisions. By keeping different elements on separate layers, you can revisit and modify specific aspects of your composition without affecting the entirety of the image.

Methods for Merging Layers Without Flattening:

  1. Using Merge Down (Ctrl/Cmd + E): The simplest method involves selecting the top layer you wish to merge and pressing Ctrl (Windows) or Cmd (Mac) + E to “Merge Down.” This combines the selected layer with the one directly below it, maintaining the remaining layers’ integrity.
  2. Merge Visible (Ctrl/Cmd + Shift + E): To merge multiple visible layers, use Ctrl + Shift + E (Windows) or Cmd + Shift + E (Mac) for “Merge Visible.” This creates a new layer containing the visible content without affecting hidden layers.
  3. Merge Layers Dialog (Ctrl/Cmd + Alt + Shift + E): For a more refined approach, Ctrl + Alt + Shift + E (Windows) or Cmd + Option + Shift + E (Mac) opens the “Merge Layers” dialog. Here, you can choose specific layers to merge, preserving the rest.

Advanced Techniques for Merging Layers:

  1. Clipping Masks and Merging: Utilizing clipping masks allows you to merge layers within a defined shape or area. This technique is particularly useful for creating complex compositions while maintaining individual layer adjustments.
  2. Smart Objects and Smart Filters: Converting layers to smart objects before merging provides additional flexibility. Smart objects retain original data, allowing for non-destructive application of filters and adjustments even after merging.
  3. Layer Comps: When working on multiple versions or variations of an image, use Layer Comps to save different layer visibility states. This allows for easy switching between compositions without merging layers prematurely.
  4. Grouping Layers (Ctrl/Cmd + G): Instead of merging, consider grouping layers using Ctrl + G (Windows) or Cmd + G (Mac). Grouping maintains individual layer properties while organizing them hierarchically, simplifying the editing process.

Preserving Layer Styles and Transparency:

  1. Preserving Layer Styles: When merging layers, Photoshop allows the preservation of layer styles. Ensure that the “Merge Layer Styles” option is selected in the Layers panel options to retain effects like shadows, gradients, and overlays.
  2. Maintaining Transparency: Merging layers does not inherently remove transparency. Transparency is preserved unless layers are explicitly rasterized. Be mindful of the impact of layer blending modes on the final composition.

Best Practices and Considerations:

  1. Naming and Organization: Adopt a systematic approach to naming and organizing your layers. Descriptive names and well-structured layer groups contribute to a more manageable and efficient workflow.
  2. Regular Saving and Versioning: Regularly save your work and create versioned copies, especially before merging significant elements. This precautionary measure ensures you can backtrack if needed.
  3. Adjustment Layers and Smart Filters: Whenever possible, use adjustment layers and smart filters instead of making direct adjustments to pixel layers. This maintains the flexibility of non-destructive editing.

Conclusion:

Merging layers in Photoshop without flattening your image is a nuanced skill that empowers creatives to balance flexibility with efficiency. By understanding the various methods, advanced techniques, and best practices for layer merging, you can navigate the complex terrain of digital image editing with finesse. Remember, the key to a successful workflow lies not only in mastering individual tools but also in employing them strategically to bring your creative vision to life. As you delve deeper into the intricacies of layer management, merging layers will become a seamless part of your toolkit, enhancing your ability to craft compelling and dynamic compositions in Adobe Photoshop.

Categories
How To Guides Photoshop

Mastering Image Sharpness: A Comprehensive Guide to Using Smart Sharpen in Photoshop

Introduction:

In the realm of digital image editing, achieving optimal sharpness is paramount for conveying visual impact and clarity. Adobe Photoshop, a ubiquitous tool for creative professionals, offers an array of sharpening techniques, and among them, the Smart Sharpen filter stands out as a powerful and versatile tool. This extensive guide aims to delve into the intricacies of using Smart Sharpen in Photoshop, offering insights, tips, and techniques to help photographers and designers elevate their images to new levels of crispness and detail.

Understanding the Basics of Image Sharpening:

  1. The Importance of Image Sharpness: Image sharpness enhances visual appeal by accentuating details and improving overall clarity. Whether for web content, print materials, or artistic creations, sharp images command attention and leave a lasting impression on viewers.
  2. Common Causes of Image Blurring: Images can lose sharpness due to various factors, including camera shake, lens imperfections, and resizing. Understanding these factors is crucial for choosing the right sharpening techniques to address specific issues.

Introduction to Smart Sharpen in Photoshop:

  1. Evolution of Sharpening Tools: Smart Sharpen represents a significant evolution in Photoshop’s sharpening capabilities. Introduced in later versions, it incorporates advanced algorithms and features that surpass traditional sharpening filters.
  2. Key Features of Smart Sharpen: Smart Sharpen offers a range of features, including adjustable sharpening amount, radius, and noise reduction. Its unique ability to distinguish between different types of image details and edges sets it apart as a sophisticated and intelligent sharpening tool.

Optimal Workflow for Smart Sharpen:

  1. Preparing the Image: Before applying Smart Sharpen, ensure that the image is properly preprocessed. This includes addressing any issues related to exposure, color correction, and basic retouching.
  2. Accessing Smart Sharpen: Navigate to the “Filter” menu in Photoshop, select “Sharpen,” and then choose “Smart Sharpen.” This opens the Smart Sharpen dialog box, providing access to a range of controls.
  3. Fine-Tuning Sharpening Settings: Adjust the key parameters, including “Amount,” “Radius,” and “Remove” (for noise reduction), based on the specific needs of the image. Experiment with different settings to find the optimal balance between sharpness and natural appearance.

Advanced Techniques and Tips:

  1. Targeted Sharpening with Masking: Smart Sharpen allows for targeted sharpening by utilizing the “Shadows” and “Highlights” options. Employing masking techniques ensures that sharpening is applied selectively to different tonal areas, preventing over-sharpening in sensitive regions.
  2. Using the “More Accurate” Option: In the Smart Sharpen dialog box, the “More Accurate” checkbox enhances the algorithm’s precision. While it may slightly increase processing time, it often yields superior results, particularly for high-resolution images.
  3. Batch Processing with Smart Sharpen: For efficiency in a workflow with multiple images, Smart Sharpen supports batch processing. This enables users to apply consistent sharpening settings across a series of images, maintaining a cohesive look.
  4. Combining Smart Sharpen with Other Filters: Smart Sharpen can be complemented by other filters in Photoshop. For instance, applying a slight “Gaussian Blur” before Smart Sharpen can simulate a selective focus effect, enhancing the overall aesthetic appeal.
  5. Preserving Output Quality: When sharpening for specific output formats (web, print, etc.), consider creating separate Smart Sharpen adjustments for each format. This ensures that sharpening is optimized for the unique characteristics of the intended output.

Conclusion:

Mastering Smart Sharpen in Photoshop opens a realm of possibilities for photographers and designers seeking to enhance the sharpness and detail in their images. This sophisticated tool, with its advanced algorithms and versatile features, empowers users to achieve a perfect balance between sharpness and natural appearance. By understanding the nuances of Smart Sharpen and incorporating advanced techniques, creatives can elevate their images, leaving a lasting impact on viewers and establishing a signature style in their visual storytelling. As technology continues to evolve, the role of tools like Smart Sharpen becomes even more pivotal in shaping the future of digital imaging, where precision and artistry converge to define the visual language of tomorrow.