Introduction:
Audio effects are powerful tools that allow video editors and sound designers to shape and enhance the soundscapes of their projects, adding depth, texture, and emotion to their audio tracks. In DaVinci Resolve, a comprehensive suite of audio effects is available within the Fairlight page, providing users with the ability to apply EQ, compression, reverb, delay, and more to their audio clips and tracks. In this extensive guide, we’ll delve into the art of using audio effects in DaVinci Resolve, providing you with the knowledge and techniques to elevate your audio to new heights and create immersive and engaging sound experiences for your video projects.
Understanding Audio Effects in DaVinci Resolve:
Before diving into the specifics of using audio effects, it’s essential to understand the different types of effects available in DaVinci Resolve and how they impact the sound of your audio tracks.
- Equalization (EQ):
- EQ is a fundamental audio effect that allows users to adjust the frequency balance of audio tracks by boosting or cutting specific frequency bands. EQ controls include parameters such as frequency, gain, and Q factor, which determine which frequencies are affected and to what extent. EQ can be used to enhance clarity, remove unwanted frequencies, and sculpt the tonal balance of audio tracks.
- Compression:
- Compression is an audio effect that reduces the dynamic range of audio signals by attenuating loud sounds and boosting quiet sounds, resulting in a more consistent and controlled sound. Compression controls include parameters such as threshold, ratio, attack, release, and makeup gain, which determine how aggressively the compressor reacts to incoming audio signals. Compression can be used to increase the perceived loudness, improve clarity, and add punch and presence to audio tracks.
- Reverb:
- Reverb is an audio effect that simulates the natural reverberation of sound in a physical space, adding depth, spaciousness, and realism to audio tracks. Reverb controls include parameters such as decay time, pre-delay, damping, and room size, which shape the characteristics of the reverberant sound. Reverb can be used to create a sense of ambience, place audio elements within a virtual space, and enhance the overall immersion and depth of audio tracks.
- Delay:
- Delay is an audio effect that creates echoes of audio signals by delaying the playback of the original signal by a certain amount of time. Delay controls include parameters such as delay time, feedback, and wet/dry mix, which determine the timing, intensity, and balance of the delayed signal. Delay can be used to create rhythmic patterns, spatial effects, and psychedelic textures, adding movement and interest to audio tracks.
- Modulation Effects:
- Modulation effects are audio effects that modulate the amplitude, frequency, or phase of audio signals to create dynamic and evolving sounds. Common modulation effects include chorus, flanger, phaser, and tremolo, each of which imparts a distinctive character and texture to audio tracks. Modulation effects can be used to add movement, depth, and richness to audio tracks, enhancing their sonic complexity and expressiveness.
Using Audio Effects in DaVinci Resolve:
Let’s explore the step-by-step process of using audio effects in DaVinci Resolve:
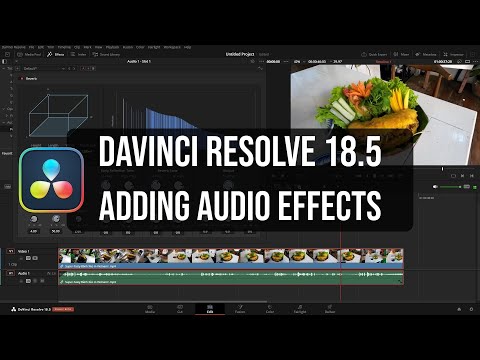
- Access the Fairlight Page:
- Launch DaVinci Resolve and open your project. Navigate to the Fairlight page by clicking on the Fairlight tab at the bottom of the interface. The Fairlight page provides a dedicated workspace for audio editing and mixing, where you can access a wide range of audio effects and processing tools.
- Apply Audio Effects:
- To apply audio effects to an audio clip or track, select the clip or track in the timeline, then navigate to the effects library in the Fairlight page. Browse through the available audio effects categories, such as EQ, dynamics, reverb, delay, modulation, and more, and choose the desired effect to apply. Drag and drop the effect onto the selected clip or track to apply it.
- Adjust Effect Parameters:
- Once an audio effect is applied, adjust its parameters to achieve the desired sound and effect. Click on the audio clip or track in the timeline to select it, then navigate to the inspector panel to access the effect controls. Use the controls to adjust parameters such as frequency, gain, threshold, ratio, decay time, delay time, feedback, modulation rate, and depth to fine-tune the effect to your liking.
- Preview and Playback:
- Preview your project in the Fairlight page to assess the impact of the applied audio effects on the overall sound of your project. Playback the timeline to hear how the effects interact with the audio tracks and contribute to the overall sonic texture and mood. Use the playback controls to scrub through the timeline and audition the effects in real-time.
- Combine Multiple Effects:
- Experiment with combining multiple audio effects to create complex and layered soundscapes. Apply EQ to shape the frequency balance, compression to control dynamics, reverb to add ambience, and delay to create spatial effects. Mix and match effects to achieve the desired sonic palette and enhance the emotional impact of your audio tracks.
- Save Presets:
- Save custom effect settings as presets for future use in other projects. Once you’ve dialed in the perfect sound with your chosen effects and settings, save them as presets to streamline your workflow and save time on future projects. Give your presets descriptive names and organize them within the effects library for easy access and retrieval.
Best Practices for Using Audio Effects:
To achieve optimal results when using audio effects in DaVinci Resolve, consider the following best practices:
- Use Effects Sparingly:
- Use audio effects sparingly and judiciously to avoid overprocessing and cluttering the sound. Focus on applying effects only where they are needed to enhance the sound and serve the artistic vision of your project.
- Listen Critically:
- Listen critically to the impact of each audio effect on the overall sound of your project. Pay attention to how the effects shape the tone, dynamics, spatialization, and emotional resonance of the audio tracks, and make adjustments as needed to achieve the desired sonic balance and impact.
- Maintain Balance:
- Maintain a balanced mix of audio effects to ensure that they complement each other and contribute harmoniously to the overall sound of your project. Avoid overpowering or masking the original audio signal with excessive effects, and aim for a cohesive and coherent sonic palette that supports the narrative and mood of your video.
- Experiment and Explore:
- Experiment with different combinations of audio effects, parameter settings, and processing techniques to explore creative possibilities and discover new sounds. Don’t be afraid to push the boundaries of conventional audio processing and experiment with unconventional effects and signal chains to achieve unique and innovative results.
- Reference Material:
- Use reference material such as professionally produced music tracks, sound effects libraries, or reference videos to guide your decisions when applying audio effects. Compare the sound of your project with reference material to ensure that it meets industry standards and sounds natural and balanced.
- Trust Your Ears:
- Trust your ears as the ultimate judge of sound quality and effectiveness when using audio effects. Use visual feedback from waveform meters and spectrograms as a guide, but rely primarily on your ears to assess the impact of the effects on the overall sound of your project.
Conclusion:
Using audio effects in DaVinci Resolve opens up a world of creative possibilities for shaping and enhancing the soundscapes of your video projects. By understanding the different types of effects available, applying them strategically, and following best practices for audio processing, you can create immersive and engaging sound experiences that captivate and resonate with your audience. Experiment with different effects, parameter settings, and processing techniques, and let your creativity shine as you elevate the sound of your projects to new heights with audio effects in DaVinci Resolve.