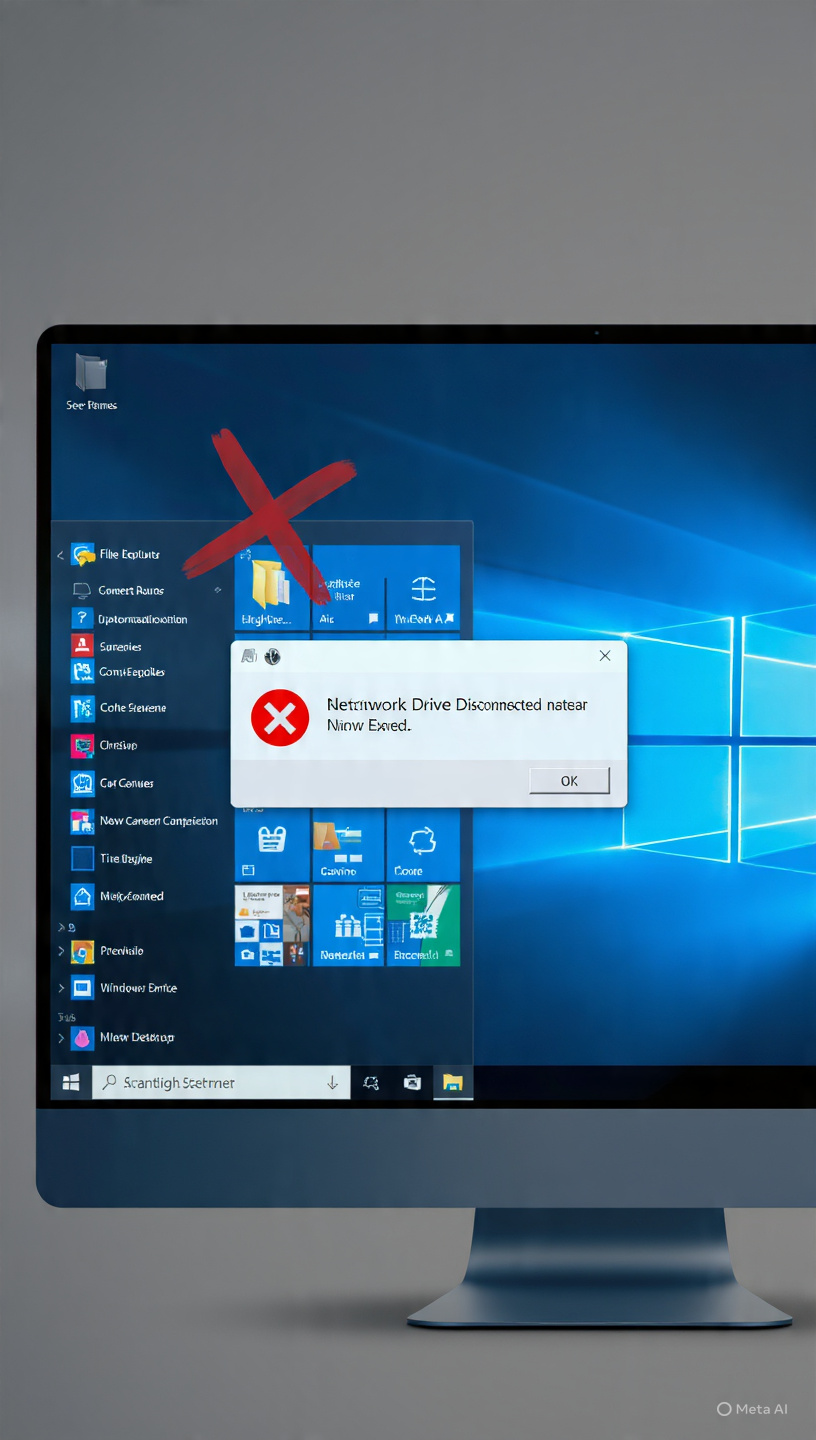
Categories
How To Guides

Unleashing Creativity: A Comprehensive Guide to Harnessing Content-Aware Fill in Adobe After Effects

Introduction: Content-Aware Fill is a revolutionary feature in Adobe After Effects that empowers creators to seamlessly remove unwanted elements from videos, fill in the resulting gaps, and reconstruct the background with stunning accuracy. Whether used for removing objects, logos, or imperfections from footage, Content-Aware Fill offers a powerful tool for enhancing the visual quality and storytelling of video projects. In this comprehensive guide, we’ll explore the intricacies of using Content-Aware Fill in After Effects, covering everything from basic setups to advanced techniques for achieving precise and seamless results.

Understanding Content-Aware Fill: Content-Aware Fill leverages advanced algorithms and machine learning technology to intelligently analyze video frames, identify unwanted elements, and generate realistic replacements based on the surrounding context. By analyzing the pixel data and motion patterns within the footage, Content-Aware Fill is able to seamlessly fill in the gaps left behind by removed objects, preserving the visual integrity and continuity of the scene. Whether used for cleaning up blemishes, removing distractions, or enhancing the composition, Content-Aware Fill offers unparalleled flexibility and precision for retouching video footage.

Getting Started with Content-Aware Fill in After Effects: To begin using Content-Aware Fill in Adobe After Effects, follow these steps:

Step 1: Import Footage: Open After Effects and create a new composition by selecting “Composition” > “New Composition” from the menu. Import the footage you want to retouch by dragging it into the composition timeline or selecting “File” > “Import” from the menu.

Step 2: Apply Content-Aware Fill: With the footage layer selected in the timeline, navigate to the Content-Aware Fill panel by selecting “Window” > “Content-Aware Fill” from the menu. In the Content-Aware Fill panel, use the Pen tool to draw a mask around the object or area you want to remove from the footage. Ensure that the mask covers the entire area of the unwanted element and extends slightly beyond its boundaries to provide enough context for the fill.

Step 3: Generate Fill Layer: Once the mask is drawn, click the “Generate Fill Layer” button in the Content-Aware Fill panel to initiate the fill process. After Effects will analyze the surrounding pixels and motion patterns to generate a realistic replacement for the masked area. Depending on the complexity of the scene and the size of the mask, this process may take some time to complete.

Step 4: Refine Fill Settings: After the fill process is complete, review the results and make any necessary adjustments to the fill settings in the Content-Aware Fill panel. Use the various controls and options available, such as Fill Method, Fill Range, and Sampling Area, to refine the appearance and accuracy of the fill. Experiment with different settings to achieve the desired result, taking into account factors such as lighting, texture, and motion blur.

Step 5: Preview and Finalize: Preview the filled footage in After Effects to assess the quality and realism of the fill. Scrub through the timeline to ensure that the fill seamlessly blends with the surrounding elements and maintains continuity throughout the scene. Make any additional adjustments or refinements as needed to achieve the desired result. Once you’re satisfied with the fill, render the composition to generate the final video output.

Advanced Techniques and Tips: To take your Content-Aware Fill effects to the next level, consider exploring the following advanced techniques and tips:

  1. Mask Tracking: Utilize After Effects’ built-in tracking tools to automatically track the motion of the mask over time. This allows for more precise and accurate fills, especially in scenes with complex motion or camera movements.
  2. Manual Correction: In cases where Content-Aware Fill produces imperfect results, use manual correction techniques to touch up the fill. Use tools such as the Clone Stamp or Healing Brush to paint over any remaining artifacts or inconsistencies, blending them seamlessly with the surrounding pixels.
  3. Background Reconstruction: Experiment with techniques for reconstructing the background behind the removed object or area. Use tools such as the Clone Stamp, Content-Aware Fill, or manually painted textures to recreate the background elements and maintain visual continuity throughout the scene.
  4. Multi-Frame Analysis: In scenes with fast motion or complex backgrounds, consider analyzing multiple frames of footage to generate a more accurate fill. Use the “Span” option in the Content-Aware Fill panel to specify the number of frames to analyze, allowing for more comprehensive pixel data and motion analysis.
  5. Mask Feathering and Expansion: Adjust the feathering and expansion settings of the mask to control the softness and blending of the fill. Experiment with different feathering values to achieve a seamless transition between the filled area and the surrounding elements, ensuring a natural and realistic result.

Conclusion: Content-Aware Fill in Adobe After Effects offers a powerful tool for seamlessly removing unwanted elements from video footage, enhancing the visual quality and storytelling of video projects. By mastering the techniques and principles outlined in this guide, you’ll be equipped to create Content-Aware Fill effects that captivate, engage, and inspire audiences with their precision and realism.

As you embark on your journey to explore Content-Aware Fill in After Effects, remember to embrace experimentation, iteration, and innovation. Experiment with different settings, refine your skills through practice, and let your creativity soar as you craft seamless and immersive visual effects that elevate the quality and impact of your video projects. With dedication, patience, and a willingness to explore new possibilities, you’ll unlock the full potential of Content-Aware Fill in After Effects and create visual effects that leave a lasting impression on your audience.

Categories
How To Guides

Mastering Motion: A Comprehensive Guide to Creating Motion Tracking Effects in Adobe After Effects

Introduction: Motion tracking is a powerful technique used in visual effects and motion graphics to seamlessly integrate elements into live-action footage. With Adobe After Effects, creators have access to robust motion tracking tools that allow them to track the movement of objects, characters, or camera shots within a scene and apply that motion to other visual elements. Whether used for adding text, graphics, or visual effects to moving shots, motion tracking offers endless possibilities for enhancing the realism and visual impact of video projects. In this comprehensive guide, we’ll explore the intricacies of creating motion tracking effects in After Effects, covering everything from basic setups to advanced techniques for achieving precise and seamless tracking results.

Understanding Motion Tracking: Motion tracking is the process of automatically capturing and analyzing the movement of objects or features within a video clip and using that data to apply motion to other elements in the scene. In Adobe After Effects, motion tracking can be used for a variety of purposes, including:

  1. Adding Text and Graphics: Track the movement of objects or characters within a scene and apply that motion to text, graphics, or visual effects, creating the illusion of them interacting with the environment.
  2. Stabilizing Footage: Use motion tracking to stabilize shaky or handheld footage, ensuring smooth and steady motion throughout the scene.
  3. Inserting Visual Effects: Track specific features or areas within a scene and apply visual effects such as explosions, gunfire, or particle effects to those tracked points, seamlessly integrating them into the footage.
  4. Match Moving: Track the movement of the camera within a scene and apply that motion to virtual 3D objects or scenes, allowing them to match the perspective and movement of the live-action footage.

Getting Started with Motion Tracking in After Effects: To begin creating motion tracking effects in Adobe After Effects, follow these steps:

Step 1: Import Footage: Open After Effects and create a new composition by selecting “Composition” > “New Composition” from the menu. Import the footage you want to track by dragging it into the composition timeline or selecting “File” > “Import” from the menu.

Step 2: Track Motion: With the footage layer selected in the timeline, navigate to the Animation menu and choose “Track Motion” to open the Motion Tracker panel. In the Motion Tracker panel, select the type of tracking you want to perform (e.g., Track Motion or Stabilize Motion) and adjust the tracking settings as needed.

Step 3: Define Tracking Points: Use the tracker controls to define tracking points within the footage. Position the tracker target over a feature or area of high contrast that you want to track, such as a corner or edge of an object.

Step 4: Analyze and Apply Tracking: Click the “Analyse Forward” button in the Motion Tracker panel to begin analyzing the motion of the selected tracking points. After Effects will track the movement of the selected points throughout the duration of the footage. Once the tracking process is complete, click the “Apply” button to apply the tracking data to a new null object or directly to a layer in the composition.

Step 5: Refine and Adjust: Review the tracking results and make any necessary adjustments or refinements to the tracking data. Use the keyframe controls in the timeline to manually adjust the position, scale, or rotation of the tracked layer or null object to ensure accurate alignment with the tracked features.

Step 6: Enhance with Visual Effects (Optional): Once the motion tracking is complete, you can enhance the scene with additional visual effects, text, or graphics. Use the tracking data to position and animate elements within the scene, adding depth, realism, and visual interest to the composition.

Advanced Techniques and Tips: To take your motion tracking effects to the next level, consider exploring the following advanced techniques and tips:

  1. Planar Tracking: Use planar tracking techniques to track the movement of flat surfaces within a scene, such as walls, floors, or screens. Planar tracking offers more accurate results for tracking complex motion and perspective changes.
  2. Manual Tracking: In cases where automatic tracking fails or produces inaccurate results, use manual tracking techniques to track features or objects frame by frame. Manually keyframe the position, scale, and rotation of the tracked elements to ensure precise alignment with the footage.
  3. Tracking Masks and Rotoscoping: Combine motion tracking with masking and rotoscoping techniques to isolate specific areas or objects within a scene. Use tracking masks to apply visual effects or adjustments to specific regions of the footage, enhancing the realism and impact of the scene.
  4. 3D Motion Tracking: Utilize 3D motion tracking techniques to track the movement of the camera within a scene in all three dimensions. Use the tracked camera data to integrate virtual 3D objects or scenes into the live-action footage, creating seamless composites and visual effects.
  5. Tracking Point Clean-Up: After tracking motion, carefully review the tracking data and clean up any errors or inconsistencies. Manually adjust keyframes or track additional reference points to correct drifting, slipping, or misalignment in the tracked elements.

Conclusion: Motion tracking in Adobe After Effects offers a powerful tool for seamlessly integrating elements into live-action footage, enhancing the realism and visual impact of video projects. By mastering the techniques and principles outlined in this guide, you’ll be equipped to create motion tracking effects that captivate, engage, and inspire audiences with their precision and realism.

As you embark on your journey to explore motion tracking in After Effects, remember to embrace experimentation, iteration, and innovation. Experiment with different tracking techniques, refine your skills through practice, and let your creativity soar as you craft dynamic and immersive motion tracking effects that elevate the storytelling and visual impact of your projects. With dedication, patience, and a willingness to explore new possibilities, you’ll unlock the full potential of motion tracking in After Effects and create visual effects that leave a lasting impression on your audience.

Categories
How To Guides

Crafting a Winter Wonderland: A Comprehensive Guide to Creating a Snowfall Effect in Adobe After Effects

Introduction: The gentle descent of snowflakes is a timeless symbol of winter’s beauty and tranquility, evoking feelings of wonder and nostalgia. In visual storytelling, the snowfall effect adds a touch of magic and atmosphere to scenes, transforming ordinary landscapes into enchanting winter wonderlands. With Adobe After Effects, you can bring this wintry magic to life by creating captivating snowfall effects that enhance the mood and ambiance of your compositions. In this extensive guide, we’ll explore the step-by-step process of creating a snowfall effect in After Effects, covering everything from basic setup to advanced techniques, ensuring that you can harness the full creative potential of snow in your projects.

Understanding the Snowfall Effect: The snowfall effect simulates the appearance of falling snowflakes drifting gently through the air, creating a serene and picturesque scene. This effect is achieved by generating particles that mimic the behavior of snowflakes, such as their size, shape, movement, and density. By adjusting parameters such as particle size, velocity, turbulence, and opacity, users can create a wide range of snowfall effects, from light flurries to heavy snowstorms.

Basic Setup: To create a snowfall effect in Adobe After Effects, follow these steps:

  1. Create a New Composition: Launch After Effects and create a new composition by selecting “Composition” > “New Composition” from the menu. Set the desired dimensions, frame rate, and duration for your composition.
  2. Create a New Solid Layer: Right-click in the Project panel and select “New” > “Solid” to create a new solid layer. Choose a color for the solid layer that will represent the color of the snowflakes.
  3. Apply the CC Snowfall Effect: With the solid layer selected, go to the Effects & Presets panel and search for “CC Snowfall” or “Snow.” Drag the CC Snowfall effect onto the solid layer in the timeline to apply it.
  4. Adjust Effect Settings: With the layer selected, navigate to the Effect Controls panel to adjust the settings of the CC Snowfall effect. Experiment with parameters such as snowflake size, speed, density, and wind to achieve your desired snowfall effect.

Exploring Effect Properties: The CC Snowfall effect offers a variety of controls for customizing the appearance and behavior of the snowfall. Here are some key properties to explore:

  1. Snowflake Size: Adjust the size of the snowflakes to control their scale and visibility. Increase the size value to make the snowflakes larger and more prominent, or decrease it for smaller and more subtle flakes.
  2. Snowflake Speed: Control the speed of the snowflakes by adjusting the speed properties. Increase the speed value to make the snowflakes fall faster, or decrease it for slower and more leisurely movement.
  3. Snowflake Density: Define the density of the snowfall by adjusting the density properties. Use the density value to control the number of snowflakes generated per unit area, creating a sparse or dense snowfall effect.
  4. Wind Direction: Simulate wind effects by adjusting the wind properties. Use the wind speed and direction parameters to control the movement of the snowflakes, adding realism and dynamism to the snowfall effect.
  5. Opacity: Adjust the opacity of the snowflakes to control their transparency and visibility. Increase the opacity value to make the snowflakes more opaque, or decrease it for a more transparent effect, allowing the background to show through.

Advanced Techniques: Once you’re familiar with the basic setup and effect properties of the CC Snowfall effect, you can explore advanced techniques to enhance your snowfall compositions:

  1. Layer Interactions: Combine multiple layers and effects to create complex and layered snowfall compositions. Experiment with blending modes, masks, and track mattes to integrate snowfall seamlessly with other visual elements.
  2. Animation: Animate the properties of the CC Snowfall effect to create dynamic and expressive snowfall animations. Use keyframe animation to animate parameters such as snowflake size, speed, density, wind direction, and opacity over time, adding movement and life to the snowfall effect.
  3. Texture Mapping: Apply texture overlays or displacement maps to add texture and detail to the snowfall effect. Use effects such as Fractal Noise or Turbulent Displace to add noise, distortion, or texture to the snowflakes, enhancing their visual impact.
  4. Particle Systems: Incorporate particle systems to add depth and complexity to the snowfall effect. Use effects such as Particle World or Particular to generate particles that interact with the snowflakes, adding visual interest and dynamism to the composition.
  5. Interactive Elements: Create interactive snowfall effects that respond to user input or environmental cues. Use expressions or scripting to link the parameters of the CC Snowfall effect to control sliders, checkboxes, or audio inputs, allowing for dynamic and responsive snowfall compositions.

Practical Applications: Snowfall effects can be used in a variety of creative projects to add mood, atmosphere, and visual interest. Here are some practical applications:

  1. Winter Scenes: Enhance winter scenes with realistic snowfall effects. Use snowfall effects to evoke the serene beauty of snowy landscapes, creating a cozy and festive atmosphere.
  2. Holiday Greetings: Create festive holiday greetings with animated snowfall effects. Use snowfall effects to add a touch of seasonal charm to greeting cards, promotional videos, or social media posts, spreading joy and goodwill to your audience.
  3. Film and Television: Enhance film and television productions with cinematic snowfall effects. Use snowfall effects to create atmospheric establishing shots, dreamy montages, or magical fantasy sequences, enhancing the storytelling and visual appeal of the narrative.
  4. Motion Graphics: Design dynamic motion graphics with stylized snowfall effects. Use snowfall effects to create abstract patterns, dynamic transitions, or whimsical animations that captivate and engage viewers.
  5. Visual Effects: Enhance visual effects shots with realistic snowfall effects. Use snowfall effects to simulate falling snow in outdoor scenes, adding depth and realism to the visuals.

Conclusion: The snowfall effect in Adobe After Effects offers a versatile and expressive tool for creating captivating and immersive winter scenes. By mastering its basic setup, exploring effect properties, and experimenting with advanced techniques, you can unleash your creativity and produce stunning snowfall compositions that captivate your audience. Whether you’re a filmmaker, motion graphics designer, or visual effects artist, snowfall effects provide endless possibilities for creative expression and storytelling. So, dive in, experiment, and transform your compositions into enchanting winter wonderlands with the snowfall effect in Adobe After Effects.