Introduction:
In the realm of digital design and visual artistry, harnessing the fiery elements of flames adds a dynamic and captivating dimension to images and compositions. The fire effect in Photoshop stands as a powerful technique that infuses artwork with intensity, energy, and drama. Whether used in photo manipulation, digital art, or graphic design, mastering the creation of fire effects offers designers and artists a versatile tool for unleashing their creativity and igniting the visual impact of their work. In this comprehensive guide, we will embark on a journey through step-by-step techniques, expert tips, and creative strategies to master the art of creating fire effects in Adobe Photoshop.
Understanding the Fire Effect:
The fire effect aims to simulate the appearance of flames, embers, or fiery elements in an image. It adds realism, drama, and a sense of movement, transforming ordinary compositions into dynamic and visually striking artworks. By leveraging techniques such as blending modes, layer styles, and custom brushes, designers can achieve stunning results that captivate viewers and evoke the raw power and energy of fire.
Now, let’s delve into the step-by-step process of creating fire effects in Adobe Photoshop:
Step 1: Setting Up the Document:
Begin by opening Adobe Photoshop and creating a new document with dimensions suitable for your design project. Choose a resolution and color mode appropriate for your intended output, such as print or digital display.
Step 2: Importing the Base Image:
Import the base image onto which you want to apply the fire effect. Choose an image with elements that you want to enhance or transform using the fiery elements.
Step 3: Creating the Fire Effect:
There are several techniques for creating fire effects in Photoshop. One method involves using brushes to paint flames directly onto the canvas. Select the Brush tool (B) and choose a fire brush from the brush presets or download custom fire brushes from online resources. Adjust the brush size, opacity, and flow settings as needed, then paint flames onto a new layer above the base image.
Step 4: Adjusting Layer Blending Modes:
Experiment with different layer blending modes to blend the fire effect layer with the underlying image layer. Overlay, Screen, and Linear Dodge blending modes often work well for creating vibrant, glowing fire effects that simulate the luminosity of flames.
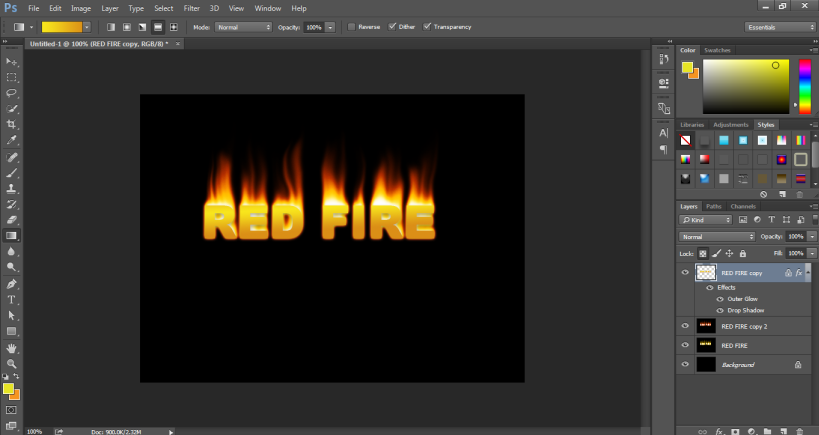
Step 5: Adding Layer Styles:
To enhance the realism and intensity of the fire effect, consider adding layer styles such as Outer Glow, Inner Glow, and Bevel & Emboss to the fire effect layer. These layer styles can add depth, dimension, and luminosity to the flames, making them appear more realistic and dynamic.
Step 6: Adjusting Opacity and Fill:
Fine-tune the opacity and fill settings of the fire effect layer to achieve the desired intensity and realism. Lowering the opacity can create a more subtle and transparent fire effect, while adjusting the fill can control the density and solidity of the flames.
Step 7: Adding Embers and Sparks:
To add additional elements of realism to the fire effect, consider adding embers, sparks, or smoke. Use custom brushes or pre-made brush packs to paint embers and sparks onto a new layer above the fire effect layer. Experiment with different colors, sizes, and opacities to create a dynamic and immersive fire effect.
Step 8: Blending and Integration:
Blend the fire effect and additional elements seamlessly with the base image by adjusting layer opacity, blending modes, and masking techniques. Use layer masks to selectively reveal or conceal parts of the fire effect, ensuring a natural and integrated composition.
Step 9: Fine-Tuning and Refinement:
Take the time to fine-tune and refine the fire effect to achieve the desired look and feel. Experiment with different brush settings, layer styles, and blending modes to enhance the realism and impact of the flames. Pay attention to details such as color, shape, and movement to create a cohesive and visually compelling fire effect.
Step 10: Final Touches and Exporting:
Once you’re satisfied with the fire effect and overall composition, take the time to make any final adjustments or refinements to the design. Fine-tune the colors, contrast, and overall atmosphere to ensure that the effect enhances the mood and aesthetic of the artwork. When you’re happy with the final result, save your work and export the design in a high-quality format suitable for your intended use.
Advanced Techniques and Tips:
In addition to the basic steps outlined above, consider exploring advanced techniques and tips to further enhance the fire effect:
- Texture Overlay: Experiment with incorporating texture overlays or pattern fills to add depth and visual interest to the fire effect. Textures such as grunge, paper, or noise can enhance the realism and intensity of the flames, adding richness and complexity to the composition.
- Color Gradients: Use gradient maps or color gradients to add depth and dimension to the fire effect. Experiment with different color schemes and blending modes to create dynamic color transitions and visual effects, adding visual interest and complexity to the composition.
- Animation Effects: For multimedia projects or digital artworks, consider adding animation effects to the fire effect to create dynamic and interactive visuals. Use keyframes and animation tools in Photoshop or export the design to a video editing software for further customization.
- Photorealistic Flames: For a more photorealistic fire effect, consider using stock photos or image overlays of actual flames. Experiment with blending modes, layer masks, and adjustment layers to seamlessly integrate the photorealistic flames with the base image, creating a stunning and immersive fire effect.
Conclusion:
In conclusion, mastering the creation of fire effects in Adobe Photoshop offers designers and artists a powerful and versatile tool for creating visually striking compositions that command attention and evoke emotion. By following the step-by-step techniques outlined in this guide and exploring advanced techniques and tips, you can unleash your creativity and transform ordinary images into dynamic and immersive artworks that captivate viewers and ignite the imagination.