Introduction:
The ability to make a subject pop out of a photo is a transformative skill in the realm of digital photography and graphic design. Adobe Photoshop, a versatile tool for image manipulation, offers a myriad of techniques to enhance the dimensionality of a photograph and bring the subject to the forefront. This comprehensive guide will navigate through the intricate steps, creative considerations, and advanced techniques required to master the art of making your subject pop out of a photo with Photoshop, turning ordinary images into visually striking masterpieces.
I. Understanding the Importance of Subject Pop:
- Visual Impact: Explore how making a subject pop out of a photo enhances the visual impact of the image. This technique draws attention to the main subject, creating a focal point that engages viewers and communicates the intended narrative.
- Depth and Dimension: Recognize the role of depth and dimension in making a subject stand out. Techniques that emphasize these elements contribute to a three-dimensional quality, elevating the overall visual experience.
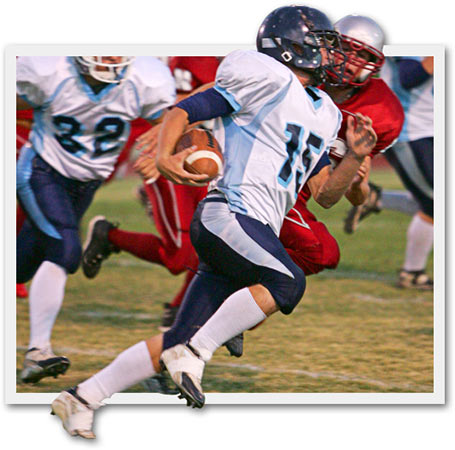
II. Selecting an Appropriate Image:
- Choosing a Dynamic Subject: Begin with an image that features a dynamic and compelling subject. Whether it’s a person, object, or landscape, a strong subject forms the foundation for creating a captivating pop-out effect.
- Considering Background Complexity: Analyze the complexity of the background in relation to the subject. A background with moderate complexity allows for more effective isolation and emphasis on the main subject.
III. Preparing the Base Image:
- Color Correction and Enhancement: Commence with basic color correction on the base image. Adjust saturation, brightness, and contrast to create a balanced foundation that complements the intended pop-out effect.
- Retouching and Cleaning: Employ Photoshop’s retouching tools to clean up the base image. Remove distractions, blemishes, or unwanted elements that may detract from the overall impact of the subject.
IV. Selective Focus and Blurring Techniques:
- Applying Depth of Field Effects: Mimic the depth of field effects seen in professional photography by selectively blurring the background. Use the Lens Blur filter or the Field Blur tool to create a gradual transition from sharpness to blur.
- Utilizing Tilt-Shift Effects: Experiment with tilt-shift effects to create a miniature or selective focus look. This technique directs attention to the subject by simulating a shallow depth of field.
V. Contrast Enhancement for Visual Impact:
- Adjusting Contrast: Fine-tune the contrast within the image to accentuate the differences between the subject and the background. This heightened contrast contributes to a more pronounced pop-out effect.
- Dodging and Burning Techniques: Apply dodging and burning techniques to selectively lighten and darken specific areas of the image. This adds dimensionality and emphasizes the contours of the subject.
VI. Selective Color Adjustments:
- Desaturation of Background: Desaturate or mute the colors in the background to reduce visual competition with the subject. This technique enhances the isolation of the subject and emphasizes its vibrancy.
- Color Grading for Emphasis: Experiment with color grading to create a harmonious color palette that guides the viewer’s focus. Enhance the colors of the subject while toning down distracting hues in the background.
VII. Creating a Vignette Effect:
- Vignette for Focus: Apply a subtle vignette effect to draw attention to the center of the image. This darkening around the edges naturally guides the viewer’s gaze towards the subject.
- Custom Vignette Shapes: Explore custom vignette shapes to add a unique touch to the composition. This can be achieved through the use of layer masks and gradient tools to craft vignettes that complement the subject.
VIII. Shadows and Highlights Enhancement:
- Accentuating Shadows: Strengthen shadows around the subject to enhance its three-dimensional presence. This can be achieved through targeted adjustments using the Shadows/Highlights tool.
- Highlight Boost for Radiance: Boost highlights on the subject to create a radiant and eye-catching effect. Carefully adjust the balance to avoid overexposure, ensuring a natural and captivating glow.
IX. Layering and Masking Techniques:
- Subject Extraction with Masks: Utilize layer masks to precisely extract the subject from the background. This allows for detailed adjustments and ensures a clean separation between the subject and its surroundings.
- Layering for Dimension: Experiment with layering techniques to introduce additional elements that enhance the dimensionality of the image. This could include foreground objects or subtle overlays that contribute to the overall pop-out effect.
X. Selective Sharpening:
- Sharpening the Subject: Apply selective sharpening to the subject to enhance details and textures. This focused sharpening contributes to the clarity and prominence of the subject within the composition.
- Masking for Sharpness: Use layer masks to limit sharpening effects to specific areas, preventing unwanted artifacts and ensuring a seamless integration of the sharpened subject with the background.
XI. Adding a Drop Shadow:
- Creating a Subtle Drop Shadow: Introduce a subtle drop shadow beneath the subject to simulate realistic lighting conditions. This technique adds a sense of depth and grounds the subject within the composition.
- Adjusting Shadow Opacity: Fine-tune the opacity of the drop shadow for a natural look. Experiment with different shadow angles and lengths to achieve the desired visual impact.
XII. Fine-Tuning with Layer Styles and Filters:
- Layer Styles for Highlights: Apply layer styles such as Inner Glow or Outer Glow to add highlights that accentuate the contours of the subject. These subtle effects contribute to the overall polished look.
- Filters for Artistic Flourish: Experiment with artistic filters in Photoshop to add unique textures or effects. Filters like the Oil Paint filter or the Poster Edges filter can contribute to a stylized and visually intriguing pop-out effect.
XIII. Attention to Details:
- Micro-Adjustments with Brushes: Utilize brushes for micro-adjustments, adding subtle highlights, shadows, or intricate details to specific areas of the subject. Attention to these small details enhances realism and visual interest.
- Consistent Stylistic Elements: Maintain consistency in stylistic elements across the composition. Whether it’s the choice of brushes, color palette, or level of sharpening, a cohesive stylistic approach unifies the pop-out effect.
XIV. Final Review and Adjustments:
- Zooming In for Precision: Zoom in for a close inspection of the entire composition. Pay attention to details, transitions, and the overall coherence of the pop-out effect. Make iterative adjustments to achieve perfection.
- Iterative Refinement: The process of making your subject pop out of a photo may involve several rounds of refinement. Iteratively adjust layers, colors, and stylistic elements until the desired visual impact is achieved.
XV. Saving and Exporting:
- Preserving Layers for Flexibility: Save the Photoshop project file with layers intact to retain flexibility for future adjustments. This is particularly useful when fine-tuning specific elements or exploring alternative compositions.
- Exporting for Different Platforms: When satisfied with the composition, export the final image in the desired format. Consider the platform where the image will be showcased – whether for print, web, or social media – and adjust the resolution accordingly.
XVI. Exploring Artistic Variations:
- Selective Coloring Techniques: Experiment with selective coloring techniques to highlight specific elements within the composition. This could involve retaining color in the subject while converting the background to grayscale.
- Monochromatic Pop-Out Effects: Explore the impact of monochromatic pop-out effects, where the subject remains in color against a grayscale or desaturated background. This classic technique adds a timeless and dramatic touch.
XVII. Troubleshooting Common Challenges:
- Balancing Realism: Ensure that the pop-out effect maintains a level of realism that complements the base image. Address any discrepancies in lighting, shadows, or color tones to uphold visual coherence.
- Avoiding Overemphasis: Be mindful of overemphasizing the pop-out effect to the detriment of overall balance. Strive for a harmonious composition where the subject stands out without dominating the entire image.
XVIII. Inspiration and Learning Resources:
- Study Professional Photography: Explore the work of professional photographers known for their skill in emphasizing subjects. Analyze their compositions, lighting techniques, and framing choices to gain inspiration.
- Online Courses and Tutorials: Engage in online courses and tutorials dedicated to advanced Photoshop techniques. Continuous learning and exposure to diverse styles contribute to the evolution of your skills in making subjects pop out.
XIX. Conclusion: Mastering the Art of Making Your Subject Pop Out of a Photo with Photoshop
In conclusion, making your subject pop out of a photo with Adobe Photoshop is a dynamic and rewarding process that enhances the visual impact of an image. Through a combination of selective focus, color adjustments, and meticulous detailing, ordinary photographs can be transformed into visually striking masterpieces that captivate viewers. Armed with the comprehensive guide provided here, aspiring creators can embark on a journey of mastery, exploring the intricacies of making subjects pop out and leaving an indelible mark on the canvas of digital creativity.