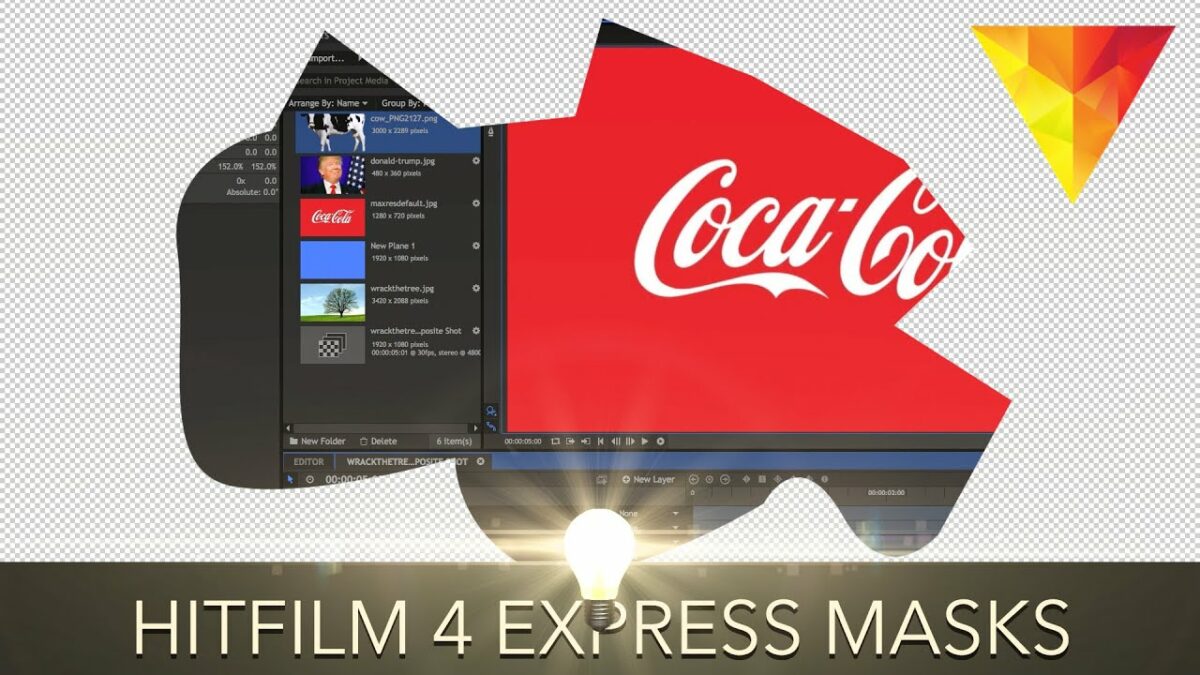
Categories
How To Guides Photoshop

Mastering the Art of Tranquility: Creating Silky Smooth Waterfalls in Photoshop

Introduction:

Waterfalls, with their mesmerizing flow and ethereal beauty, have been a timeless subject of fascination for artists and photographers alike. Capturing the silky smooth motion of waterfalls requires a delicate balance of photographic skill and post-processing expertise. In this extensive guide, we will delve into the step-by-step process of creating silky smooth waterfalls using Adobe Photoshop. From selecting the right photographs to employing advanced editing techniques, this comprehensive tutorial aims to elevate your waterfall photography to new heights.

Section 1: Choosing the Right Photographs

Step 1: Capturing Long Exposures:

Achieving the silky smooth effect in waterfalls often involves capturing long exposure shots. Use a tripod to stabilize your camera and set a slow shutter speed to allow the water’s movement to blur, creating the desired smoothness.

Step 2: Considering Composition:

Pay attention to composition when capturing waterfall images. Position yourself to include interesting foreground elements or use framing techniques to enhance the overall visual appeal of your photographs.

Section 2: Importing and Organizing Images

Step 1: Transferring Images to Photoshop:

After capturing the waterfall images, transfer them to your computer and organize them in a dedicated folder. This step ensures easy access and efficient workflow during the editing process.

Step 2: Opening Images in Photoshop:

Launch Adobe Photoshop and open the waterfall images you’ve selected for editing. Use the “File” menu and select “Open” to access the images within the Photoshop workspace.

Section 3: Basic Adjustments in Adobe Camera Raw

Step 1: Accessing Adobe Camera Raw:

Before diving into Photoshop, make basic adjustments using Adobe Camera Raw. This includes tweaks to exposure, contrast, and white balance. Access Adobe Camera Raw by selecting “Filter” > “Camera Raw Filter.”

Step 2: Enhancing Highlights and Shadows:

Fine-tune the highlights and shadows in Adobe Camera Raw to bring out the details in both the water and surrounding elements. Adjust the sliders for highlights and shadows until you achieve a balanced and visually pleasing result.

Section 4: Combining Images for Dynamic Range

Step 1: Bracketed Exposures for HDR:

If you’ve captured bracketed exposures, consider merging them to create a High Dynamic Range (HDR) image. This technique helps preserve details in both highlights and shadows, crucial for achieving a balanced look in waterfalls.

Step 2: Merging HDR in Photoshop:

To merge bracketed exposures, select the images in Adobe Bridge or Lightroom, right-click, and choose “Merge to HDR in Photoshop.” Follow the prompts to merge the images, creating a single HDR file.

Section 5: Focus on Water Details

Step 1: Isolating the Water:

Create a duplicate layer of your image and isolate the waterfall. Use selection tools like the Pen Tool or Lasso Tool to carefully trace around the water, separating it from the surrounding elements.

Step 2: Applying Gaussian Blur:

With the water isolated on the duplicate layer, apply a Gaussian Blur to enhance the silky smooth effect. Experiment with the blur radius to achieve the desired level of smoothness while retaining essential details.

Section 6: Enhancing Waterfall Motion

Step 1: Utilizing the Motion Blur Filter:

To further emphasize the motion of the waterfall, apply the Motion Blur filter to the entire image or specific areas. Adjust the angle and distance parameters to simulate the direction and intensity of the water’s flow.

Step 2: Masking for Selective Blur:

Use layer masks to selectively apply the Motion Blur effect to specific parts of the waterfall. This allows for fine-tuned control over the areas where you want to enhance the sense of movement.

Section 7: Color Grading for Atmosphere

Step 1: Adjusting Hue/Saturation:

Enhance the overall atmosphere of your waterfall image by adjusting color tones. Use the Hue/Saturation adjustment layer to fine-tune specific colors, emphasizing the mood you want to convey.

Step 2: Introducing Gradient Maps:

Experiment with Gradient Maps to add a touch of color grading to your image. This technique allows for creative control over the color palette, helping to evoke specific emotions in your waterfall photograph.

Section 8: Creating a Dreamy Atmosphere

Step 1: Softening Surrounding Elements:

To enhance the dreamy and ethereal feel of your waterfall image, soften the surrounding elements. Create a duplicate layer, apply a slight Gaussian Blur, and use a layer mask to reveal the softened layer selectively.

Step 2: Adding Vignettes for Focus:

Guide the viewer’s attention toward the waterfall by adding a subtle vignette. Use the Elliptical Marquee Tool to create a selection around the waterfall, invert the selection, and apply a darkening effect to the outer areas.

Section 9: Fine-Tuning with Dodge and Burn

Step 1: Dodging for Highlights:

Use the Dodge Tool to selectively lighten highlights in the waterfall. This step adds a touch of brilliance to areas where the water catches the light, contributing to the overall smooth and luminous effect.

Step 2: Burning for Shadows:

Employ the Burn Tool to darken shadows and create depth in your waterfall image. Focus on areas where shadows naturally occur, enhancing the contrast and three-dimensional quality of the scene.

Section 10: Advanced Techniques for Masterful Edits

Step 1: Incorporating Light Leaks:

For a whimsical and enchanting touch, experiment with adding subtle light leaks. Create a new layer, apply color gradients, and set the blend mode to Screen or Overlay to achieve a soft, glowing effect.

Step 2: Introducing Luminosity Masks:

Harness the power of luminosity masks to precisely control adjustments based on the brightness values in your image. This advanced technique provides unparalleled control over the editing process.

Section 11: Adding Final Touches

Step 1: Sharpening Details:

Prior to finalizing your waterfall image, apply sharpening techniques to enhance details. Use the Unsharp Mask filter or Smart Sharpen to bring out intricate textures in the water and surrounding elements.

Step 2: Checking Overall Composition:

Evaluate the overall composition and make any final adjustments to cropping, alignment, or perspective. Ensure that the elements in your waterfall image harmonize to create a visually appealing and balanced scene.

Section 12: Saving and Exporting

Step 1: Save Your Masterpiece:

Once satisfied with your silky smooth waterfall image, save your work in a high-quality format such as PSD to retain layers and editing flexibility for future adjustments.

Step 2: Exporting for Different Platforms:

When ready to share your masterpiece, export the image in appropriate formats for various platforms. Whether for print, web, or social media, ensure the exported file showcases the full impact of your silky smooth waterfall composition.

Section 13: Troubleshooting Common Challenges

Challenge 1: Overblown Highlights:

If highlights in your waterfall appear too bright or overblown, revisit the exposure adjustments in Adobe Camera Raw or use the Dodge Tool selectively to tone down excessively bright areas.

Challenge 2: Unwanted Artifacts:

To address unwanted artifacts in your image, such as color fringing or noise, consider applying targeted adjustments with tools like the Clone Stamp or Healing Brush to clean up distracting elements.

Section 14: Showcasing Inspirational Examples

Example 1: Enchanting Twilight Waterfall:

Explore the enchanting allure of a silky smooth waterfall captured during twilight, where the soft glow of ambient light enhances the dreamlike quality of the scene.

Example 2: Misty Mountain Cascade:

Witness the mystical charm of a mountain cascade enveloped in mist, creating a serene and tranquil atmosphere with a perfect balance of smooth water motion.

Section 15: Advancing Skills in Waterfall Photography

Step 1: Exploring Different Waterfall Types:

Expand your waterfall photography skills by exploring different types of waterfalls. From cascades to horsetails, each type presents unique challenges and opportunities for creative expression.

Step 2: Experimenting with Multiple Exposures:

Push the boundaries of creativity by experimenting with multiple exposures. Blend images of the same waterfall captured at different times or from different angles to create visually dynamic compositions.

Conclusion:

Capturing silky smooth waterfalls in Photoshop is a captivating journey that combines technical expertise with artistic vision. This comprehensive guide has equipped you with the tools and techniques needed to transform your waterfall photographs into works of art. As you embark on your creative endeavors, let the soothing flow of waterfalls inspire your artistic expression, and let Photoshop be the canvas through which you bring the magic of silky smooth waterfalls to life. Embrace the tranquility, embrace the artistry – let your waterfall images become a testament to the seamless harmony of nature and creativity.

Categories
How To Guides Photoshop

The Art of Self-Masking: Unleashing Creative Potential with Photoshop’s Photo-to-Mask Technique

Introduction:

In the dynamic world of digital design, Adobe Photoshop stands as a powerful and versatile tool, constantly evolving to meet the creative needs of designers and artists. Among the myriad techniques available, the concept of using a photo to mask itself is a captivating approach that adds depth, complexity, and a touch of artistic flair to digital compositions. In this extensive guide, we will delve into the intricacies of this innovative technique, exploring the step-by-step process of using a photo as its own mask within Adobe Photoshop.

Section 1: Understanding the Concept

The Magic of Self-Masking:

The notion of using a photo to mask itself revolves around the idea of blending an image seamlessly with its own contours and features. By employing Photoshop’s masking tools, designers can create captivating effects that harmonize the subject and its surroundings in a visually stunning manner.

Creative Applications:

Self-masking opens the door to a plethora of creative possibilities. From ethereal double exposures to surreal photo manipulations, this technique allows designers to breathe life into their compositions, seamlessly integrating elements of the same image to produce captivating and visually engaging results.

Section 2: Selecting the Right Image

Step 1: Choosing a Suitable Image:

The success of the self-masking technique relies heavily on selecting the right image. Opt for a photo with distinct features, strong contrasts, and interesting textures. Images with a clear subject and a well-defined background provide a solid foundation for effective self-masking.

Step 2: Analyzing Tonal Range:

Consider the tonal range of the chosen image. An image with a good distribution of highlights, midtones, and shadows enhances the versatility of the self-masking technique, allowing for a more nuanced integration with its own elements.

Section 3: Preparing the Image

Step 1: Duplicate the Image:

Begin by duplicating the chosen image layer. This duplicate will serve as the basis for creating the mask, allowing for non-destructive editing and experimentation.

Step 2: Adjusting Contrast and Tones:

Fine-tune the contrast and tonal qualities of the duplicated image. This step enhances the distinctiveness of features and ensures that the self-masking effect will be visually compelling.

Section 4: Creating the Mask

Step 1: Adding a Layer Mask:

With the duplicated image layer selected, add a layer mask by clicking on the “Add Layer Mask” icon at the bottom of the Layers panel. This action introduces a blank mask linked to the image layer.

Step 2: Applying Gradients and Brushes:

Utilize gradients and brushes to selectively reveal or conceal areas of the image. Experiment with different opacities and brush sizes to achieve a seamless transition between the masked and unmasked regions. This step requires a delicate touch to maintain a natural and organic feel.

Section 5: Refining the Mask

Step 1: Fine-Tuning with Brushes:

Refine the mask further by using soft brushes to manually adjust areas that may require more precision. Pay attention to intricate details and edges, ensuring a seamless blend between the subject and its surroundings.

Step 2: Incorporating Layer Styles:

Experiment with layer styles, such as drop shadows or inner glows, to enhance the integration of the masked image with its background. Layer styles add depth and dimension, contributing to a more polished and professional outcome.

Section 6: Exploring Blend Modes

Step 1: Blend Mode Options:

Dive into the realm of blend modes to explore different ways in which the masked image interacts with its own background. Overlay, Soft Light, and Multiply are often favored blend modes for creating visually striking and harmonious compositions.

Step 2: Adjustment Layers for Harmony:

Incorporate adjustment layers, such as Hue/Saturation or Color Balance, to harmonize the color tones between the masked image and its background. This step ensures a cohesive and unified visual experience.

Section 7: Adding Depth and Dimension

Step 1: Duplicate and Transform:

To amplify the depth of the self-masking effect, consider duplicating the original image layer and applying transformations such as scaling, rotation, or flipping. This creates additional layers that contribute to the illusion of depth.

Step 2: Adjusting Opacity:

Experiment with the opacity of duplicated layers to achieve the desired level of subtlety or intensity. This step allows for nuanced adjustments that contribute to the overall aesthetic of the self-masking composition.

Section 8: Advanced Techniques for Mastery

Step 1: Introducing Texture Layers:

For an extra layer of sophistication, introduce texture layers to the composition. This could involve overlaying textures that complement the subject or adding subtle patterns to enhance visual interest.

Step 2: Incorporating Smart Objects:

Convert layers into smart objects to maintain flexibility and non-destructive editing. Smart objects preserve the original image quality and facilitate adjustments at any stage of the creative process.

Section 9: Experimentation and Iteration

Step 1: Embracing Iterative Design:

The beauty of the self-masking technique lies in its versatility and room for experimentation. Embrace an iterative design approach, making incremental adjustments, trying different variations, and allowing the composition to evolve organically.

Step 2: Seeking Feedback:

Invite constructive feedback from peers or fellow designers. Fresh perspectives can provide valuable insights and suggestions for refining the self-masking composition, ensuring a polished and well-executed final result.

Section 10: Saving and Exporting

Step 1: Save Your Work:

As the self-masking composition takes shape, save your work regularly to preserve progress. Consider saving versions at different stages to facilitate easy exploration of creative choices.

Step 2: Exporting for Different Platforms:

When satisfied with the final composition, export the image in appropriate formats for various platforms. Whether for print, web, or social media, ensure that the exported file retains the quality and impact of the self-masking design.

Section 11: Troubleshooting Common Challenges

Challenge 1: Jagged Edges:

If jagged edges appear in the masked areas, refine the mask using smaller brushes and softer gradients. Additionally, consider using the anti-aliasing option when using selection tools to achieve smoother transitions.

Challenge 2: Color Mismatch:

Address color mismatches between the subject and its surroundings by fine-tuning the color balance and saturation levels. Adjustment layers can be particularly helpful in achieving color harmony.

Section 12: Showcasing Inspirational Examples

Example 1: Ethereal Double Exposure:

Explore the ethereal beauty of a self-masking composition where the subject seamlessly merges with its own silhouette, creating a mesmerizing double exposure effect.

Example 2: Surreal Photo Manipulation:

Witness the surreal magic of a photo manipulated through self-masking, where elements within the image interact harmoniously with their own reflections, defying the boundaries of reality.

Section 13: Advancing Skills with Self-Masking

Step 1: Expanding Subject Variety:

Push the boundaries of self-masking by experimenting with different types of subjects. From portraits to landscapes, each subject offers unique challenges and creative opportunities.

Step 2: Incorporating External Elements:

Take self-masking to the next level by incorporating external elements into the composition. This could involve blending the subject with textures, patterns, or even other images to create captivating and multidimensional designs.

Conclusion:

The technique of using a photo to mask itself in Photoshop is a testament to the limitless creative possibilities that digital design offers. This comprehensive guide has walked you through the step-by-step process of harnessing this innovative technique, from selecting the right image to refining the mask and exploring advanced variations. As you embark on your journey of self-masking mastery, let creativity be your guide, and let Photoshop be the canvas for bringing your imaginative visions to life. Embrace the art of self-masking, embrace the creative journey – let your designs transcend boundaries and captivate audiences with the mesmerizing allure of seamlessly blended images.

Categories
How To Guides Photoshop

Mastering Illusions: A Comprehensive Guide to Faking Text Wrap in Photoshop

Introduction:

In the ever-expanding universe of graphic design, the art of creating visually captivating layouts often involves the delicate dance between text and imagery. While dedicated desktop publishing software may offer native text-wrapping functionalities, Adobe Photoshop, primarily known for image editing, lacks this feature. However, fear not, as this comprehensive guide unveils the secrets of faking text wrap in Photoshop. By leveraging smart techniques and creative solutions, designers can achieve the illusion of text gracefully wrapping around images, opening up a world of possibilities for dynamic and aesthetically pleasing compositions.

Understanding the Need for Faking Text Wrap:

Text wrap is a crucial design element that allows text to flow harmoniously around images or objects, avoiding visual clutter and enhancing readability. In Photoshop, where image manipulation takes center stage, designers often encounter scenarios where the absence of a native text-wrap feature poses a challenge. Faking text wrap becomes the key to achieving seamless integration of text and images, creating layouts that appear as if text naturally conforms to the contours of the visual elements.

Step-by-Step Guide to Faking Text Wrap in Photoshop:

  1. Open Photoshop and Create a New Document: Launch Adobe Photoshop on your computer and create a new document by selecting File > New. Choose the dimensions and resolution that suit your design requirements. Click “OK” to create the new canvas.
  2. Import the Image: Open the image around which you want to fake the text wrap. Use the “Place” command (File > Place) to import the image into your Photoshop document. This allows for easy resizing and positioning.
  3. Create a New Layer for Text: Create a new layer for your text by selecting the Text tool (T) from the toolbar. Click on the canvas and type the desired text. Choose the font, size, and color from the options in the toolbar or Character panel.
  4. Rasterize the Text Layer: Right-click on the text layer in the Layers panel and choose “Rasterize Type.” This step is essential for applying various transformations and effects to the text.
  5. Use the Pen Tool to Outline the Image: Select the Pen tool (P) from the toolbar and carefully outline the contours of the image. Create a path around the areas where you want the text to wrap. Ensure that the path follows the natural curves and shapes of the image.
  6. Convert Path to Selection: Right-click on the path you’ve created with the Pen tool and choose “Make Selection.” Adjust the feather radius if needed to soften the selection edges. Click “OK” to convert the path to a selection.
  7. Apply the Selection as a Mask: With the text layer selected, click the “Add layer mask” icon at the bottom of the Layers panel. This will apply the selection as a mask to the text layer, creating the illusion of the text wrapping around the outlined areas of the image.
  8. Refine the Mask (Optional): Use the Brush tool (B) with a soft brush to refine the mask. This step allows you to manually adjust the mask’s edges, ensuring a smooth transition between the text and the image. Painting with black conceals parts of the text, while painting with white reveals them.
  9. Experiment with Layer Styles: Enhance the realism of the text wrap effect by experimenting with layer styles. Double-click on the text layer to open the Layer Style dialog. Explore options such as Drop Shadow, Inner Shadow, or Bevel and Emboss to add depth and dimension to the text.
  10. Adjust Text Size and Position: Fine-tune the size and position of the text to optimize its interaction with the image. This step ensures that the text appears convincingly wrapped around the visual elements, maintaining a cohesive and balanced design.
  11. Create Multiple Text Layers (Optional): For more complex text wrap effects, consider creating multiple text layers with different portions of the text wrapping around various elements in the image. This approach provides greater control and flexibility in crafting intricate layouts.
  12. Experiment with Opacity and Blending Modes: Adjust the opacity of the text layer to control its transparency and blend it seamlessly with the image. Experiment with blending modes (e.g., Multiply, Overlay) to achieve different visual effects. This step allows for further customization based on the desired aesthetic.
  13. Add Decorative Elements (Optional): To enhance the overall design, consider adding decorative elements or graphics between the text and image layers. This can contribute to the illusion of a more complex and visually appealing text wrap effect.
  14. Fine-Tune and Preview: Regularly toggle the visibility of layers, experiment with different settings, and fine-tune the text wrap effect to achieve the desired appearance. Preview the design in different contexts to ensure it remains visually impactful.
  15. Save and Export: Once satisfied with the design, save your work in the desired format. For web or print use, consider exporting the image in common formats like JPEG or PNG. Preserve the layered Photoshop file (PSD) to retain the flexibility for future edits.

Examples of Creative Applications for Faked Text Wrap:

  1. Magazine Layouts and Editorials: Create visually engaging magazine layouts and editorials by faking text wrap around images. This technique enhances the flow of content and adds a dynamic element to editorial designs.
  2. Product Packaging and Labels: Elevate product packaging and labels by incorporating faked text wrap around product images. This approach is effective for showcasing product details and enhancing the overall packaging design.
  3. Web Graphics and Banners: Capture attention on websites by using faked text wrap in web graphics and banners. This technique is ideal for creating interactive and visually appealing layouts on digital platforms.
  4. Infographics and Educational Material: Enhance infographics and educational material by faking text wrap around relevant images. This approach facilitates the seamless integration of text and visuals in informative content.
  5. Branding and Promotional Material: Incorporate faked text wrap in branding materials and promotional graphics. This technique adds a touch of creativity and sophistication to promotional campaigns and brand communication.

Conclusion:

The ability to fake text wrap in Photoshop opens up a realm of creative possibilities for designers seeking to seamlessly integrate text and images in their compositions. By following the comprehensive steps outlined in this guide, you gain valuable insights into the process of crafting layouts that give the illusion of text gracefully wrapping around visual elements. Whether you’re working on magazine layouts, product packaging, web graphics, or educational material, the art of faking text wrap provides a versatile and effective solution within the Photoshop toolkit.

As you embark on the journey of creating visually compelling designs, let your creativity guide you. Experiment with different images, text arrangements, and layer styles to tailor the text wrap effect to the unique requirements of each project. The fusion of text and imagery through faked text wrap offers a flexible and impactful approach to design, allowing you to craft layouts that resonate with your audience. So, dive into the world of faking text wrap in Photoshop, and let your designs speak with the eloquence of seamless integration and visual harmony.